 One thing I have discovered on my baking journey is that, I, as a baker of sweets and other delicious “good” for you treats have gotten to know my neighbors really well. Like Of course I knew names and faces of the people next door; I may even wave to them and flash them a rare smile from time to time. We all know that does not constitute a real friendship. I would bring up the other unfortunate thing that has connect me to my neighbors however keeping this posting positive, I will direct you to news I am taking about.
Ever since I began to take on my baking as a serious hobby, I never knew that sharing sweets with people made them so talkative. On a daily basis in my kitchen fridge there is probably at least one fully made cake, slice or biscuit; a pudding or custard tart filling of any nature and most likely you will find a bowl of ganache with one teaspoon mark (we all need to taste test right?)
 Well I am reporting the current state of my fridge right now; left over salted caramel sauce, sticky date puddings, coffee and caramel mousse gateaux, and a cake box filled with small petite fours of tiramisu, cheese cake and tarts. I would mention what is OUTSIDE my fridge that I have baked but that comes in the realm of savory stuff (soup, pizza, pasta); so not that interesting.
What I am about to say will dismiss my doctor’s concern for my blood sugar levels; I cannot live on cake alone. So in a desperate effort to “off load” desserts I bring back; my neighbors have been sampling some of the baked good I have made. Sure they are not always cooked perfection; they also my not even be the biggest or creative dessert I have made. It does not make a difference, when you come around with a smile and a box filled with small tarts, cookies or slices of cake people really love it. It was a bit awkward at first t give the first box of sweets away but as we both got more comfortable and familiar; a conversation opened up and phone numbers were swapped.
As the song goes, Everyone needs good neighbors, and one way to get to that is by sweets. Also another benefit is that you develop a rather good rep among the street; so baking orders have recently come in that I delivered to them. BONUS!
None the less, ever since March, it has made it lot easier on my family and I to recover. Who cannot feel better when you have neighbor who ring; send over cards of good wishes; drop off stews and give you advice to help around the house?
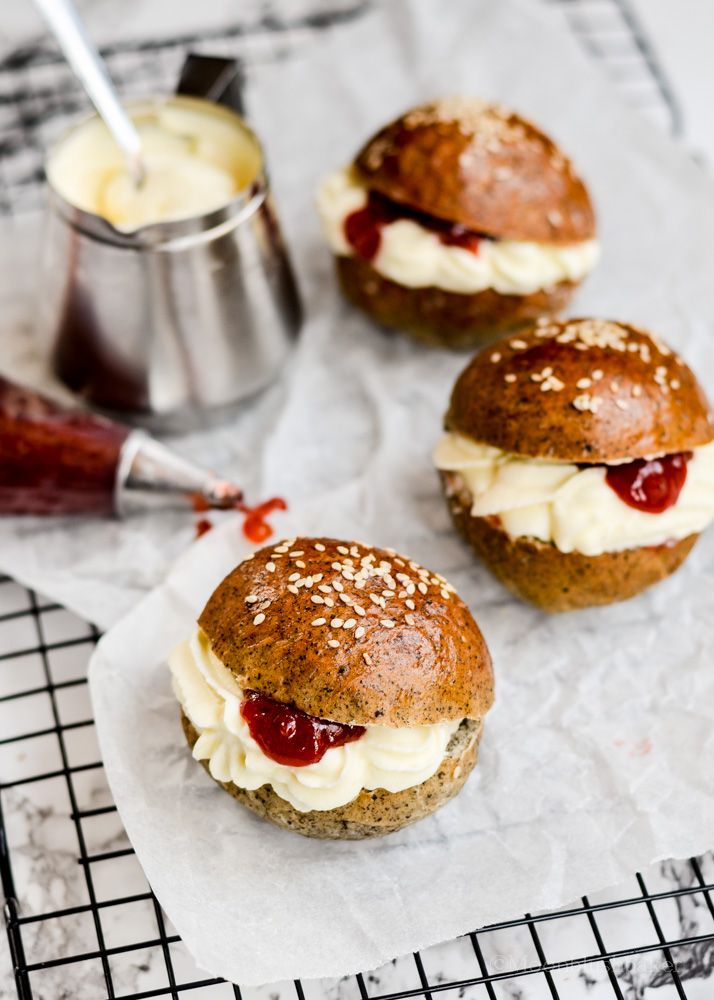
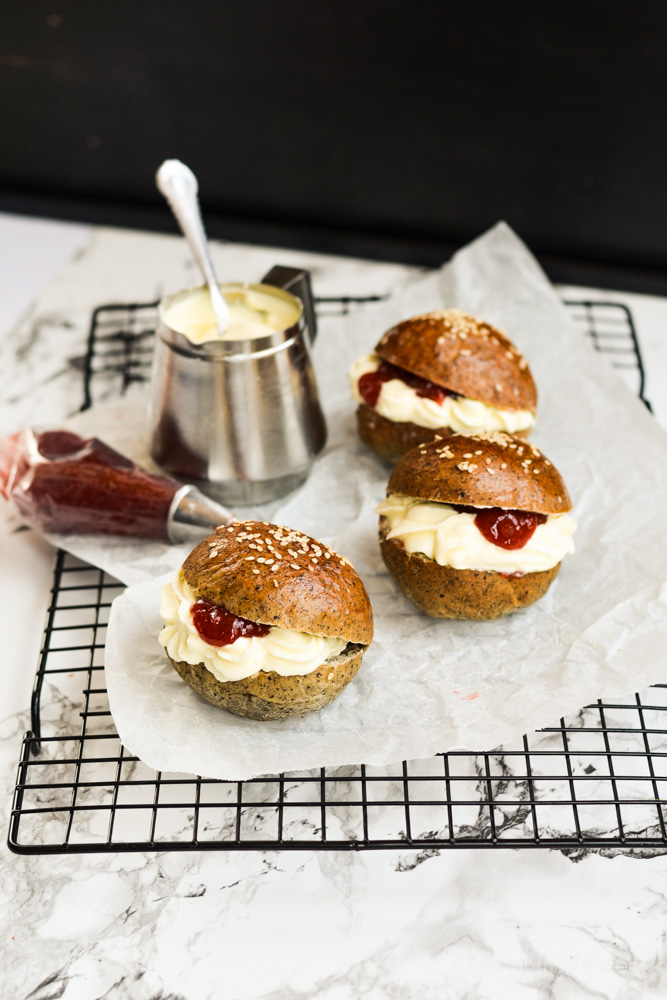
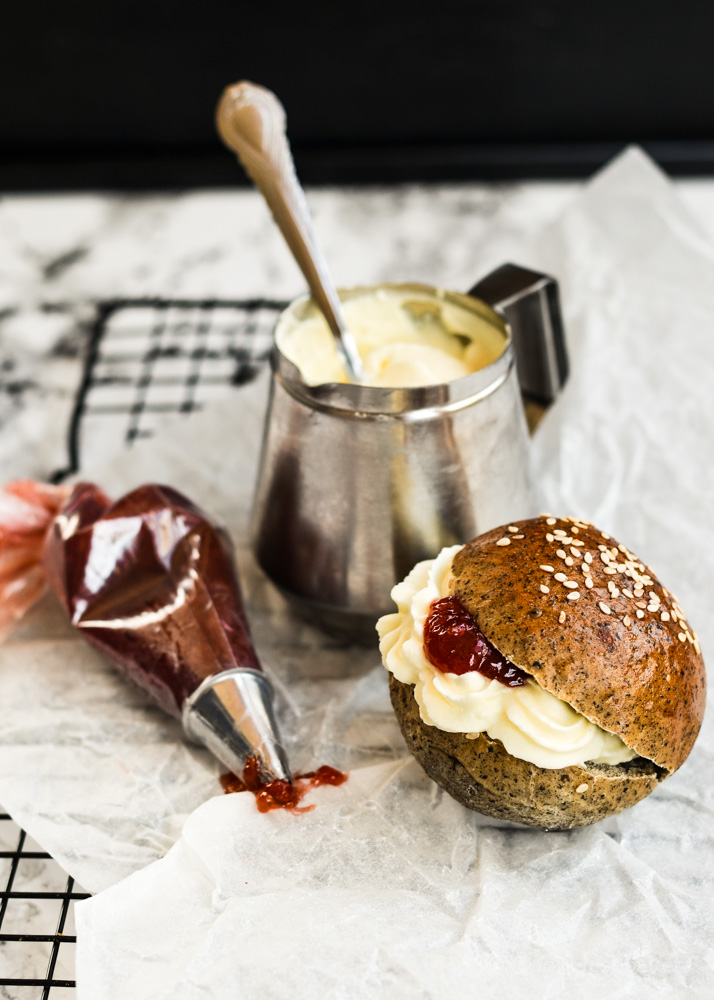
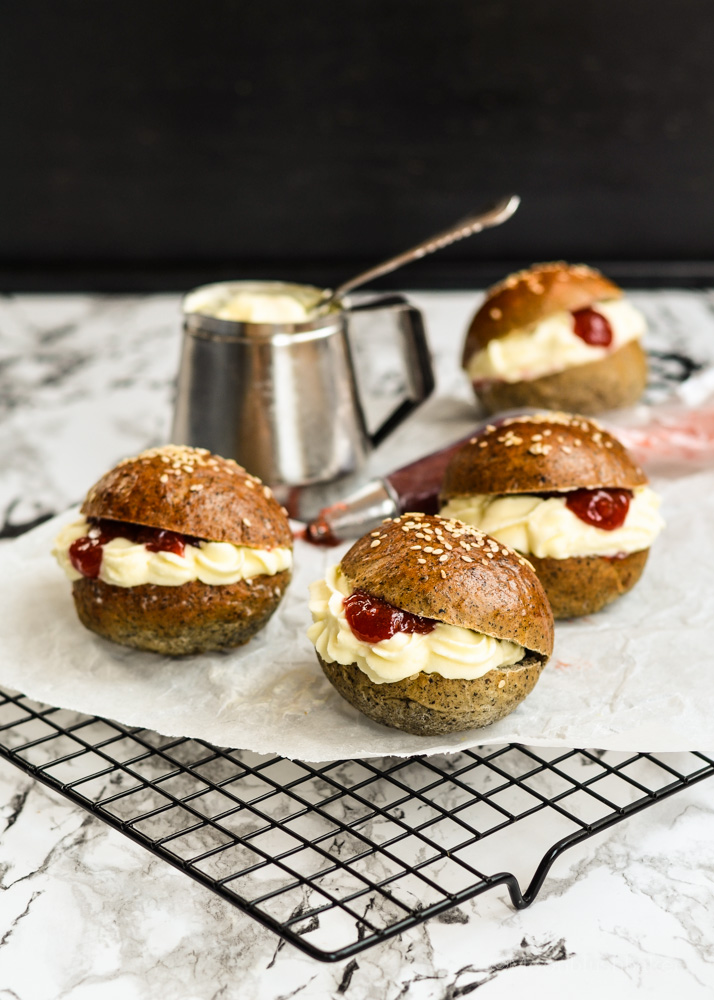
I bring you some cream buns. Have weak spot for cream buns; no lie. Whether they are filled with mock cream, cheese or cream I have to at least have one bite of one. This based of the milk breads you can get at the Asian bakery; were the slightly sweet undertones of a pillow soft bread have magical addictive powers. One you bite one, anyone can tell you, you cannot stop. Trust me I have eaten a WHOLE loaf of one of these breads as lunch.
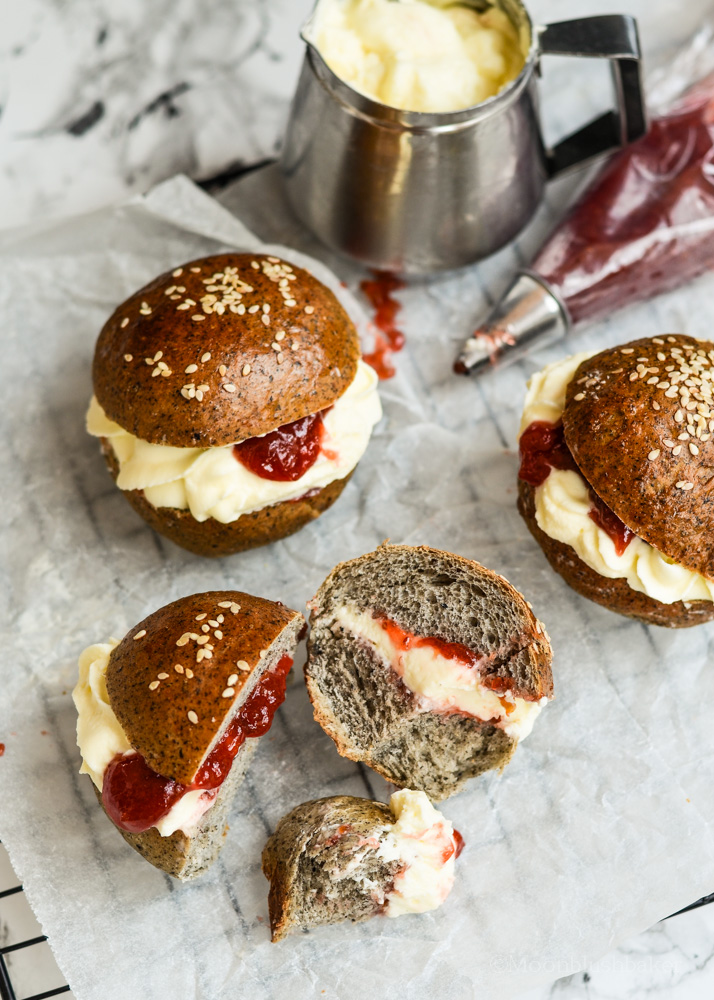
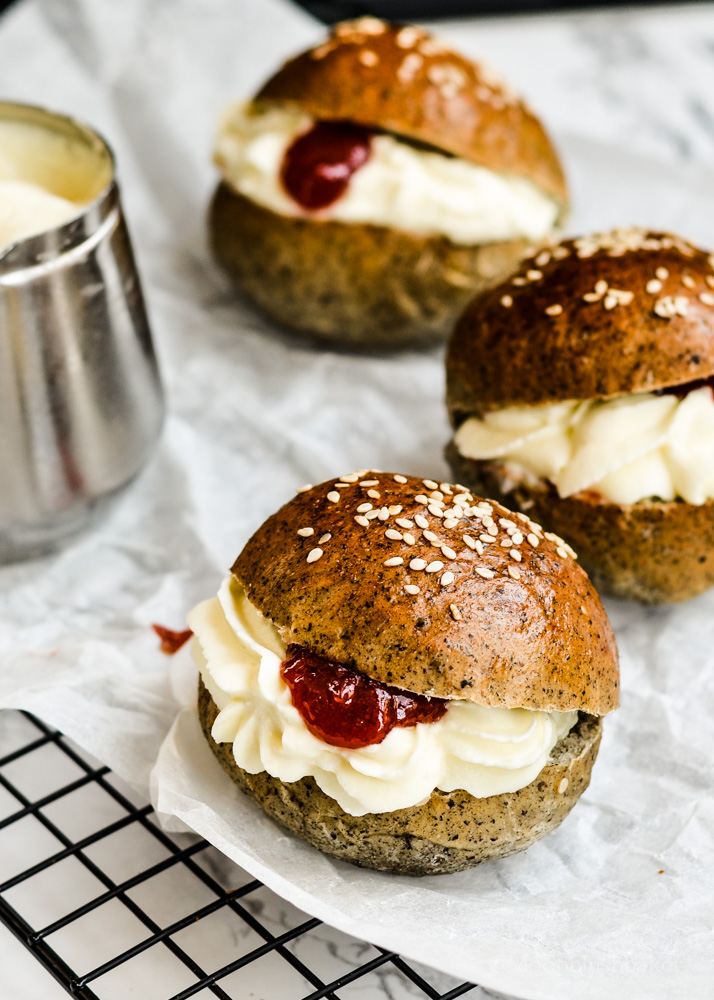
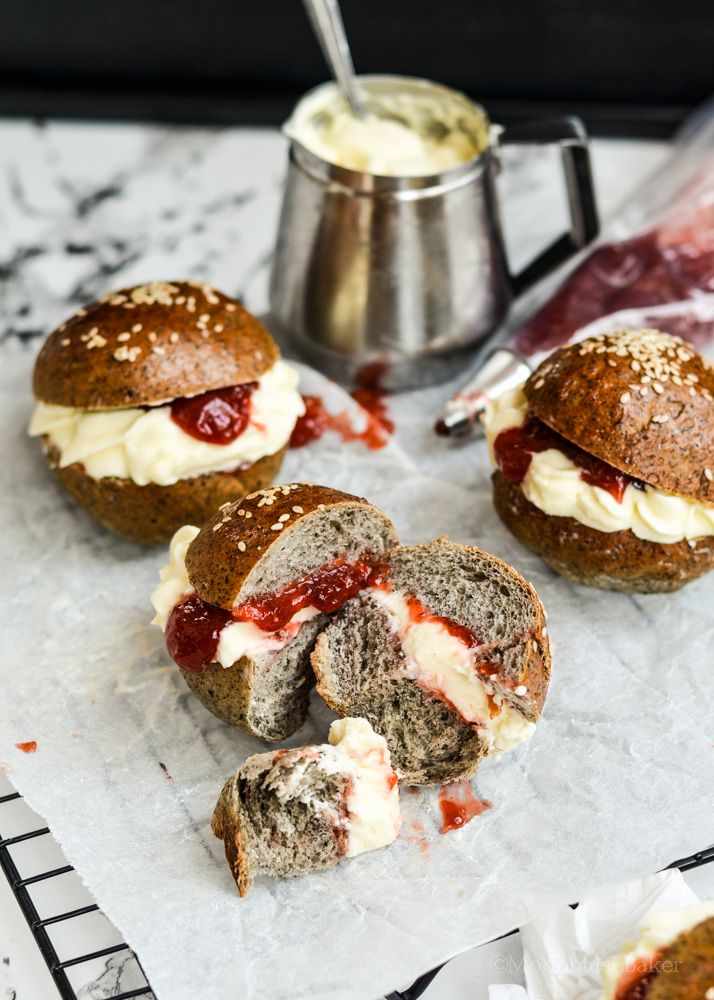
I have infused this bread with black sesame for a twist as I recently got some yuzu infused plum preserves from a friend. You can fill it with any spikey jam you have on hand, the important thing is it must have a tangy sweetness as the bread is the main player in this bread roll. By changing the plain vanilla tones of Asian bakery bread with black sesame, pairing it with sweeten cream and a tangy jam; it is like all grown up cream bun.
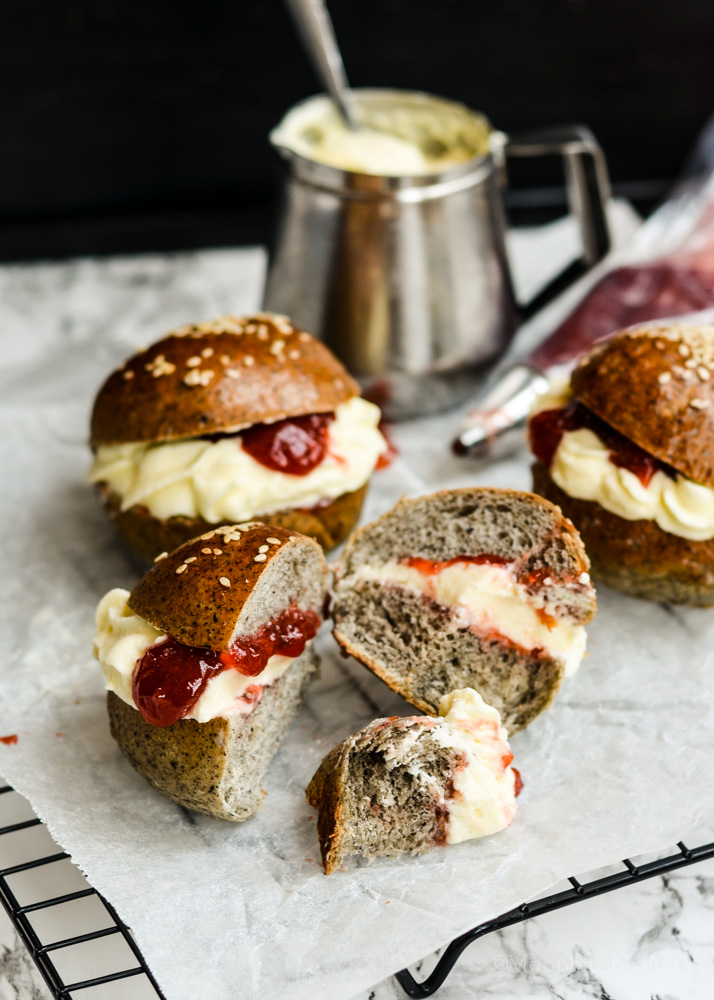
I have either created a breakfast for the Gothic lovers or the snack you really want to sink your teeth into during a re runs of True Blood. Sultry and dark; I won’t tell if you keep these beauties to yourself.
Black sesame cream buns
Makes 18 mini buns
350g white bread flour
200g all purpose plain flour
5g salt
7g dry yeast
15g coffee whiter (coffee mate)
60g egg whites
200ml full cream milk
30g condensed milk
30g roasted black sesame powder
60g sugar
50g salted butter, soft in cubes of 1cm
200g chosen fruit jam ( strawberry, plum etc.)
Whipped cream (whisk together to firm peak)
500ml cream
40g icing sugar, sieved
Egg wash: egg plus milk.
Optional sesame seeds
Add white flour, all purpose flour, salt and coffee whiter in a large bowl. Mix thoroughly together.
Warm milk, condensed milk, black sesame powder and sugar in a sauce pan till combined. Allow to cool to 30C degrees. Add yeast.
Mix milk and yeast mix into the flour mix. Add your egg whites and kneed in a stand mixer till it forms a rough ball and a medium level of gluten has developed.
With the stand mixer running add your cubes of butter until combined.
Continue to kneed until it passes the window pane test. This is where you are able to pull it to a very thin membrane see through before it breaks. The dough should be very bouncy and smooth.
Cover in greased bowl and allow to rise for 1-2 hours or until doubled.
Punch down dough and divide into 18 dough balls.
With each dough ball roll it into a ball shape. Once all balls have been used cover with cling film and allow to rise for 45 minutes.
Pre heat oven to 185c. Brush with egg wash and sprinkle seeds on top. Bake for 20-25 minutes.
Transfer to wire rack once baked. Cool complete before filling with whipped cream and jam.
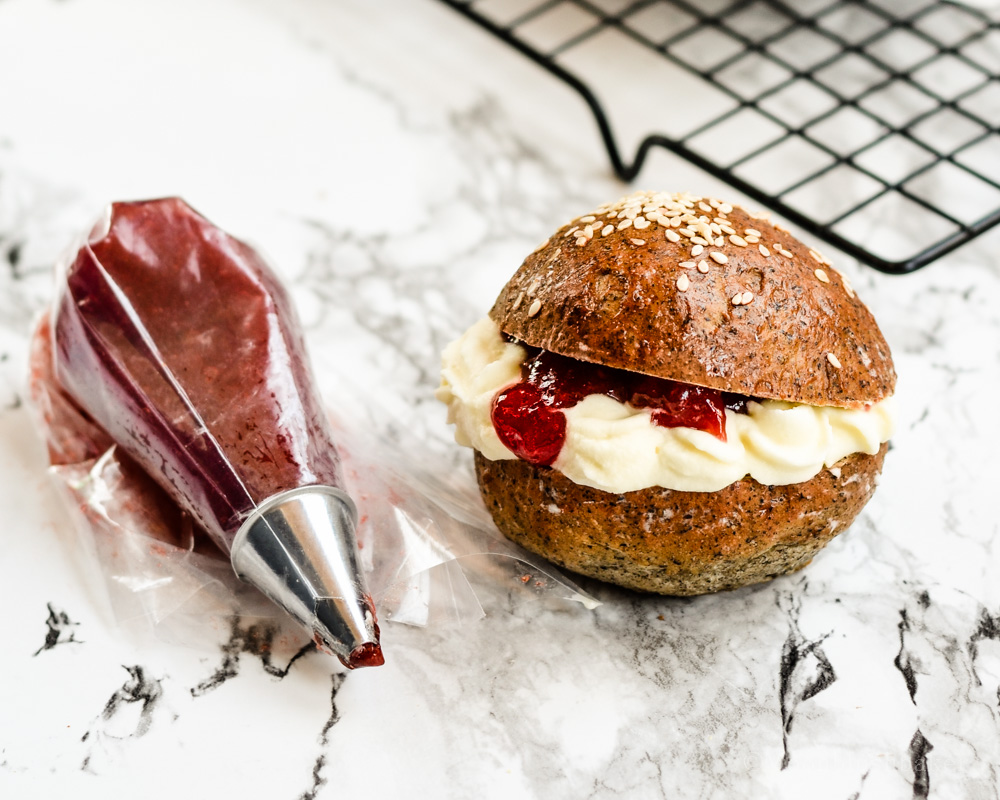
To fill buns, fill a piping bag with a large star nozzle and a smaller one with a round small nozzle. Fill the star pastry bag with whipped cream and the smaller one with jam.
Cut buns about half way to create a side opening. Gently squeeze in the cream by stretching the cut open. Do the same with the jam. Allow to set in the fridge for 30 minutes before serving.
Hey! Hey! I am not dead, in fact I have been on a baking spree for the past week and a bit. After making over 5 or so batches of 100 and something shells for macarons filling and stuff; I had two order for petit fours AND a birthday cake including mini cupcakes!
 Woo!!! Things have been looking up for me and my rep among the neighborhood for baking. At least they will not think I am weird any more for the smell of bread and other baked goods wafting out the house at 2am in the morning. No I am not on the drugs; unless you count ice cream and espresso as a drug.
 Well a bit of photo love from Instagram. If you follow me here you can see
My series of petite fours from here, to this chocolate load sweetness and the all classical Aussie slice. I have also made macarons for this order too but really with the amount of picture on the internet I think I will save you guys from ANOTHER typical pretty, pretty picture post.
See this link; My very imperfect photo of a foot ball ball cake I have done for an order. Bad, bad lights and other photo sins.
Answer me this Instagram photo genius, How do you make them look so perfect???
Sign... Oh well…
 Even though Winter had truly settled in to Australia; I will never, never stop making ice cream. Now ice cream is one of those things you can have may paths to greatness but you also have many sins that can be committed against it. Even though we all know that Jeni’s ice cream base with her magical formula for an eggless ice cream is a worldwide favourite; I still cannot go past the egg yolk base ones. It is either I have a taste of massacring little chickens or my taste buds are more catered for the creaminess that you get from the natural properties of egg yolk.
As a small child I was only exposed to trio of classic store bought ice creams. Strawberry, vanilla and chocolate. However thankfully I have graduated from these basic flavours to expose ones that have additions of chilli, herbs and other weird things (avocado anyone?)
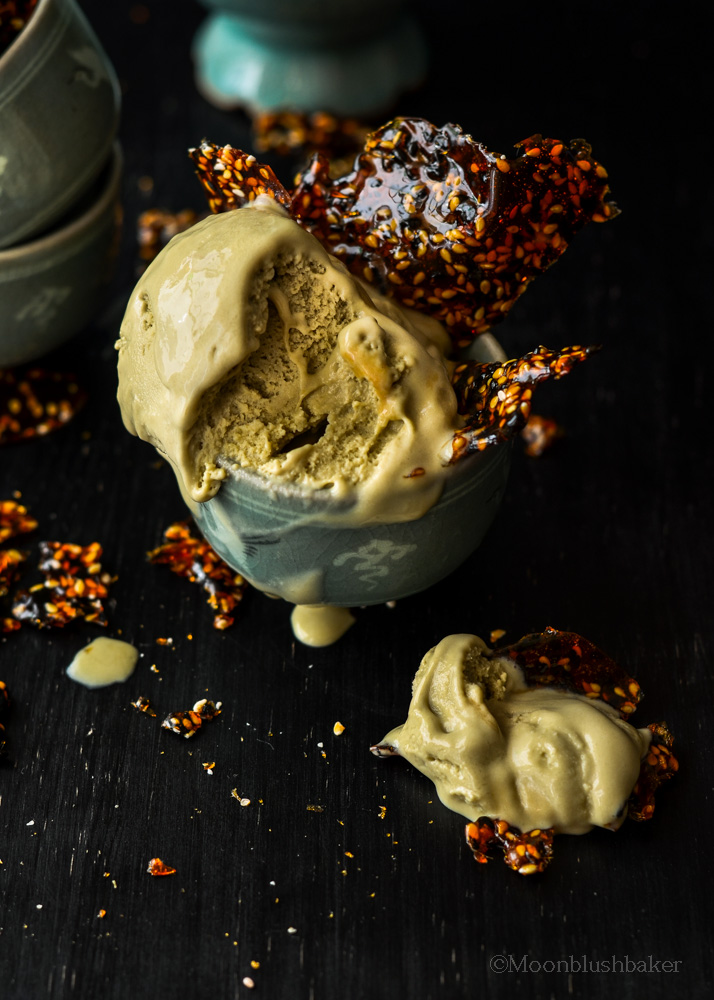
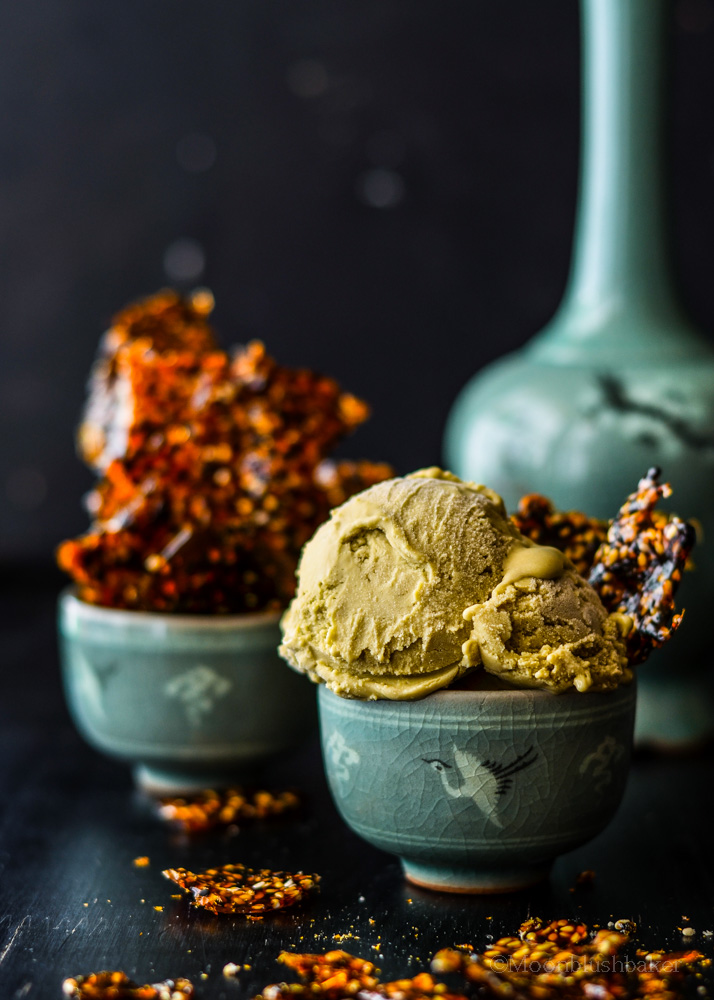
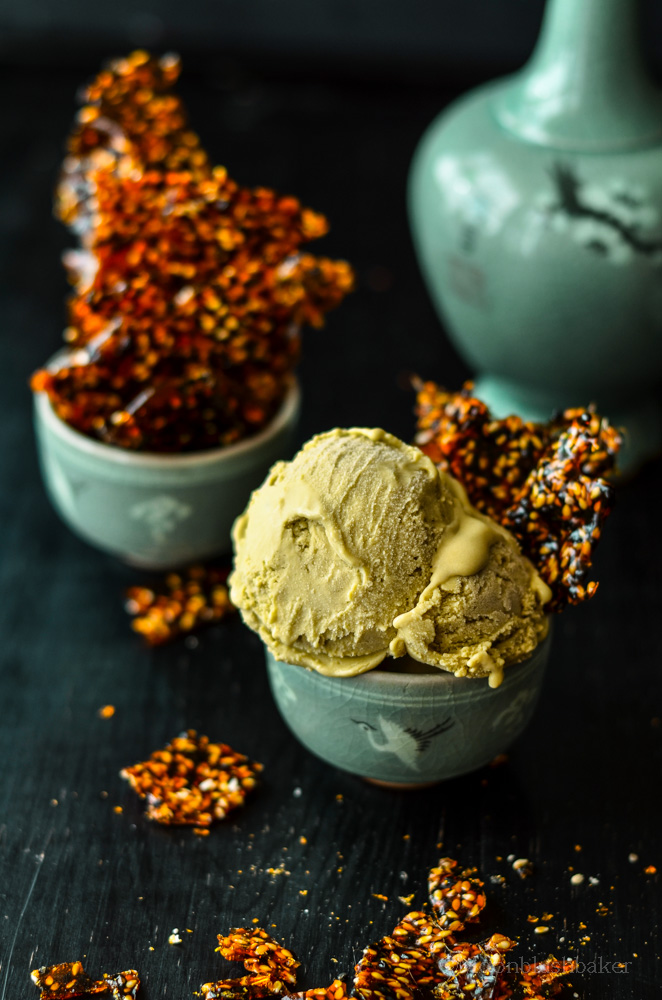
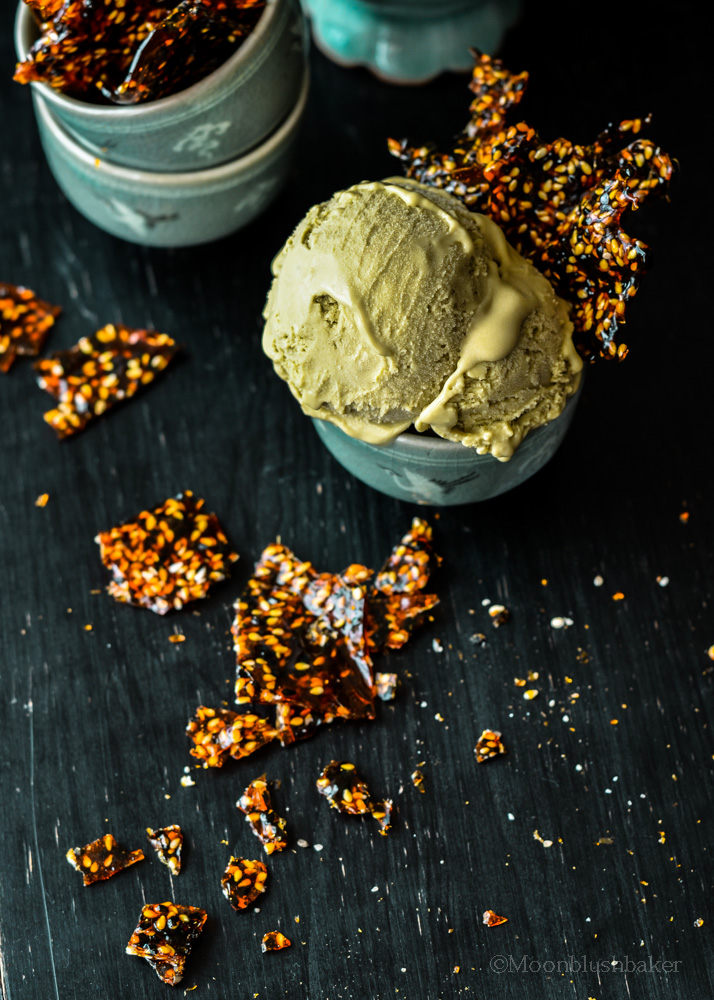
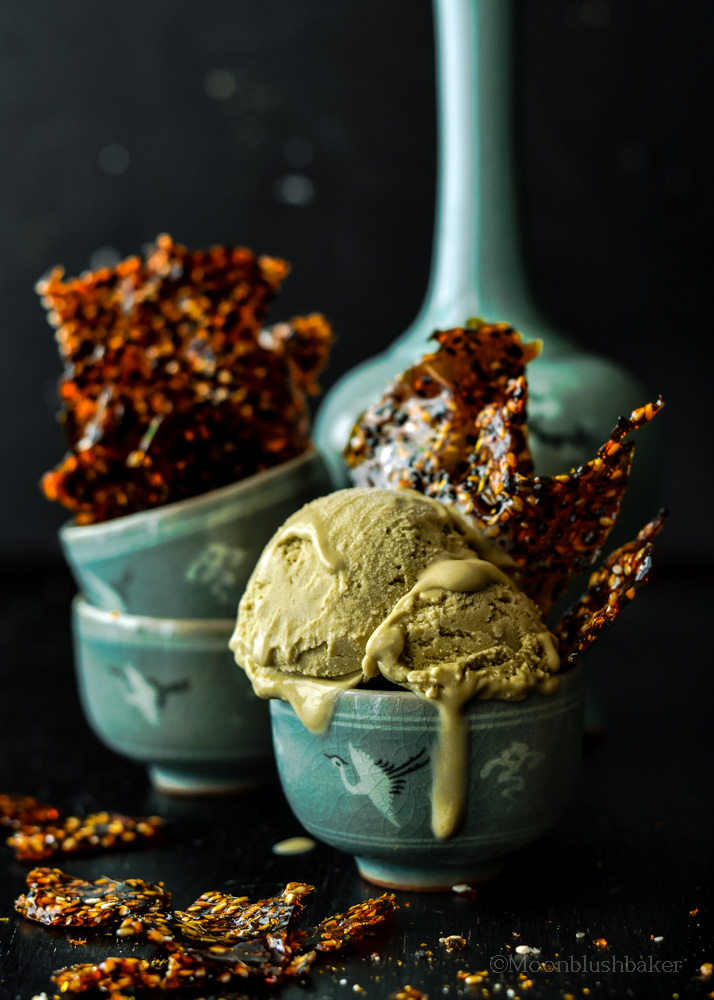
One flavour my family and I cannot get enough of is green tea. I am not sure how to describe green tea when you put in ice cream; I am lost for words. May be I am too entranced by the cream taste to pay attention. The Smokey depth of green tea helps to cater for less sweet tastebuds but I just love the colour it gives to a sweet ice cream base. While the additional jasmine infusion is not necessary; I have recently turned for this tea bag infusion. The light floral fragrance of jasmine is actually sweet compared to green tea; so I guess this help balance it out.
The base is a typical crème anglisese base which you know will make a creamy, smooth ice cream. You will need a domestic ice cream maker for this; however by my research around the web you can also freeze it for a bit (maybe an hour) then take it out and blend it again. I have not tested this way but if you do let me know!
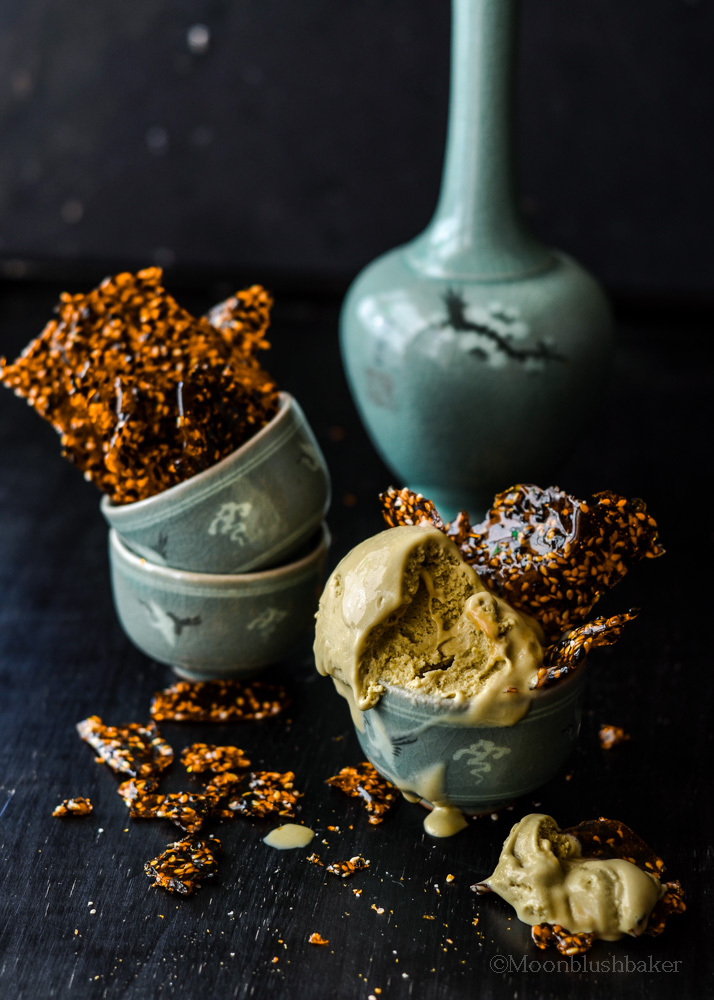
Infused Green tea ice cream sundae with double sesame brittle.
Recipe adapted from PS desserts by Philippa Sibley
500ml full fat milk
500ml pure cream 35%
One dried jasmine flower
15g matcha powder
200g caster sugar
200g egg yolk
Combine milk, cream and matcha in a large pot over medium heat. Bring to boil and add the flower.
In large glass bowl, whisk the sugar and egg yolk to light and fluffy.
While whisking at the same time pour the hot milk in thin stream into the egg mix. By tempering the eggs first you avoid the curding effect.
Pour this mix back into the pan and place over medium heat. With a wooden spoon mix constantly but slowly with a wooden spoon. Continue to mix in a figure 8 motion so bubble with disappear and it will thicken. The crème anglasie is ready when the reaches 80 degrees on a thermometer.
Pour the anglaise into a metal bowl sitting a bowl of ice water and stir it until it is cool. Strain through a sieve and set it covered the fridge for 1 day. Place your ice cream maker in the freezer and churning the next day according the instruction of your machine.
Double sesame brittle
50g black sesames
50g white sesames
200g white sugar
50g water
Line a tray with baking paper.
In a small sauce pan bring to boil the sugar and water, put it over medium heat. DO NOT TOUCH IT THIS POINT. Wait until it turns a deep golden brown before stirring in the seeds. Immediately pour on the lined tray and leave to set but snapping in to pieces for your ice cream.
Wednesday, gosh how much do I love Wednesday. Hump day may be some people idea of hell however for me I am very keen to share you with you why I love Wednesday. Well for me the idea of a "perfect day" involves a lot of baking and sweets. While I would love to have gone out this weekend to get some sun; the weather here has not been on Sydney siders side. It has been rainy, cold and wet… The worst weather for me at least. I need to wash clothes!!!
However Wednesday also gives me a chance to process what I will later in the week. As you might know I have been really trying to organise where I want to go in my baking career, so forgive for posting not as often as I did. None the less this absence has also come with some perks. I did markets with my sisters this weekend selling macarons which was very successful in my opinion and it is drumming up business for both of us.

I know I do not talk about this much but this blog is actually open to custom cake order from the Moonblushed Baker herself. Yes it is still in the works but this absence from the blog has been a result of a rush of orders for the month of June/ July. If you are in Sydney, Australia; having a party and wanting to one of my many cake creations for your party. I am here to listen to your ideas to create the perfect cake for you. Of course I do other baked good too, so I am pretty much dabbing in to everything right now. But enough with my shameless plug and on to this cake.
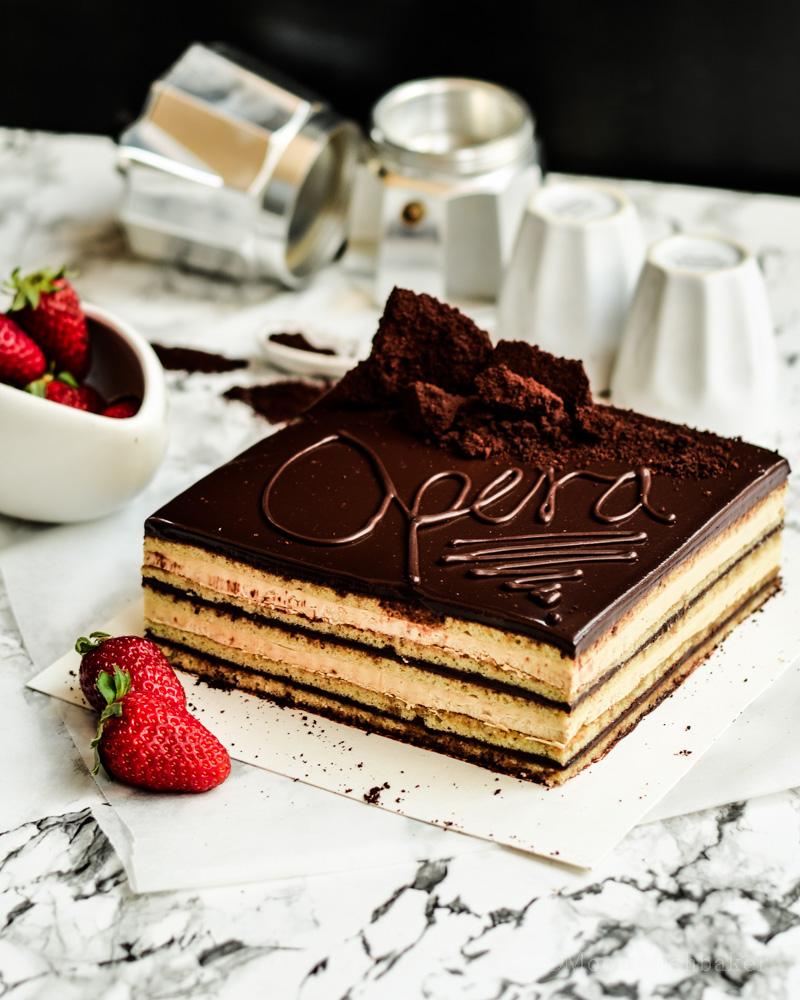
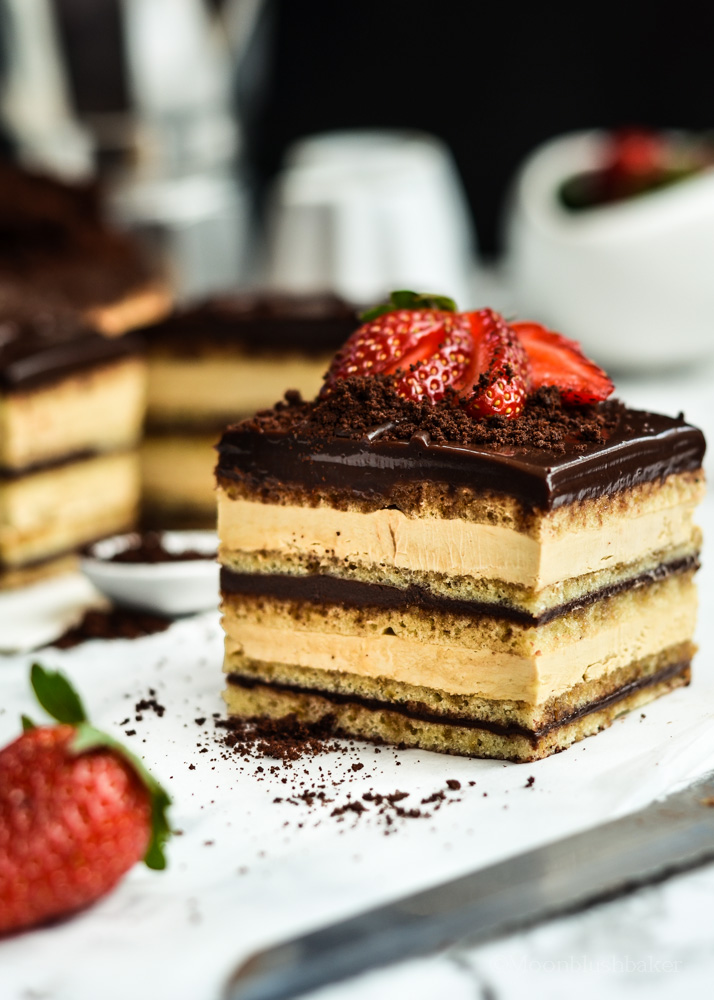
We just had a 3 day holiday in Australia. So you can understand why this opera cake was the perfect long weekend project. It requires you baking and creating many different layers, preparing the tin and waiting for the right time to cut. The French definitely know how to make a statement this this coffee gateaux. Why does the French always have to make things look so much more difficult than it seems?
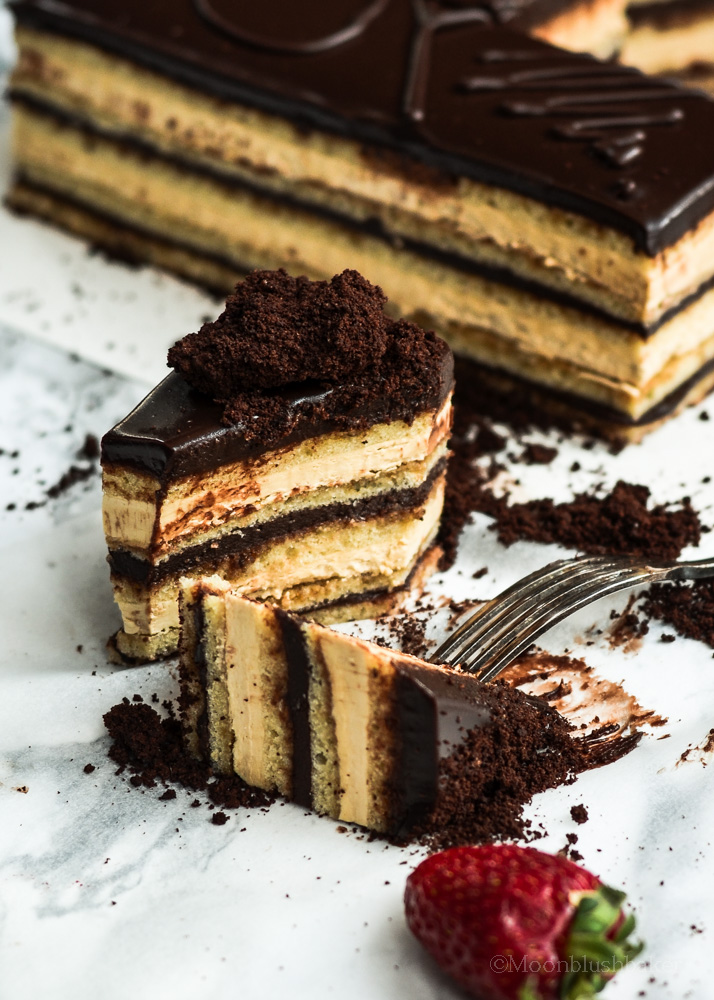
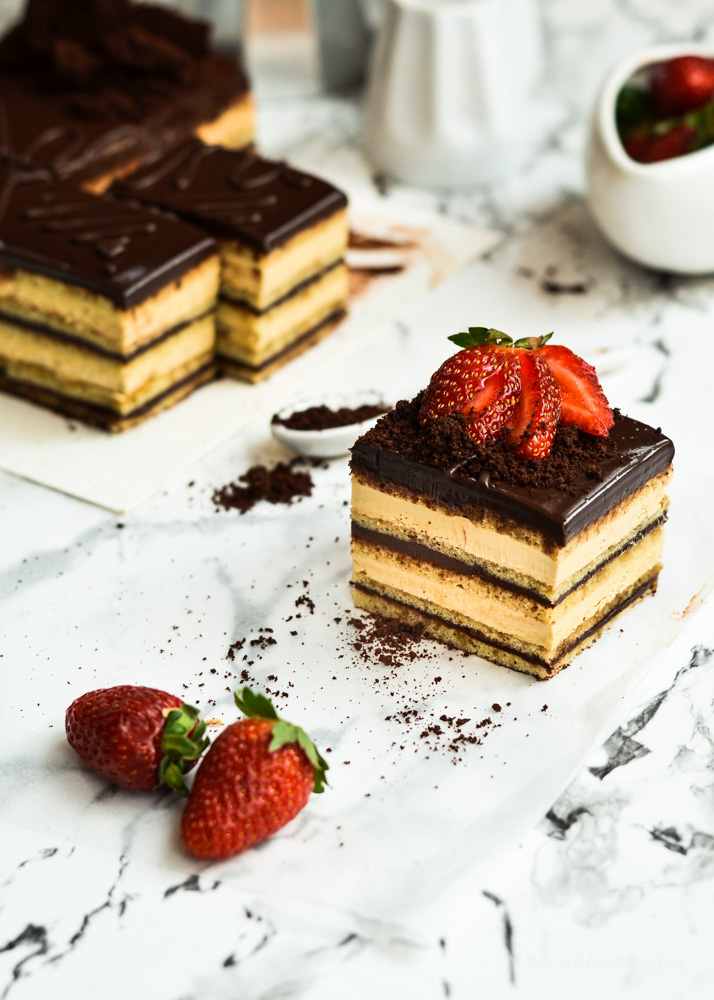
Coffee drunken layers of soft and fragrant joconde alternating with equal layers dark, dreamy ganache and melt in the mouth coffee French butter cream; you cannot ask for more French dessert than this. It is truly a celebration of butter, sugar and chocolate but I would not have it any other way.
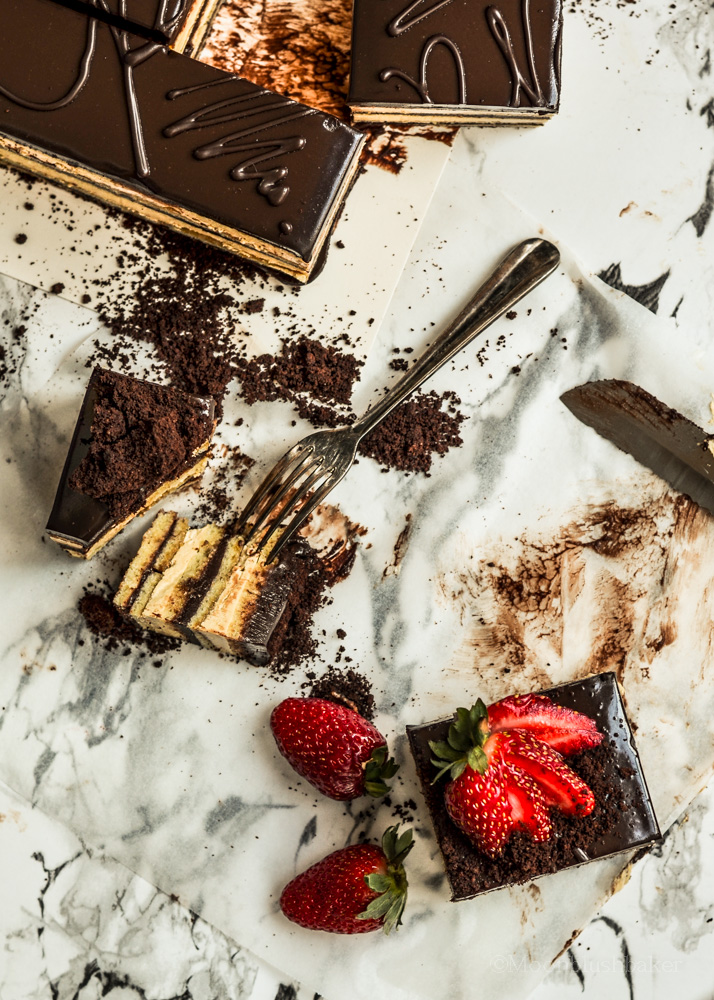
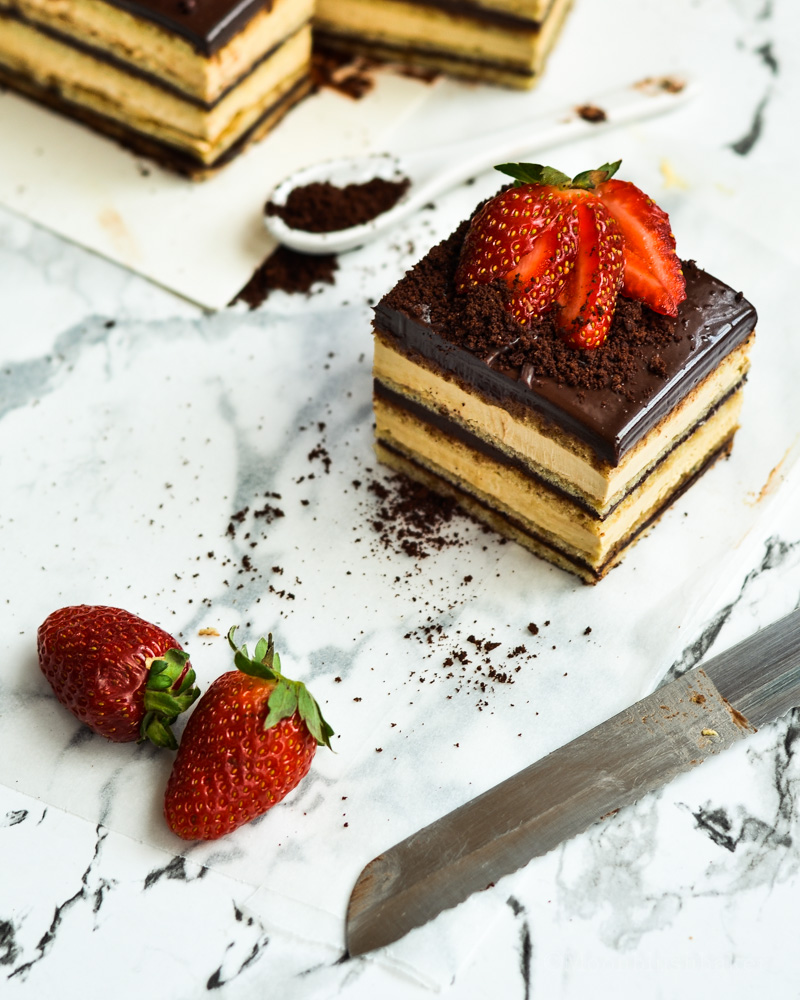
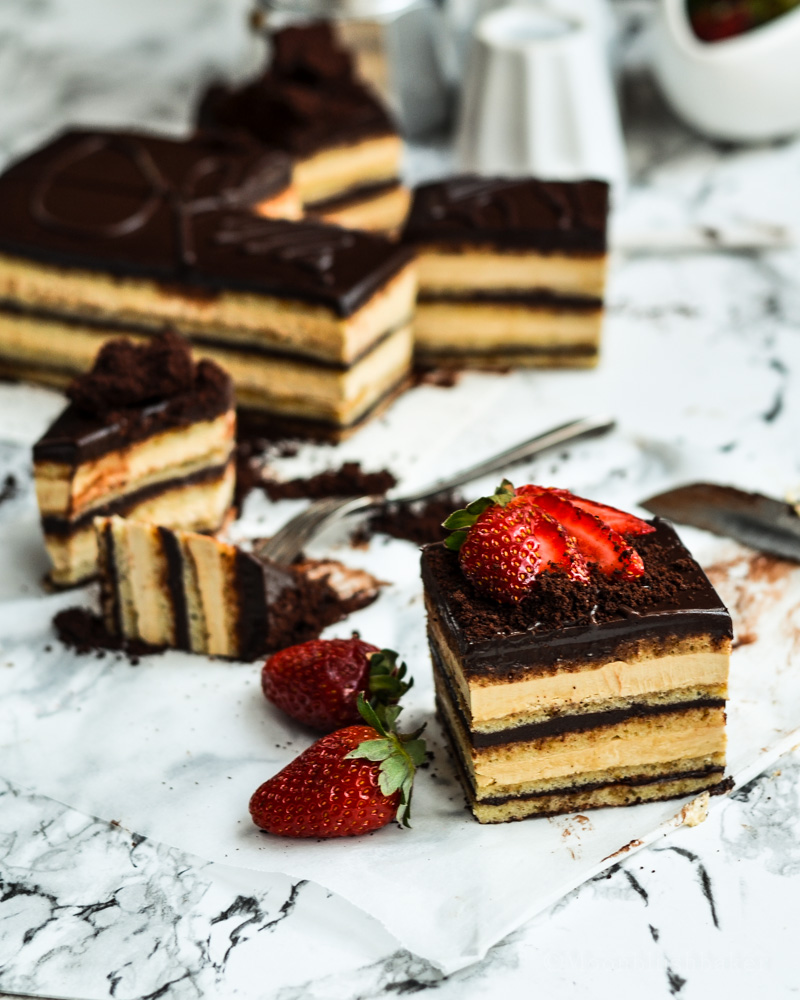
It looks stunning as a whole but I think it looks best when cut into little petite fours and garnish with a bit of Dutch cocoa crumb and a simple redder than red strawberry. The best part about this cake is any kind of messy sides or imperfect can be covered up AS long as you can cut straight, you are set to astonish your guest with your culinary skills (which are actually not any harder than a normal butter cake) and maybe you can roll off a bit of French to make them even more envious of your skills :)
 Opera Gateaux
Makes 16 pieces
Joconde ( you will need one and half of this recipe)
6 egg whites
50g caster sugar
280g almond meal
280g icing sugar
60g plain flour
6 eggs
60g butter melted
Coffee syrup
25g instant espresso powder
150ml boiling water
150g sugar
30ml Tia maria or Kahlua
Butter cream
6 yolks
250g caster sugar
30ml water
450g butter
2 tsp clear vanilla extract.
20g coffee powder with 10ml boiling water
Ganache
350g dark chocolate
250g cream
20g butter
To make the Joconde
Preheat the oven to 200C. Grease and line three 40 cm by 30 cm pans with baking paper or you can make thickers/more layers in smaller rectangle trays.
Using an stand mixer, whip egg whites on high until they reach soft peak. Turn it to medium and sprinkle in the 10g sugar, every 30 seconds until it is all beaten in. Turn it back to high and beat to thick and glossy. Move mixture into another bowl once stiff peak is reached.
In that same bowl, mix the almond meal, icing sugar, and whole eggs on medium just until the mixture becomes light and pale yellow. Fold in shifted flour into the almond batter.
Fold one scoop of egg white in to the almond batter to lighten it. Fold the remaining egg whites in to the lightened almond batter. Fold in the the melted, cooled butter into final mix. Divide the cake batter between the trays and bake the cakes for 5-8 minutes, until the surfaces spring back from a light touch. WATCH IT VERY CLOSELY!!!
Prepare two cooling rack with a lining baking paper. You will use this to turn out the cake once they are baked.
Once the cake is baked place the baking paper on top of the tin then your cooling rack. With your oven gloves hold the cooking rack and tray and quick flip it to invert. Remove tin. Peel back the parchment paper and cover the cake with a tea towel to prevent it drying out.
To make the espresso syrup:
In a small saucepan, set over medium heat, combine all ingredients for the syrup and bring to boil. Allow to cool in the fridge for 20 minutes before stirring in the alcohol.
To make the coffee buttercream:
Dissolve the espresso powder and boiling water and set the mixture aside for a moment.
Place egg yolks in a stand mixer with the whisk attachment, set aside.\
In a thick based saucepan, bring the sugar and water to boil. Continue cooking it until it reaches 118C on a candy thermometer. Begin to whip the egg yolks on hight. Remove the sugar syrup at 121C from the heat and allow the bubbles to disappear. Once the egg yolks have become very light and pale yellow pour in the syrup in a thin stream, with the mixer running on medium. Once the syrup is incorporated, turn it to high and beat to cool.
Change to beater attachment, on medium, add the butter, 20 grams at a time until it is fully incorporated into the buttercream. Add the cooled coffee mix and vanilla extract. The coffee buttercream is completely once it turns thick and fluffy.
To make the ganache:
Chop your chocolate finely and place in a metal bowl.
In a saucepan, set over medium heat, bring the cream to a boil. Remove the pan from the heat and pour on the chocolate. Leave to melt for 90 seconds. With a spatula gently stir the mix once it is all smooth. Add butter and combine. Divide the mix into two bowls, one with 1/3 and other with 2/3 of the mix. Allow the bigger bowl to set in the fridge for 30 minutes. Allow the smaller one to set at room temp.
Assembly
Line a large baking sheet with parchment paper. Divide each layer cake in half and place one cake it on the baking sheet. Brush the cake with the espresso syrup. After cover this layer with the ganache about 1-2mm. Place another layer of cake on top and brush cake with syrup. After spread out the butter cream in an even 2-3mm layer. Repeat these step until all cake is used. Chill the cake for 1 hour.
For the glaze topping take the smaller bowl you set aside from the ganache. If it is too hard melt it over a warm water in saucepan until smooth. Pour the glaze over the cake. Fridge for 2 hours before cutting.
Once cooled and set. Cut a 16cm by 16cm square from the cake with a warmed knife, cleaning it after each cut before service
I am not keen on reality television. Today there are 5 reality shows on the airwaves in Australia with the latest addition sending shivers down my spine. Really? you are gullible enough to believe Prince Harry is that desperate for publicity that he is looking for a wife, via a television show?
Gosh, you must be really good at hype if you work in Television. In the lead up to these reality television shows; I kid you not the over use of capital letters, exclamation marks and poor descriptive words have me fearing for the future of the English language in our youth.
The thing that has got me is if reality is that compelling, if reality is that entertaining; why do the advertises need to try so hard?

Yes, competition among networks is fierce but there is no excuse (in my mind) to claim such great titles; especially when you cannot deliver.
This is rampant in the food industry/food blogging. Along with the good and excellent dishes which require no description to keep them going, I am turning my attention to the way people have overreacted to how good a cookie, cake or muffin is.
I try not to claim a food stuff is OMFG good in my blog unless it REALLY something I believe in. I will never die over a cookies, faint over a custard or dehydrate myself from drooling over a runny egg (ok , I might get close).

Have you seen the description for recipes which are labelled “copy cat”? These , in my humble pie opinion, are the most disappointing ones.
Why would you make a copycat version of food stuff that is still on the selves; for the double the price of buying the real thing?
As much as homemade tries to claim that it is better tasting; there are just some things that cannot recreated. Not only the food processing and recipe (containing things not common to the normal cook) but what about the memories attached to these particular products that make them so significant?

The Royal Easter show lemonade you buy for $6 dollars a cup; because it reminds you of the first time you went as a child with your family.
The cookie brand you simply have to have because you shared an intimate moment with love of your life.
That packet custard, even though it contains more additives than real ingredients, you buy it anyway. We all know that eating it with your fingers is a gastronomic delicacy that cannot be recreated.
Take away message? Do not promise more than you can deliver. At least if you under describe it, your followers can relish in the knowledge they found a new secret great recipe.
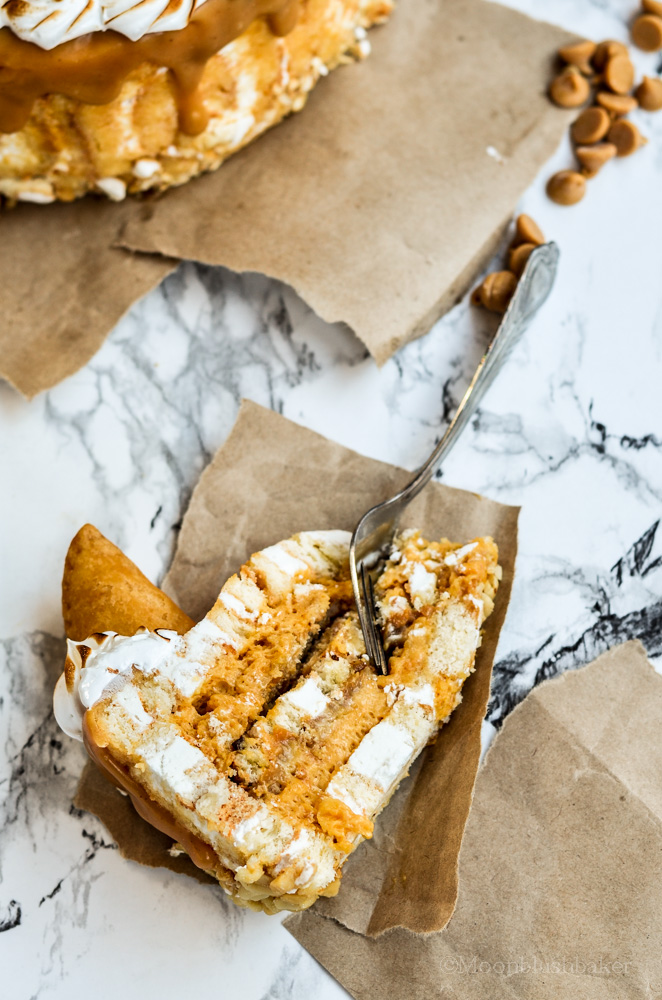
Another day, another cake. I have put off posting this cake as I am not happy with these photos but I will do it anyway because this was the cake I had for 22nd birthday!
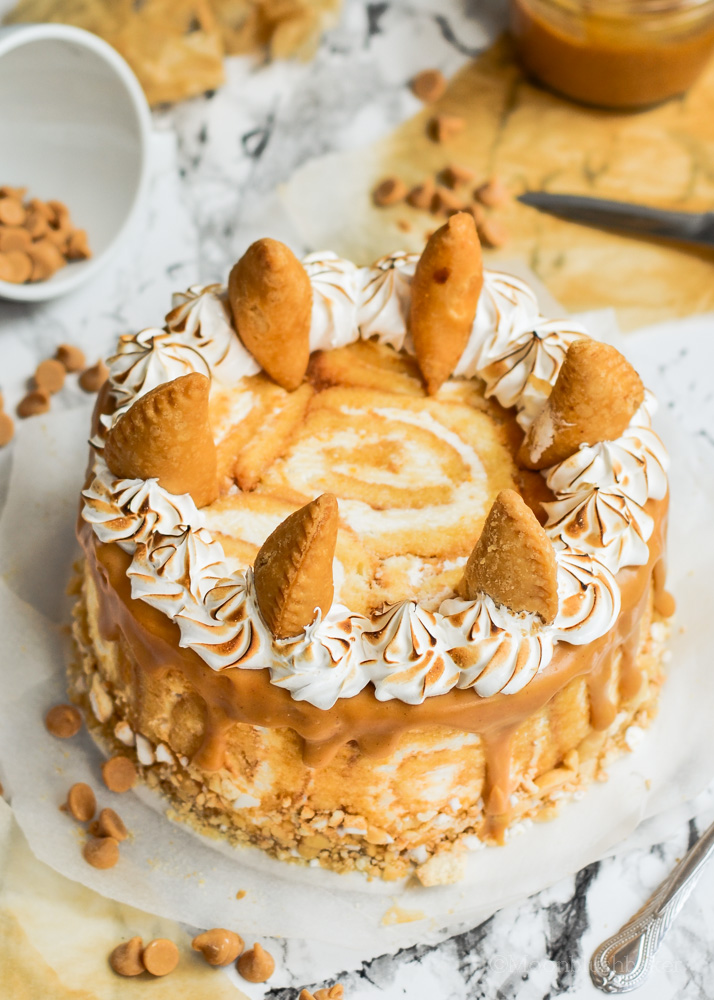
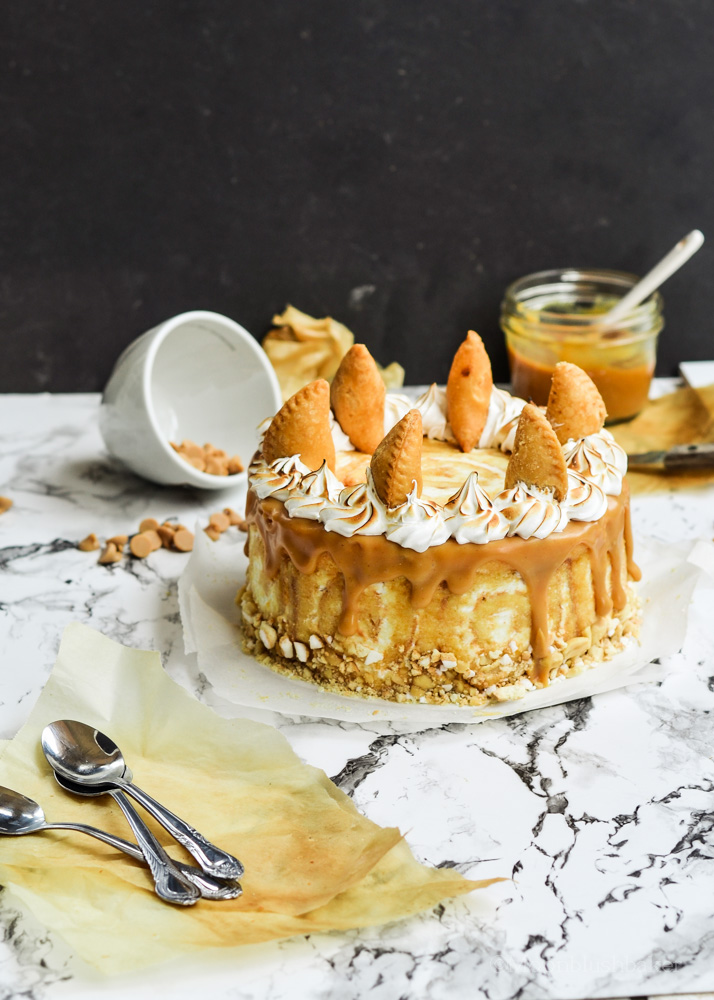
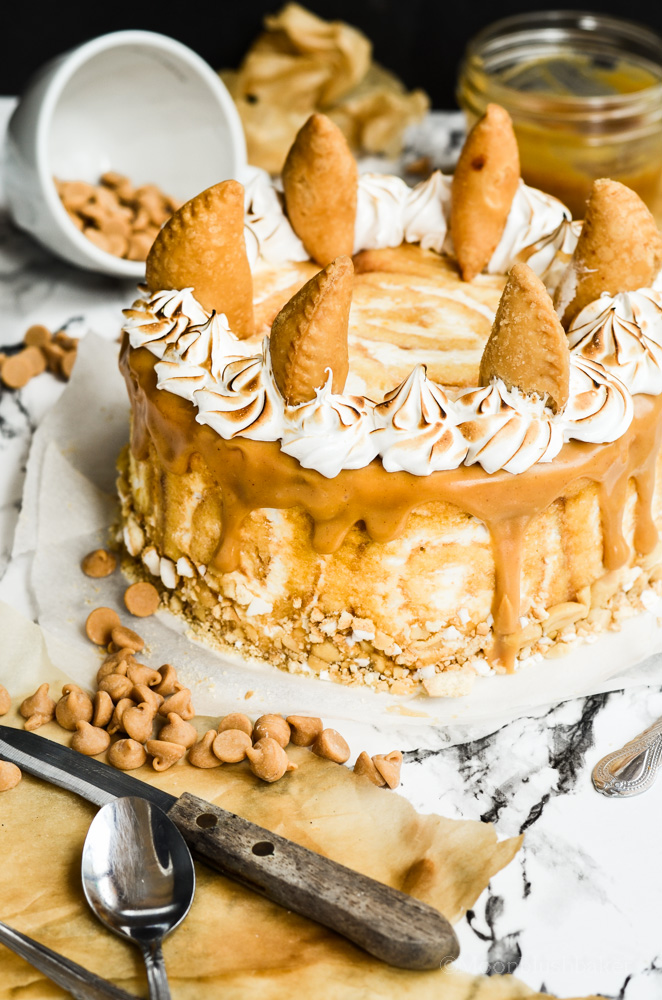
Base on Charlotte rouge, this peanut butter mouse pie cake is my latest cake creation. It is an ice box cake in reality as you do not bake the cake but assembled from swiss rolls. I made mine but you may use any store bought vanilla mini cake with a vanilla cream filling. This twist upon the normally dome shape cake means it really does become a highlight. While the swirls of cake may hypnotize you into eating more, it is hardly needed for the taste of the filling. The creamy, rich power of peanut butter adds salty sweet note to a light but rich mousse that will have you licking your fork for every last mouse coated crumb.

The tiny pies were not made by me but they are cookie which is a traditional Chinese deep fried pastry filled with sweeten peanuts. I am not sure what they are called but look in your local Asian food store because I am sure they will have it. Trust me, I got mine from the store down the road from where I live.
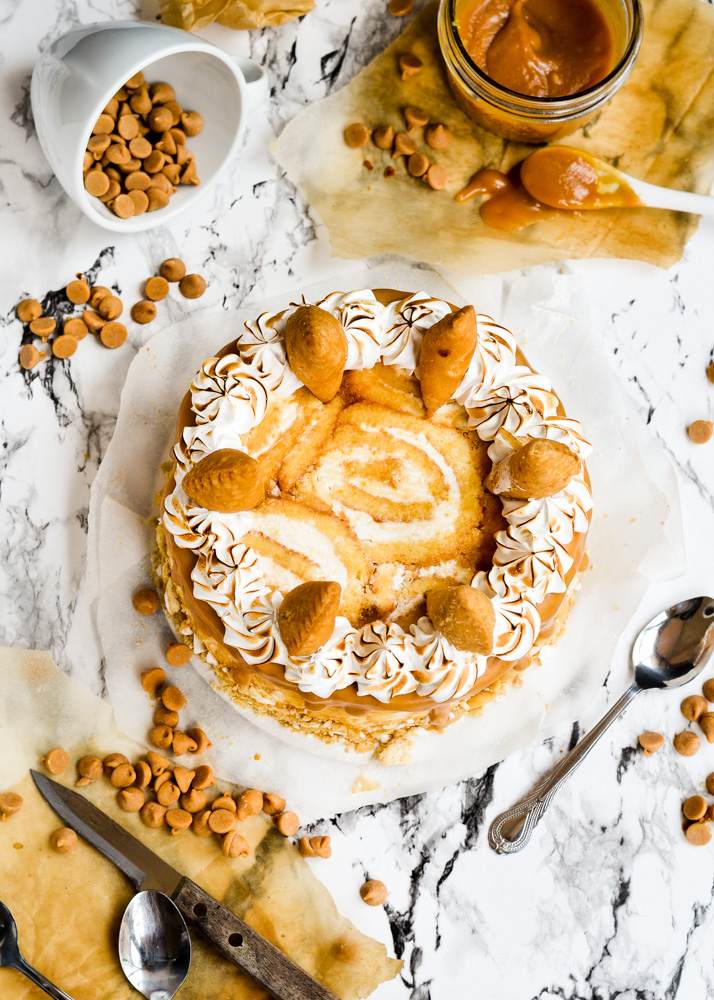
The edge coat of a peanut butter glaze topped with broader burned meringue makes this cake that much more special and OTT. Hey that’s what this cake is about, you do not make Charlotte rouge if you want to blend in.
If you looking for a cake for that peanut butter lover, pie lover or all over cake lover in your life; this is the cake if you are looking for something special and slightly unique. Look at it this way; Soft sponge rolls, creamy mousse, slightly chewy peanut glaze, fluffy meringue and crunchy, deep fried peanut pies? It is a taste and texture bomb for your sweet taste buds
Elaborate? Yes
Lots of steps? Yes
Worth it? Totally, like I said it is a no bake cake. All you need is all the things that go into it. Simple eh? *sorry jokes but it is not that hard*
Peanut butter pie mousse cake
Makes a 23 cm cake.
SWISS ROLL
Ingredients
10 Eggs
250g Caster sugar
120g unsalted Butter
250g CAKE Flour
Filling:
40g caster sugar
1/3 This Butter cream recipe
Method
Pre heat oven to 200C. Melt the butter and cool to room temperature
Separate the eggs. Whisk the egg whites to soft peak, then add the sugar and continue whisking to firm peak.
Add the egg yolks and fold through.
Sift the flour and fold into the egg and sugar mixture. Mix the melted butter through the mixture
Spread evenly onto a lined baking tray (30x23cm). Bake at 200C for 10 minutes
Remove from the oven and dust with caster sugar. Cover with a tea towel and turn over. Remove the baking paper gently, staring at the corners. Carefully use the towel to roll the sponge up. Keep it rolled in the sponge to keep it moist. Cool completely
Un roll the sponge. Square off the edges. Spread a little bit of butter cream over the entire surface of the sponge. Roll up the sponge so the shortest sides become the ends of the roll. Transfer onto cling wrap and roll up tightly. Store in the fridge or freeze.
Peanut butter mousse
80g Egg yolks
125g Caster sugar
500mL Milk
1 Vanilla bean
300mL Cream
200g peanut butter (creamy)
6 Gelatine leaves
In a stand mixer cream the egg yolks with the sugar, till light yellow. Bring the milk, peanut butter and split vanilla bean to just below boiling point in a medium pot.
With the mixer running, add gradually to the egg and sugar mixture. Pour it back into the pot. Bring it back to thicken over low heat.Strain
Whip the cream. Soak the gelatine in water, then squeeze out and add to the warm custard.
Combine cream and custard, and then allow to cool in an ice bath.
Assembly
One lined with cling film 23cm cake tin, spring form.
One recipe of the Swiss roll
One recipe of the mousse
½ recipe of Italian meringue recipe from Whisk Kid
One recipe of Peanut butter chip glaze recipe from Reeses Hershey’s kitchen
Peanut butter pie cookies
Slice the Swiss roll into ~1cm thick slices
Line the cake tin with cling wrap. Line the cake tin ( base and up the sides) with the Swiss roll slices. Make sure that there are no gaps between the slices.
Fill the cake tin half way with mousse. Trim the remaining sponge slices so that it covers the mousse layer completely.
Top with more mousse. Cover this final layer with sponge slices.
Set in the fridge for 4 hours before turning out to serve on the day.
On the day glaze the cake in a dilute mixture of apricot jam. Set for 30 minutes in freezer.
Warm the glaze and pour it along the edge. Allow to set. Pipe meringue around the edge in a star pattern. Burn the meringue with a blow torch. Place cookie pies on top.