 Even though my twitter is for the purpose of reaching you my lovely readers, one thing which is getting my undies in a knot is the hash tag #icebucketchallenge. For those who have been living under a rock, the ice bucket challenge is a way of raising money and awareness of a motor neuron disease. If you are unfortunately diagnosed with it you are going to need to get in to palliative care ASAP. You can manage the pain of not being able to use the muscles in your major organs for living but ultimately it is a chronic illness that often takes the lives of many people too young to leave the Earth.
 I have no problem with the charity wanting to raise money for cure or at least a way to delay the onset of the inevitable. Many organisations over the years have done this. “Movmber”, those nudie calendars for breast cancer, world’s greatest shave… I can go on and on. For every campaign that has gone viral there are always the asses that spoil the good message it was first founded on. By tipping the bucket of ice water over your head, it is meant to recreate the feeling of those suffering with the disease on a smaller scale. You cannot control your face, breathing however you are still aware of all your other senses.
For every 10 people that do any of these challenges or outlandish displays, at least half will not know what the hell it is about in the first place! Now that frustrates me!
If you are growing a bread or doing this ice bucket challenge for shits and giggles, shame on you. The point of the display is raise money for the organisation! Not for you to do something that everyone else is doing because it is trending on Twitter and it looks good when you go around, showing people the video. Every time a lame ass E grade star from a fail television show does this challenge with the intention of drumming up their own profile; it detracts from the real reason people are putting their brain cells at risk of shock freezing (well at least for a few seconds anyway).
The way you know it is a trend is when the world “fail” appears on the end of hash tag…. OR the people have no done it with a full bucket of ICE filled water ( Ice half way up the 20 L bucket). Lame attempts and people in wet shirts with unflattering displays of nipple is all I see.
Also what about next year when the organisation still needs money? Is the month of august going to become Ice bucket challenge month?
If you really want to help; Why don't you donate WITHOUT having to freeze and waste water? Money and good hard working scientists is a way to help, not being part of a trend. Enough with me rant and use of exclamation marks.
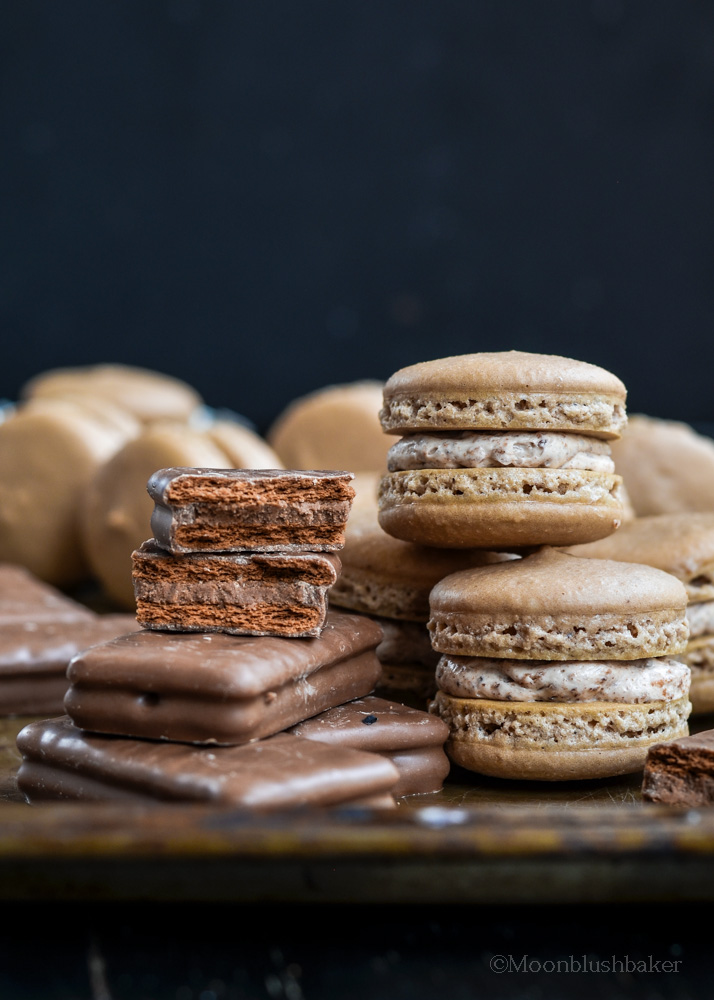
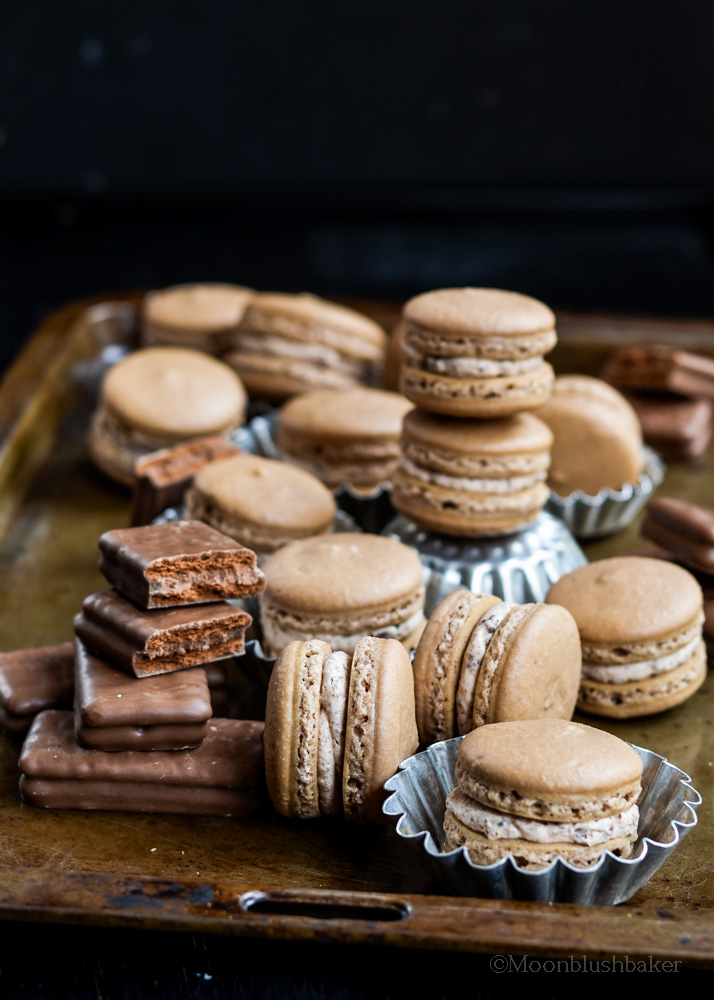
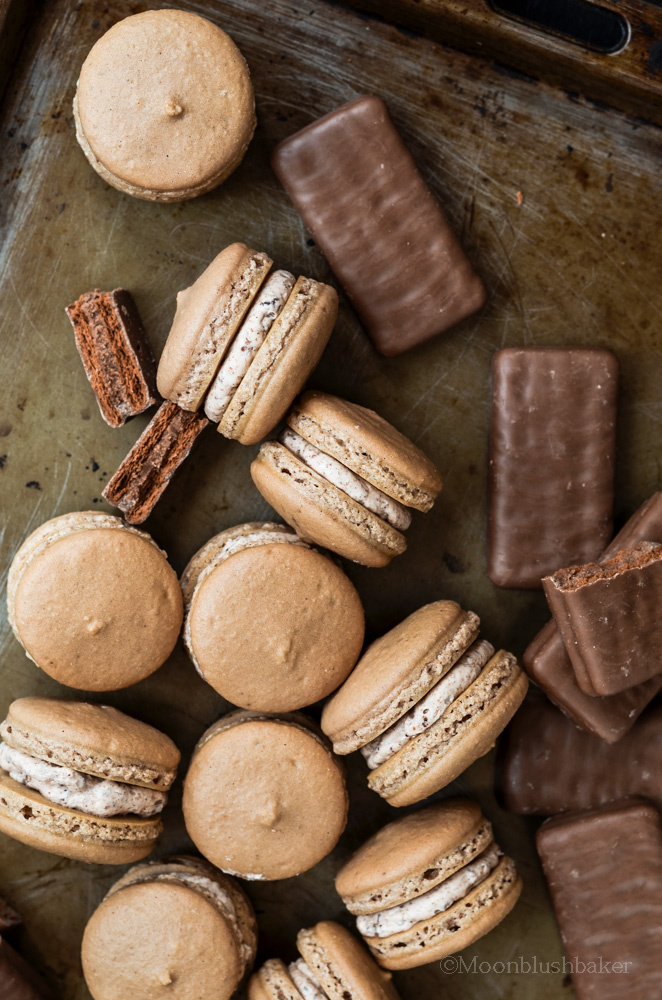
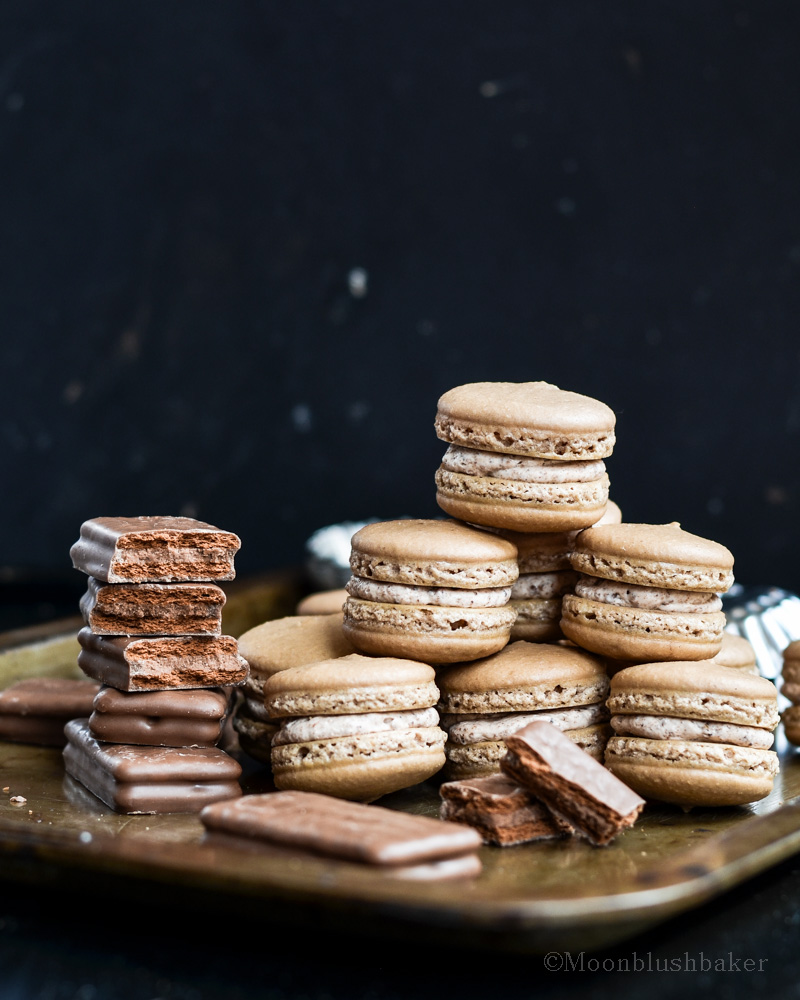
At least I had enough money left to stock up on Tim tams. Tim tams are those delicious as biscuits with the equal layers of icing to two biscuits in many flavours. I am boring and only like the dark chocolate and double coated ones but I think my sister likes the salted caramel one (not bad). If Those of you who think macrons are dead, think again. Unlike those cronut trends; having a good macaron is one of those culinary dining experience that you can only recreate in a French patisserie, or if you by chance have the skill to recreate it at home.
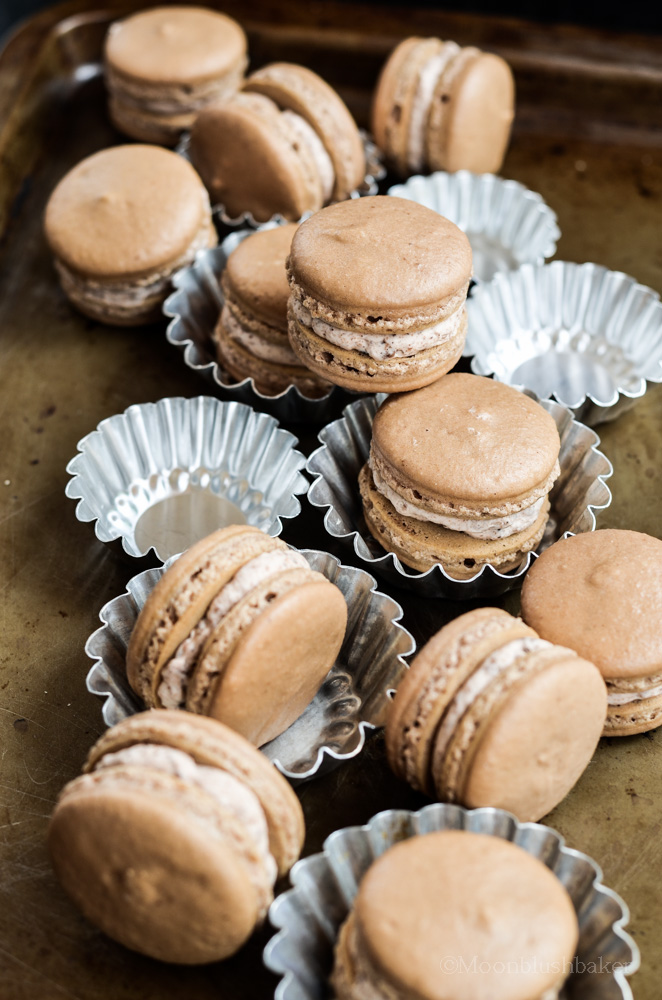
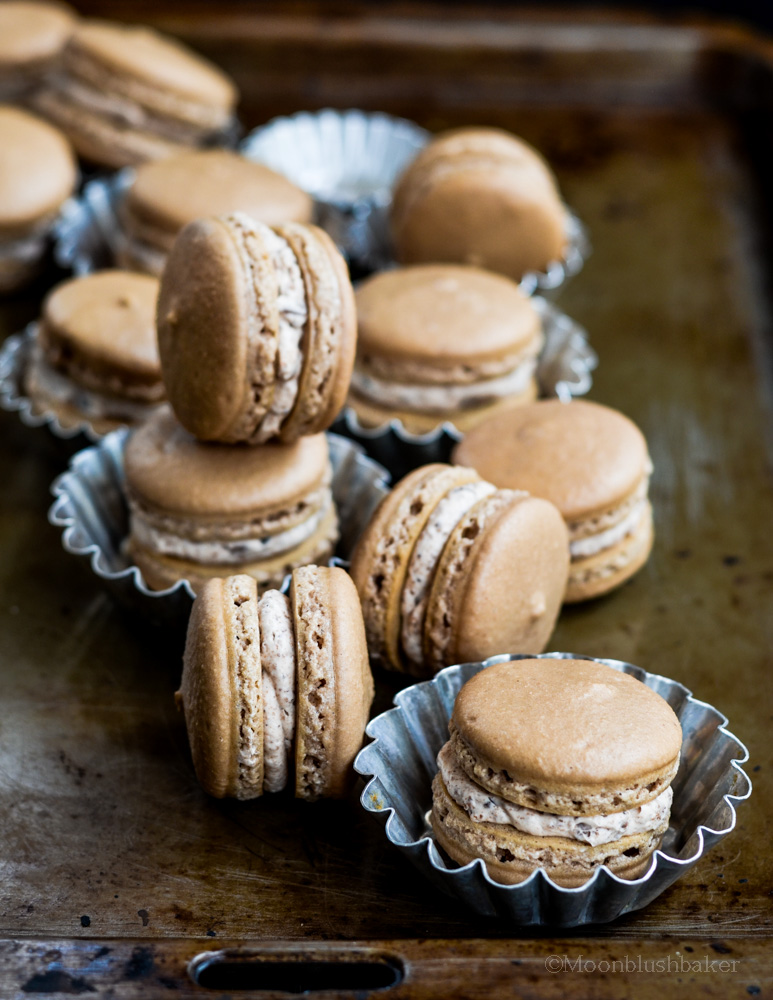
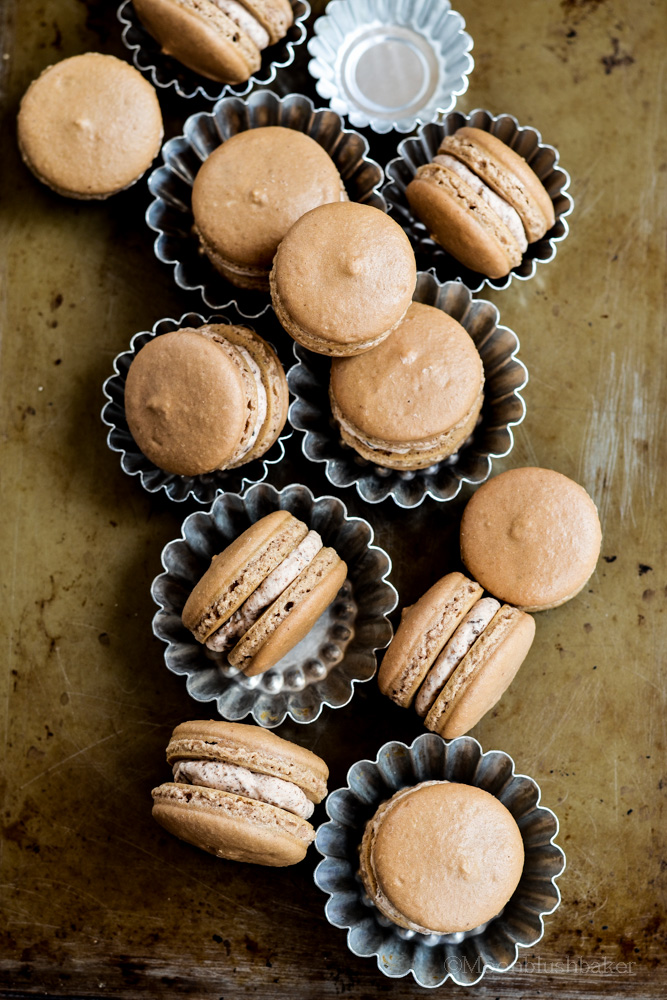
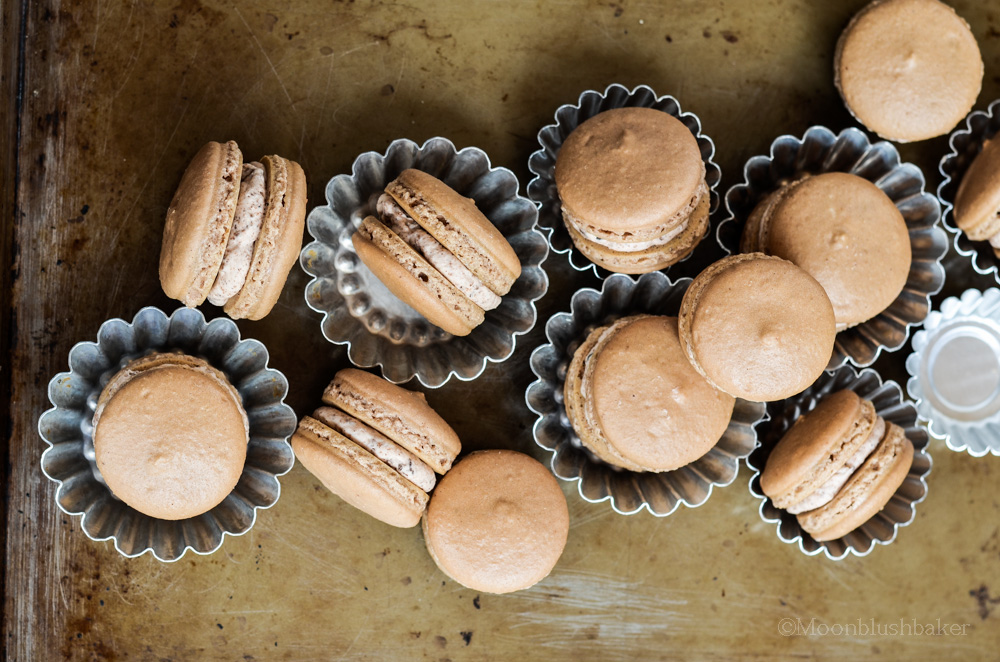
These are simple but effective. Tim tam slam is when you drink the coffee with a tim tam like straw. SO in honour of this very Aussie custom. I did a Tim tam slam macaron! Coffee and cocoa infused shell with a creamy milky filling of butter cream and crust classic Tim tams. It is adult way of enjoying the very casual Tim tam custom. Sweet Tuesdays Friends!
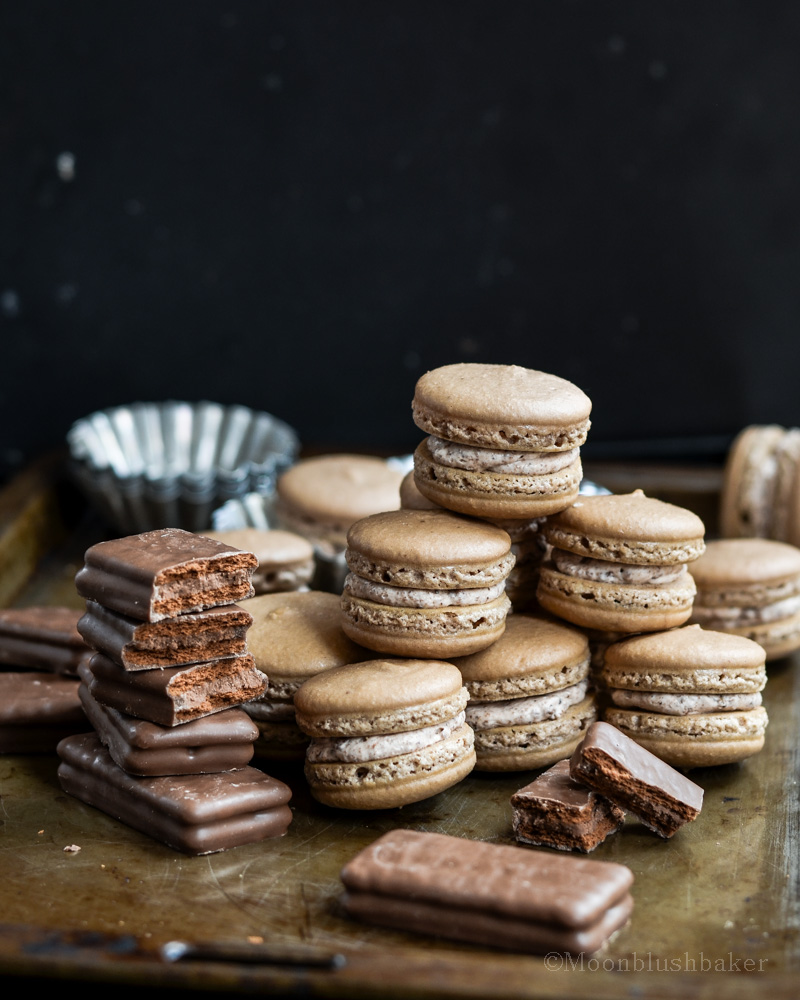 Tim Tam Slam Macarons
MACARONS
Tim Tam Slam Macarons
MACARONS
95g egg whites, at room temperature
110g almond meal, well sifted
180g icing sugar
10g cocoa
10g instant strong espresso
30g caster sugar
Line two baking trays with good quality baking paper.
Place icing sugar, cocoa and instant espresso in food processor and turn on high for one minute. Stir in almond meal and pulse for 5 rounds. Sift into a large mixing bowl and set aside. Using an electric mixer, beat egg whites and salt in a mixing bowl until it reaches soft peaks.
Turn the mixer to high speed, gradually add sugar and beat until it reaches stiff peaks. It will be shinny and hold a peak, not dry textured though.
Add all meringue to your dry mixture and mix together with a spatula, By using the spatula to push the meringue against the side of the bowl to break down bubbles, do this for 10 strokes. Then fold carefully til it becomes incorporated and the mixture starts to become shiny again. The mixture should flow like lava and a streak of mixture spread over the surface of the rest of the mixture should disappear after about 30 seconds. Place mixture in a piping bag with a 1 or 1.5cm round piping tip.
Pipe circles about 3cm wide on your prepared trays, leaving about 3cm space around each one. Tap baking sheets carefully but firmly on the benchtop a couple times.
Leave to dry for about 60 mins, until it develops a skin like texture and is not sticky to touch.Preheat your oven to 130C. Bake for 20-25 minutes until risen and dry. You can test one by lifting it carefully off the baking sheet, if it is sticky and tears it is not done but if comes clean it is ready.
Remove from the oven and cool on the tray till cool then gently remove from the sheet and place on a cooling rack.
TIM TAM MILK BUTTER CREAM
Recipe adapted from Bravetart
230ml whole milk
20g malted milk powder
20g ovaltine
1 vanilla bean pods, split and scraped, seeds reserved for another use
100g sugar
20 corn flour
1.5 whole eggs about (75g total whisked weighed eggs without shells)
400g unsalted butter, room temperature
¼ teaspoon kosher salt, or more to taste
50g crushed Tim tams, any flavour.
In a medium pot, bring the milk to a simmer along with the vanilla bean pods. Turn off the heat and set aside to steep for at least one hour. Dissolve malted milk and ovaltine in the sauce pan while still warm.
Strain the milk mixture into another bowl but reserves the vanilla pods. Scrape out the vanilla pods and set the mixture aside. Return the milk to a simmer. Whisk together the sugar, reserved vanilla bean scrapings, corn and eggs medium bowl.
Temper the milk in the egg mixture by pouring a steady thin stream of hot milk into the egg mix while whisking. Return the tempered egg/milk mixture back into the pot. Turn the heat to medium and whisk until the mixture begins to thicken and bubble sluggishly. From that point, continue whisking and cooking for a full minute more; use a timer or you run the risk of not fully cooking out the cornstarch. When the minute is up, pour the custard into a large mixing bowl.
In a stand mixer, beat it with the mixer paddle until room temp. This will take a while like 25 minutes. Beat it till it is creamy and stable.
Cut you butter into a small dice. Proceeded to add in the butter, one tablespoon at a time. Add the salt and continue to whip until the mixture is creamy and homogenous.
Add your crushed Tim tams and mix to combine.
Use immediately or refrigerate until needed. When ready to use, whip until creamy before proceeding.
 How important is your status? If you mind immediately goes to FaceBook, you will be right! It must be a new thing but has your partner been notifying you about this? I am single but I hear you people in relationships have been bickering about this. It all starts with one question. How do you know you are “official”?
Well I only just found out (yes I am technological slow/challenged), on Facebook when you change your relationship status it is posted out to all of your friends, not just the ones that follow you more often. This goes for all changes to a status as well. Married? Divorced? De facto? Nothing is protected when it comes to your relationship. It has been at least 2 years since my last serious partnership but even I know the tragic tales of Facebook. He was very into social media but two years ago I could not fathom even owning a “page” of anything.
Anyway the main debate which has been raging among my friend is, when and if you HAVE to change your status to in a relationship with whom? Over a coffee and a gas bagging session, more numbers where thrown round than at a sudoku competition. 2 months? 1week? Half a year? (You can guess what guess was mine…)
Viewer question: What do you think is the time frame before you notify your friends of your relationship?
However some then said something interesting. It was that the GUY was pressing her to change it on Facebook. After I found out from a radio program that is not a single case. Many, MANY guys want the girl to change her status. It has actually caused some of them to break down slightly if they don’t. Now I have heard this before about girls needed the status change (it is referenced EVEYRWHERE) but never from guys. She is not born in Australia but apparently it is big news to her family. If know Asian families and their ability to gossip about absolutely nothing is amazing.

In a world that is dictated by the way you present yourself, has a simple click of a button, “single” or “in a relationship” been the difference between ending or continuing your relationship success. I am not an expert on relationships. I probably have more expertise in baking and fermenting natural yeast but even I can tell if you need social media to confirm something: there is something very wrong with the world. Either that or men in the 20s-40s age limit are getting more metro than I dare to contemplate.
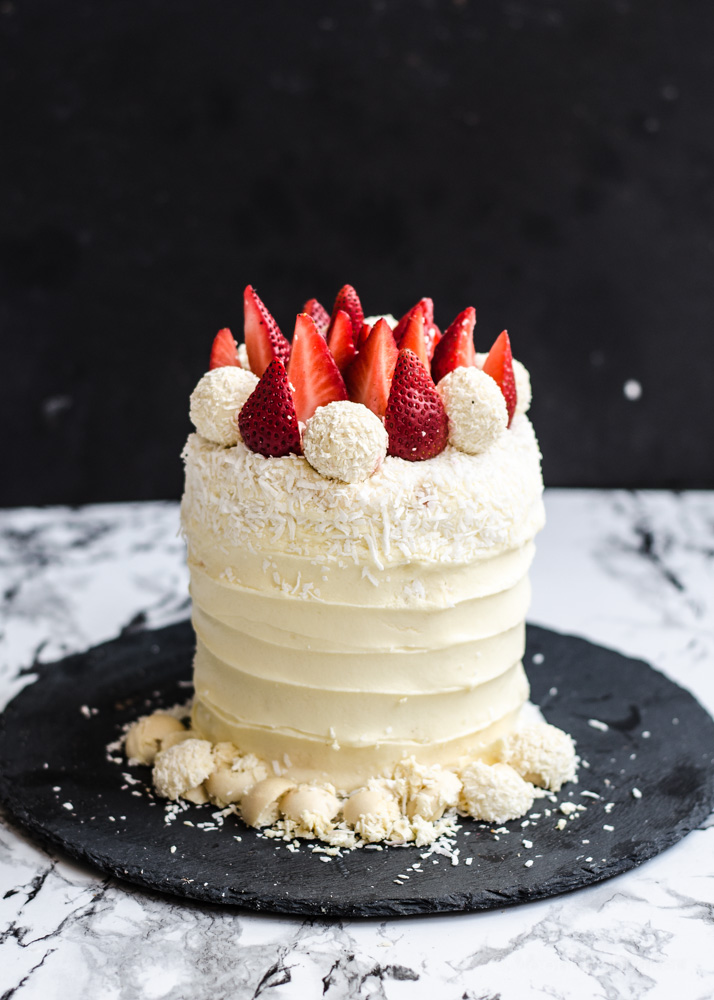
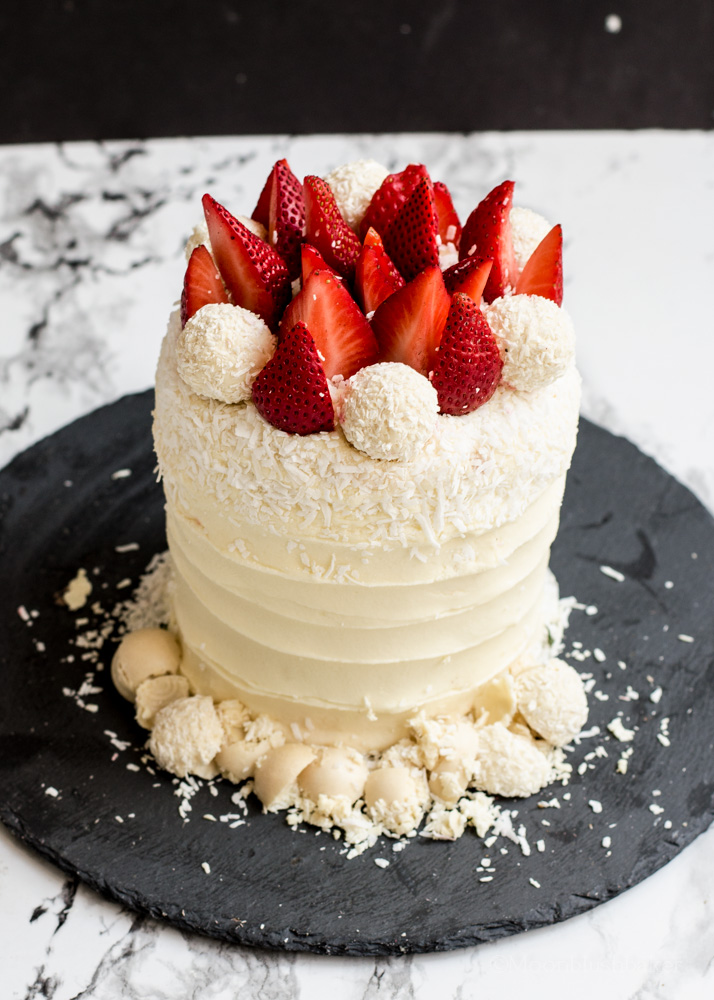
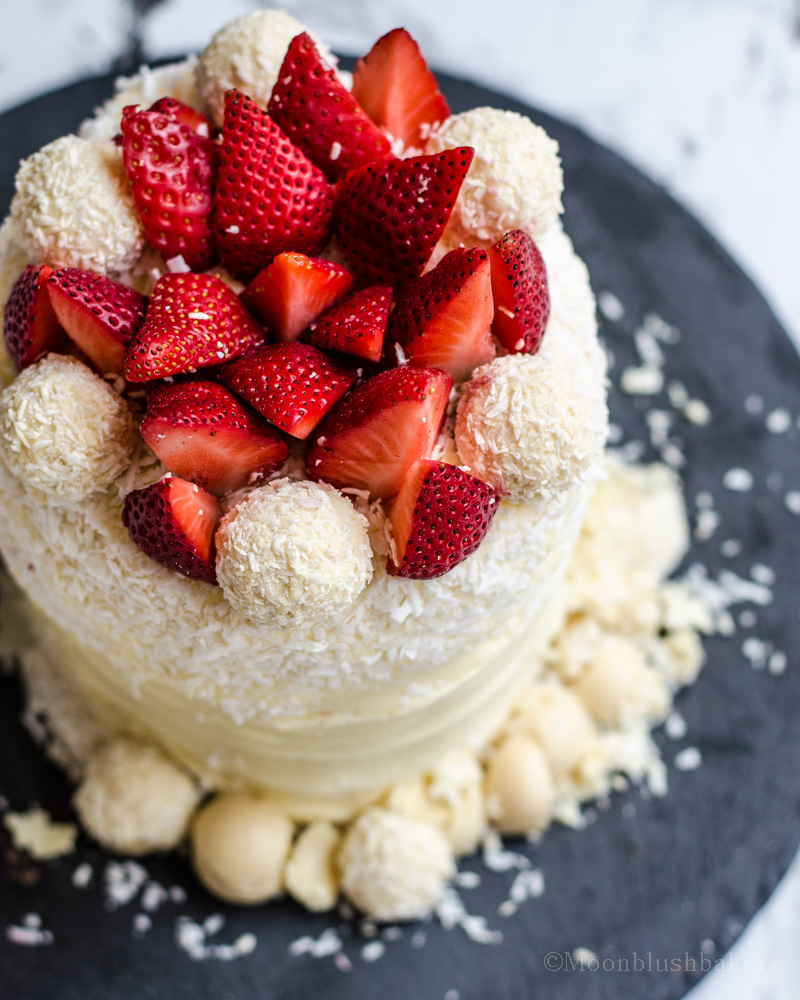
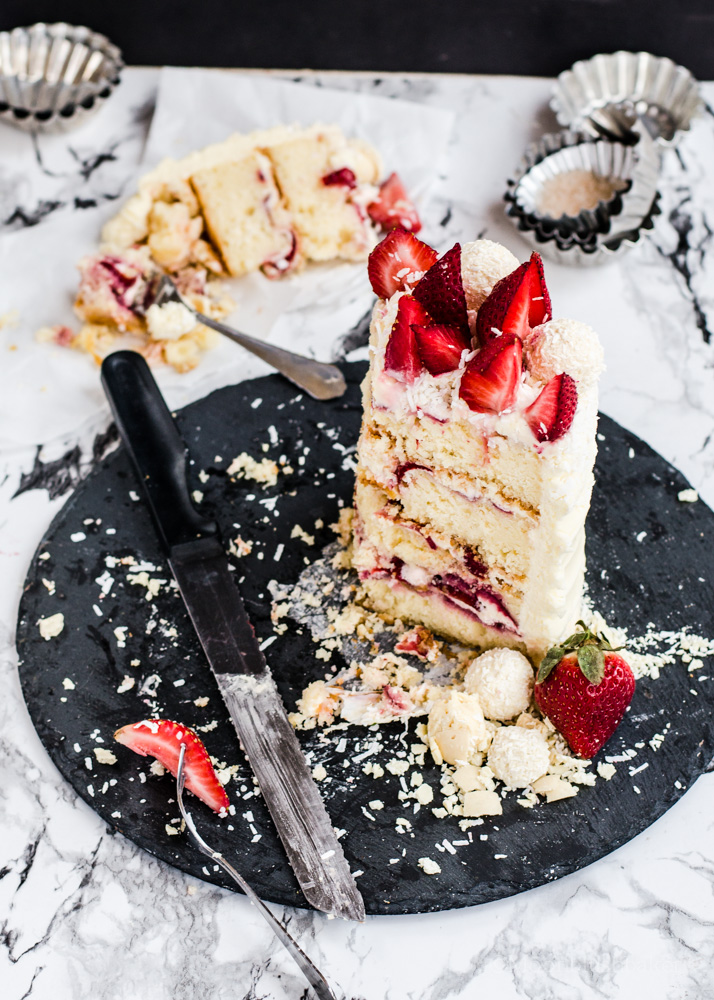
Either way; if you are single or in a relationship, you always have room for cake. Now in Australia it may be rainy and windy but it means that strawberries are dirt cheap. Well they are dirt cheap in comparison to the prices at other times of the year. My older sister just celebrated her birthday; so in traditional Belinda baker fashion, I made a cake. She is not a fan of traditional butter cream but I know that she likes her sweets especially berries and cream cheese. I was going to make a baked strawberry cheese cake but I forgot to buy eggs on the day I wanted to make the cheesecake, meaning that went out the window.
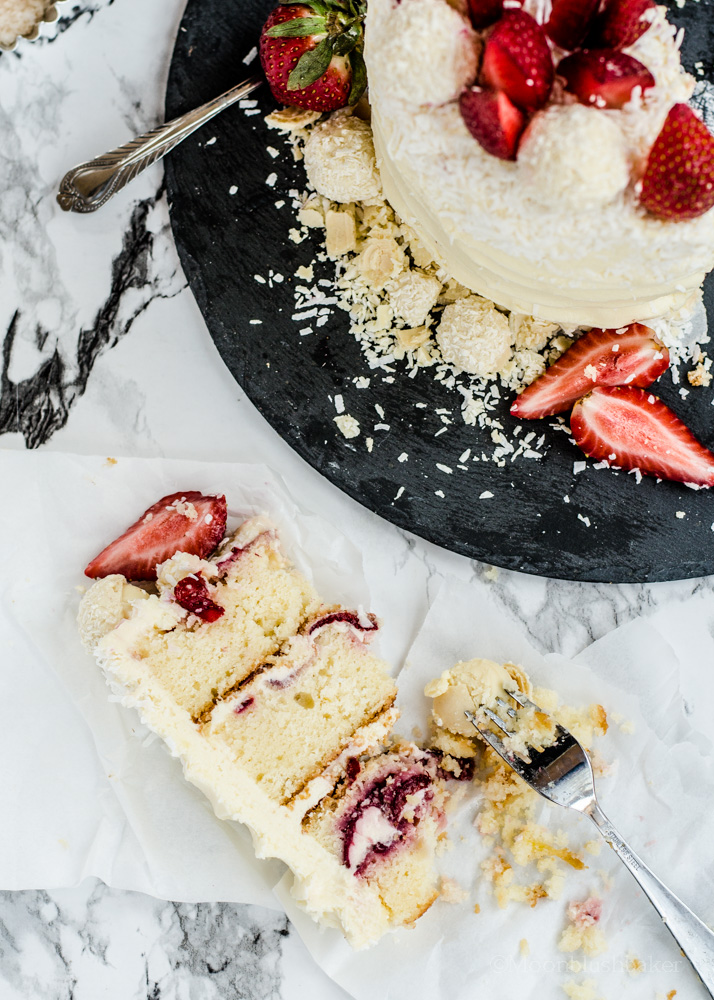
This cake is made can be made well in advance as it is a delightfully sponge textured butter cake with a light level of sweetness. I was not keen on the level of sugar in the cake, so I did reduce it but added a bit more moisture and egg to the cake to help it keep the structure. It is important in this cake that the flour is shifted as the strawberries have the tendency to weight down the cake or sink. You can fix this be dusting the strawberries in flour but if you combined it just enough the strawberries will sit well on the top.

The cream cheese icing is creamy and smooth with a light tart edge from the lemon zest. I love it, it actually works well on sweet white bread or toast in the morning. Now this a simple cake for a Tuesday but is bright and happy for the winter blues.
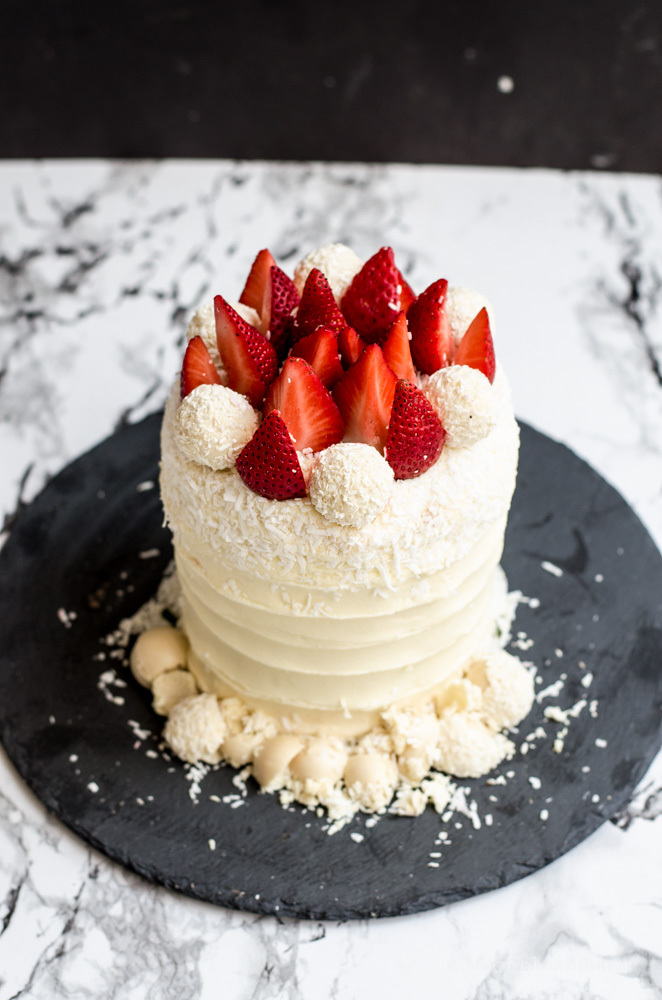
Dreamy Roasted Strawberry White cake with Velvet Cream Cheese Icing
Makes a 4 layered 15cm cake
WHITE CAKE
Recipe from Leites Culinaria
320g Plain flour, shifted
4g baking powder
8g baking soda
3g salt
240g unsalted butter, soften
300g caster sugar
4 eggs plus one egg white
250ml butter milk
2 tsp vanilla extract
300g strawberries, hulled and sliced to 5mm
Pre heat oven to 160C. Grease a large 35 cm by 27cm pan with butter and line it with baking paper; coming up the sides by 5cm.
Shift flour, baking powder, salt and baking soda 3 times over a large bowl. Set aside until needed.
Cream butter and sugar in a stand mixer for 5 minutes on medium high. Scrape down the bowl then continue to cream for another 2 minutes; until it is a fluffy and white. Turn the mixer to low and beat in each egg one at a time, waiting for each one to be mix in well before adding the next one.
Add vanilla at this stage.
Alternating between butter milk and flour mix. Fold in 1/3 of each mixture in to the butter and sugar, until just combined. So fold in 1/3 of flour then 1/3 of butter milk, then 1/3 flour etc…
Scrape batter into the prepared pan and top evenly with strawberries. Bake in the pre heated oven for 25-35 mintues or until a skewer comes clean when inserted in the middle. You know it is ready when the sides are pulling away from the pan and you can smell the cakes sweet scent.
Keep the cake in the pan until completely cool. Carefully lift the cake out of the pan with the extended baking paper ( get another person to help you). Transfer to wire rack and place in fridge until cool.
CREAM CHEESE ICING
300g cream cheese
160g butter
2 tsp. vanilla extract
1 tsp almond essence
1 tsp lemon zest
650g icing sugar, shifted
In a stand mixer bowl place all ingredients but icing sugar.
Beat the mix until creamy. Slowly add the icing sugar to the butter and cream cheese until combined.
Turn the mixer up to high and continue to beat until fluffy about 2 minutes ( you may need to scrape the sides)
Set aside until needed.
ASSEMBLY
Recipe of white cake
Recipe of cream cheese icing
One recipe of Roasted strawberries (get the recipe from Joy the baker as it is perfect)
200g shredded coconut
100g strawberries, hulled. Half cut into quarters and half cut into half
Coconut chocolates
Using a 14cm circle template, cut circles out of the cake. These will be your layers; depending on how well you cut you will get three to four layers. Set a side
Place a cake broad on a turn table.
Place a small amount of icing on the cake broad then top with one cake layer. The strawberries face up.
Pipe a layer of icing on the top of the cake, creating a well in the middle. Fill with roasted strawberries. Place another cake on top. Continue this process until all cake layers are used.
Crumb frost the cake with cream cheese icing and transfer to the cake to the fridge for 30 minutes.
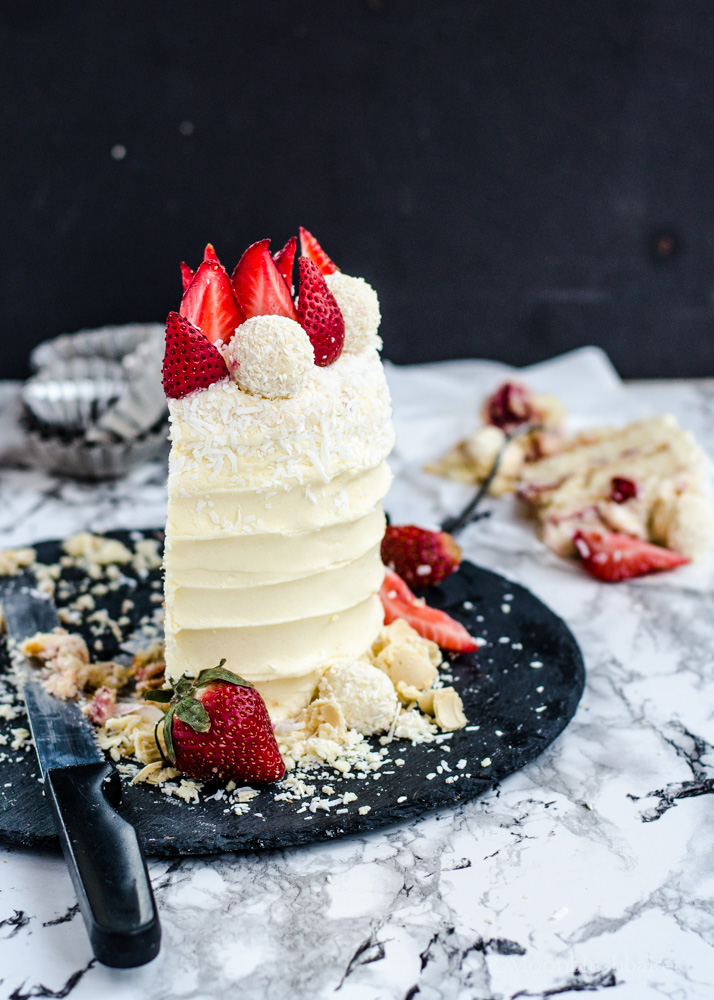
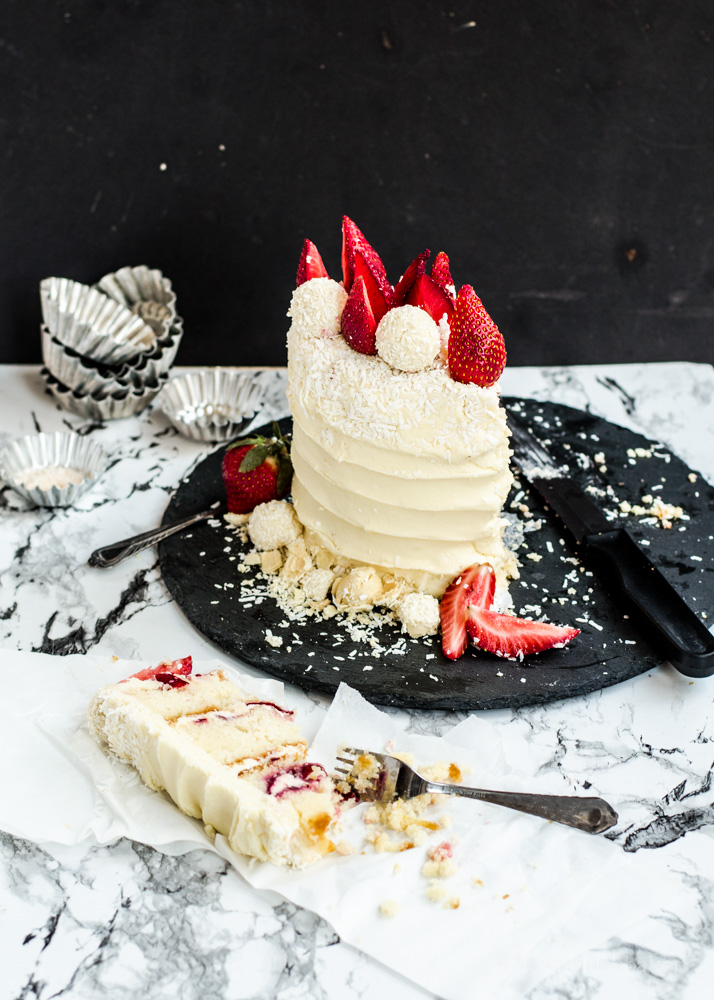
Continue to frost the cake in the icing. You may do whatever pattern you want. I did this swirl which is guided by Apt 2b. Baking.
It will look pretty even with the rough icing.
Top with Coconut chocolate, shredded coconut and strawberries. Serve.
 You know what today is not about me nor is really about the problems I have being cynical and too realistic about life.
Today this post is about my mum. Just last month my family celebrated the glorious woman that is my mother. After losing my father a few months back, my mum really has been the strongest person in this whole mess. I know everyone thinks they have the best, greatest mother in the world but it really doesn’t matter. I think all mum’s rule the school; no matter how corny that sounds.
You know what today is not about me nor is really about the problems I have being cynical and too realistic about life.
Today this post is about my mum. Just last month my family celebrated the glorious woman that is my mother. After losing my father a few months back, my mum really has been the strongest person in this whole mess. I know everyone thinks they have the best, greatest mother in the world but it really doesn’t matter. I think all mum’s rule the school; no matter how corny that sounds.
One of things that make me admire my mum is her ability to wear a smile. Even on days where the life seems over whelming and hard, my mum has the biggest smile on her face. She might not be as young however the smile she wears is just as wide and warming as the ones in photographs from 30 years ago.
While she is not a fan of hiding your emotions or bottling them up like I do, her ability to make other feel better with her smile is otherworldly. It is like a super power!
For anyone in distress, she will swoop in save you from your swap of worries with her caring arms.
For anyone calling for a ear, she will use for super sonic hearing and intense listening capabilities to figure out a solution for you (even though sometimes it is a bit irritating )
Even the strangers in the street cannot help but be drawn to her vibrant personality like a super charged magnet.
I can go on and on about my mum however being a procrastinator I have piled up a bunch of assignments from school. So as I leave you with this cake I made for her birthday.
I want you to go to your mum and think about what her super power is. After give her a big hug and kiss randomly and out of the blue. She may think you are being weird but I know it will warm her heart. For those who are separated by distance or their mum has departed this world; I am sure thinking about them (only them!) for a solid minute or two will be enough.
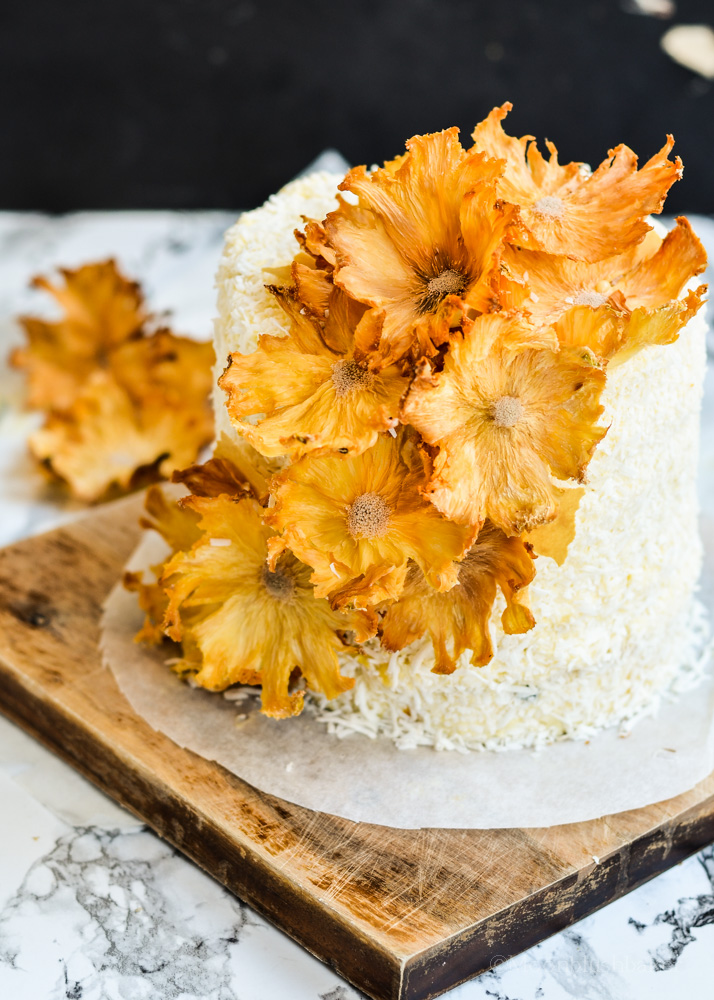
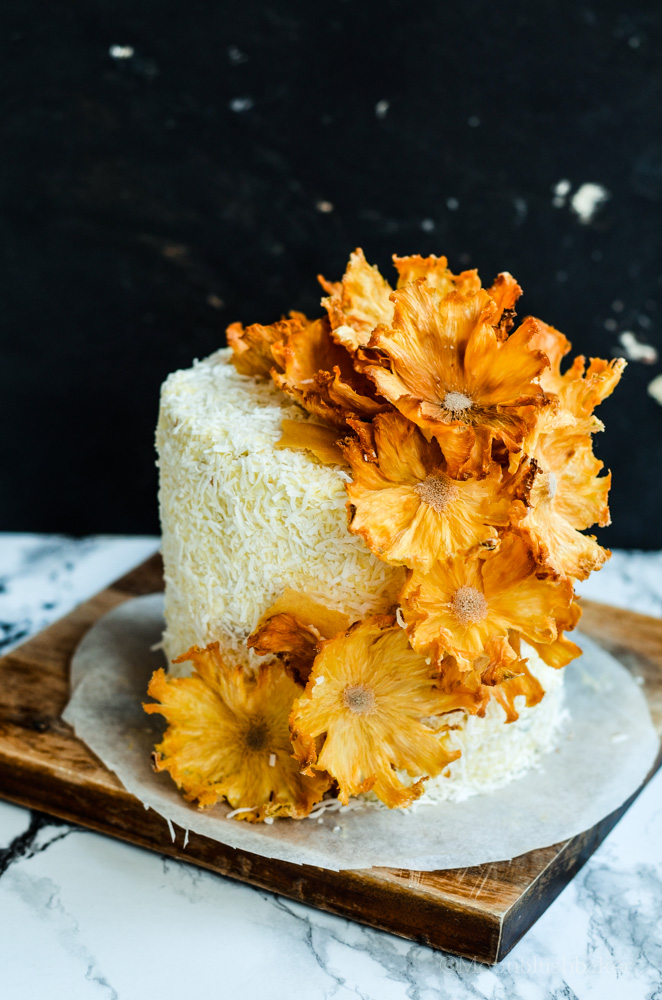
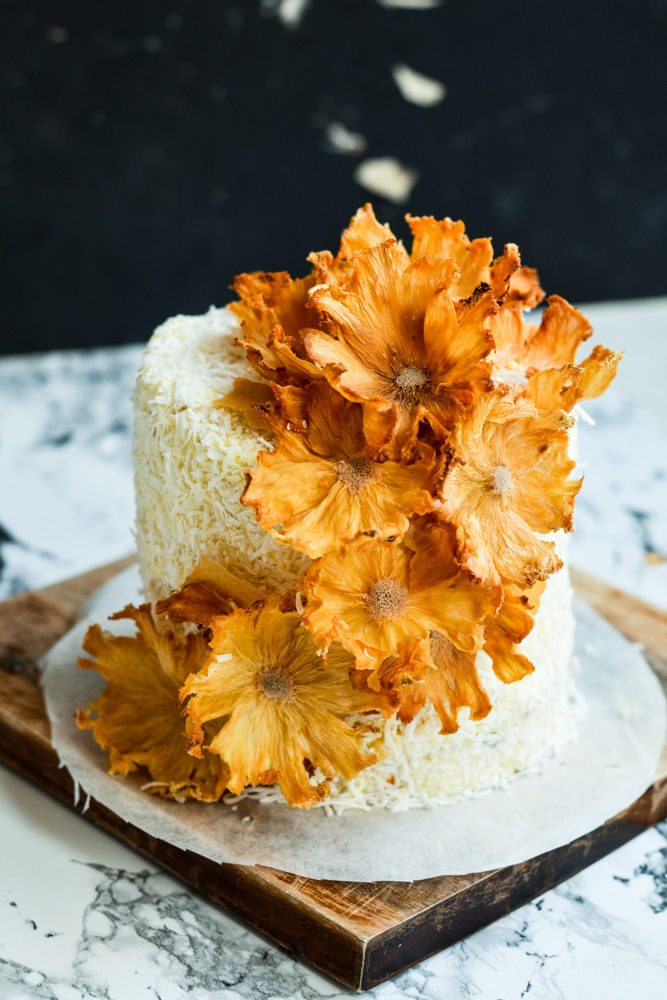
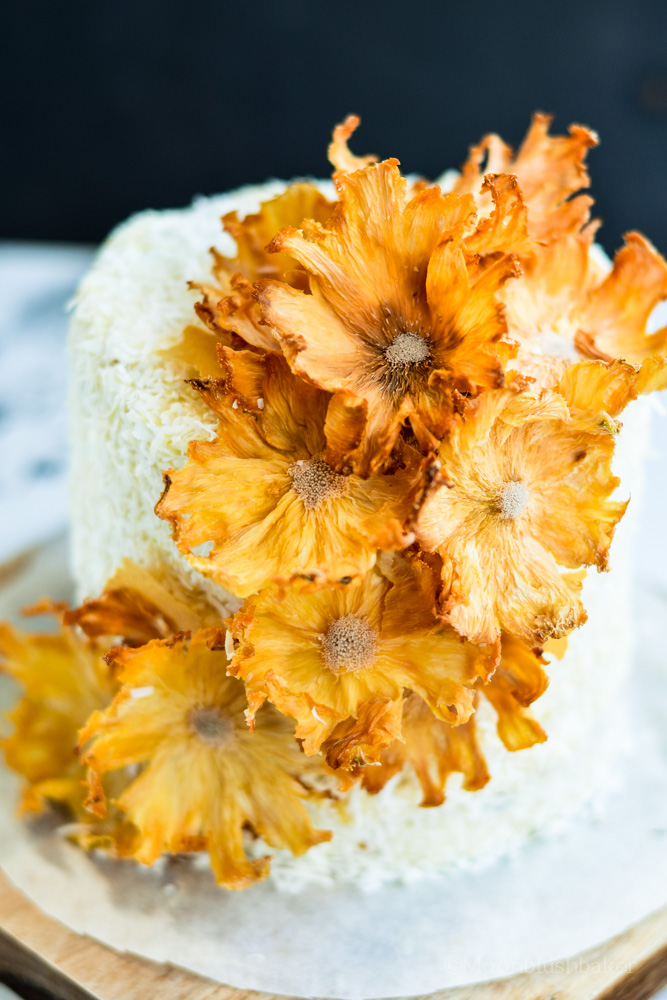
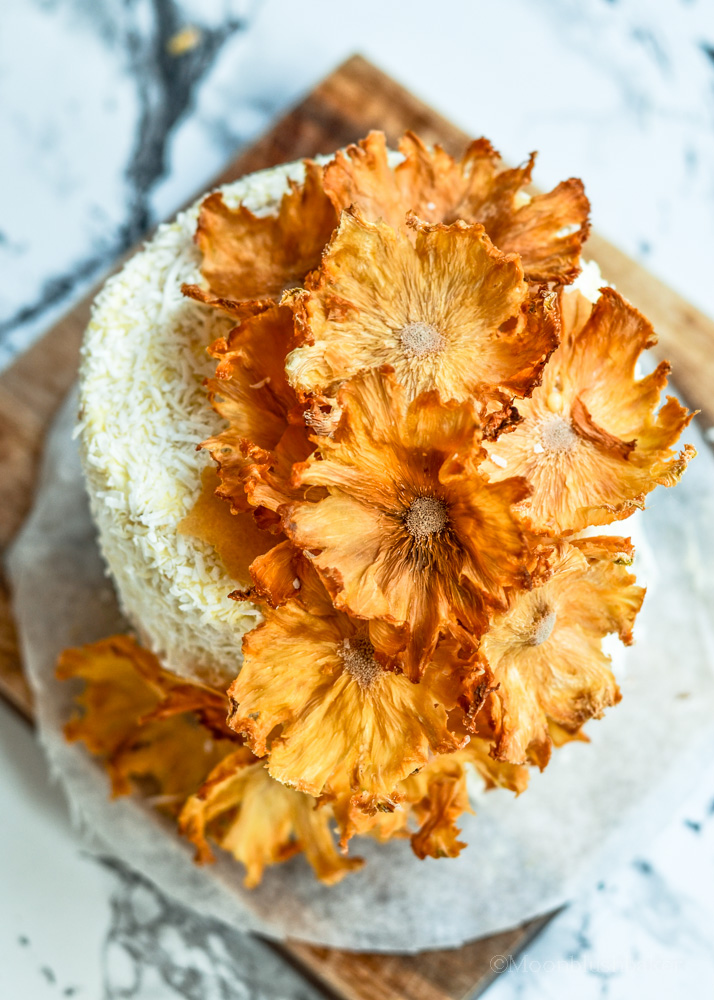
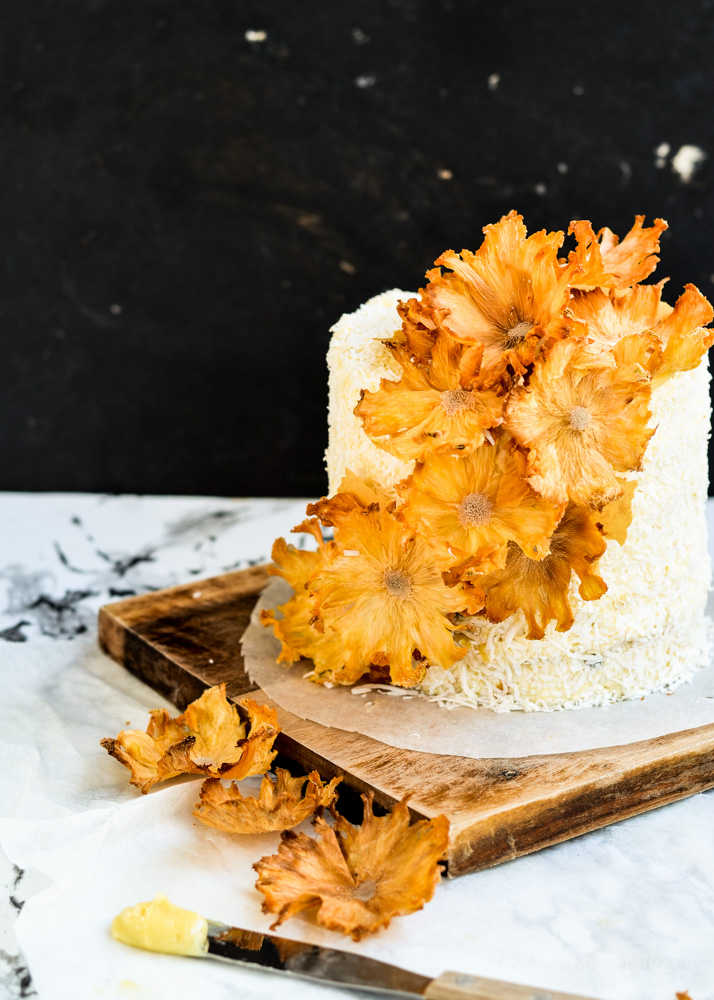
This cake is light, fragrant and very traditional in the best possible way. I was not trying to make this cake vegan but I am sure this is best recipe for a yellow cake when you are missing out on eggs. The buttery texture of traditional yellow cakes is recreated by the chemical reaction created by using vinegar and bi carb soda. Also it help to shift well, as this contributes to the even texture in the cake. While the concept of flowers may be considered formal and reserved; by using the technique of drying out pineapple brings a modern twist to the cake. Be careful not burn it!
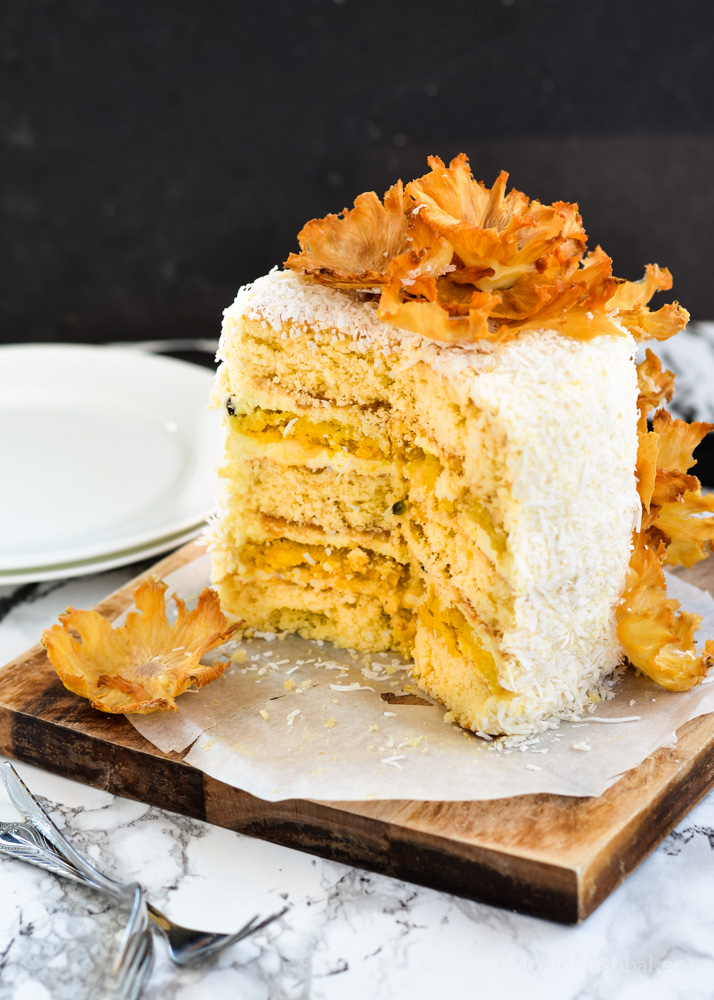
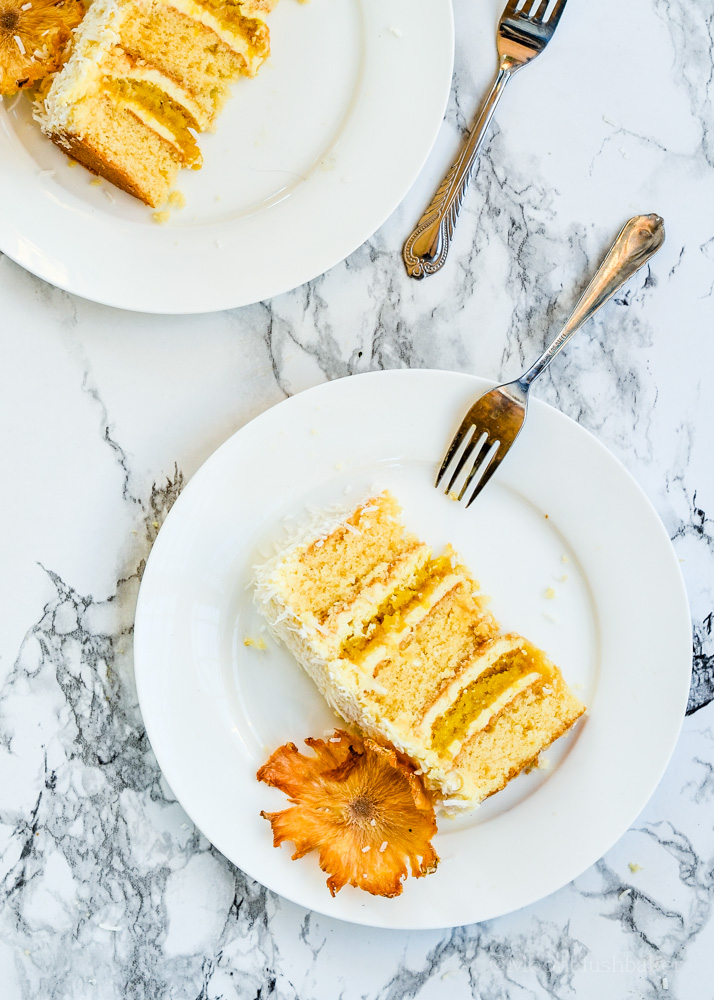 The use of passion fruit curd and coconut is my way of recreating summer in the middle of winter. The layers of creamy coconut, smooth curd are contrasted by the crisp but chewy almond biscuit in the cake. I used passion fruit curd from the stores but you can make your own if you are feeling domestic.
I am not going to lie; cakes like this one do take a gentle hand. Though it is all worth it if you can see a smile on someone’s face; especially when it is like my mum’s when she is genuinely happy.
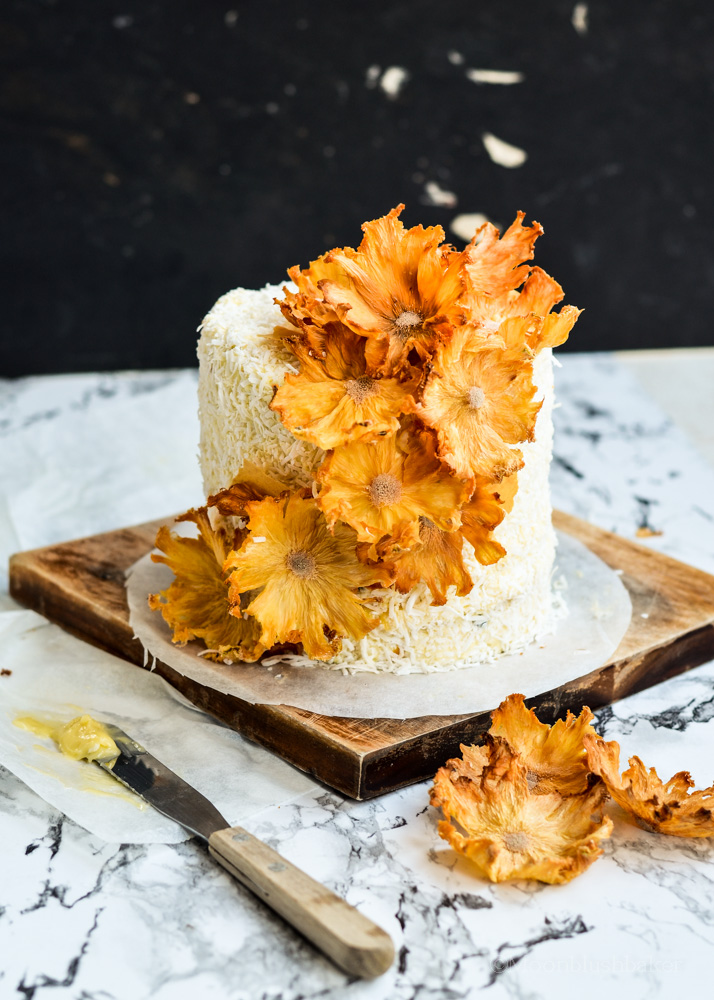
Layered Passion fruit Butter Cake with Coconut Cream Frosting and Pineapple flowers
Cake used In my Vegan “yellow” cupcakes
Adapted from Food.com and Madhatter’s cupcakes
Cake
200ml soy milk or milk alternative
5ml white wine vinegar
80ml rice bran oil
30ml golden syrup
150g golden caster sugar
1 tsp almond extract
1 tsp vanilla extract
180g plain flour
32g corn flour
6g baking powder
4g baking soda
In a jug measure out your milk and whisk in vinegar. Set aside until needed.
Grease and line 3 cake pan (15cm) with baking paper. Pre heat oven to 165C.
Shift your flour, corn flour, baking powder, baking soda, and salt 3 times.
In a large bowl using an electric mixer whisk the oil, syrup and sugar until the sugar is slightly dissolved. Add the extracts and whisk again for 3 minutes on high. It will not cream but become paler.
Gentle mix in the flour and milk mix alternating as you go.
Spread into your prepared tin, smoothing out the top with a spatula.
Bake for 25-30 minutes or until skewer draws clean when inserted into the center.
Cool cakes in tins for 10 minutes before turning out to cool on a wire rack. Trim domes and refrigerate before use
Pineapple flowers
Sourced from this video on Taste.com.au
One whole pineapple, de skinned.
Simple syrup (100g of sugar and 100ml water, bring to boil then cool) NOTE: keep extra in a glass Jar in the fridge, it is very useful in cakes!
Make pineapple flowers: Preheat oven to 120°C.
Place a Cooling rack over a large baking tray. Make sure the tray keeps the rack steady.
Using a knife (chef knife), slice pineapple to 2mm-thick. Brush on sugar syrup to both sides of each pineapple slice.Place on wire rack.
Dry in oven until slices are tacky to touch but still pale. This took 45 minutes for me but you should be able to lift each slice off the rack without tearing them. Flip them and dry for further 15 minutes. Remove from oven.
Take a muffin tray and place each hole with a slice of pineapple from the par baked tray. This will create the flower shape. Return to the oven and turn it straight off! Leave in oven over night.
Coconut cream frosting
3 cans of full fat coconut milk, chilled
100g coconut butter, soften to room temp.
1 tsp vanilla extract
100g pure icing sugar
Open cans. Scoop the top thick layer of fat off from the top and place in large bowl.
Using an electric hand mixer, beat the cream and butter on medium. Turn down to low, while beating add in vanilla and icing sugar. Continue to beat until it reaches soft peaks. Set aside.
Almond meal biscuit (you will get 3-4 x 15cm layers from this)
200g finely ground almond meal, shifted
120g pure icing sugar shifted
90g egg whites
30g caster sugar
Optional yellow food colour
With two large baking trays, line with both baking paper. Draw 2x15cm circles in pencil on one side of the baking paper and the turn it over. Place on one of the baking trays. Do the same with the other baking tray and baking paper.
Place egg whites in a large bowl. Whip the egg whites to below soft peak. Add a teaspoon of caster sugar in to egg whites. Beat for another 30 seconds. Continue to do this process (one teaspoon of sugar then beat) until all of it is used.
Turn the mixer on to high and beat until it is fluffy, smooth and glossy.
Fold in shifted almond meal, yellow food colour and icing sugar. Once combined spread mixture carefully on the baking paper, using the 15cm circles as a guide. Leave to the layers to form a skin (about an hour)
Preheat oven to 150C. Bake the trays, one at time for 35 minutes until crispy. Leave on tray to cool. Set aside until ready.
 Assembly
One recipe of cake
One recipe of coconut cream
One recipe of pineapple flowers
One recipe of almond biscuit
Store brought or homemade passion fruit curd (400g jar will be plenty)
500g Desiccated or shredded coconut
Place one cake layer on a piece of baking paper. Pipe a thin layer of coconut cream. Spread 2 tablespoons of curd in the middle of the cream. Place almond biscuit on top. Pipe on another layer of coconut cream. Place a cake on top. Repeat until all layers are used. Chill for 30 minutes to an hour.
Spread cream along the sides of the cake, and refrigerate for 30 minutes. Lay desiccated coconut on a baking tray. Roll side of cake in coconut. Place on plate. Spread top with cream and gently press in coconut. Set in fridge for 15 minutes.
Place on pineapple flowers with extra cream. Serve.
 Sometimes I think we are the devil to our own demise. For anyone that has been lured in to the attractive commercials for exercise equipment, kitchen kit and other “make it easier” appliances you know about this. Manufactures of late night infomercial products have profited of our need to do everything in an easier and shorter way. It might not be the most practical way but if it gets you from A to B in the fast way possible, so be it.
However once we begin, we realise that it require more effort, grunting and struggling than first made out to be. For example, I think most of us have been lured into the commercial for that robot that vacuums the floor for you. Oh the commercial is attractive, also to the point of euphoric when it states that you can save time and hard ache by letting this robot roll around your house with minimal fuss. In practice, boy do they cut out the worst parts of having it. It is noisy, the bumping, the entanglement, missing big areas of the house and entrapment under television. The worst part has to be the cleaning… god it is like using a bag of dust bunnies as an inhaler….
It should be renamed “The hay fever horror”. To cut this story short, that product is never used again and it gets shoved into a cardboard or becomes the fanciest clothes hanger in our rooms. It doesn’t have to be around a product too. I face this in my everyday life, most often it comes down to a battle between me and the big vacuum cleaner.
As you might get from this post the battle between me and keep the floors dust free is a nightmare (especially when you cook, eat and bake as much as I do)
I am not a big person however the area where we store our cleaner is very tight and cramped. So trying to get it out may result in other objects falling on you. So in traditional Belinda fashion, I think that pulling it out from outside is easier than moving myself into the space and picking it up. WRONG! WRONG WRONG!
I say this three time because even though try to clean the floors almost every day, I still seem to think this way would be easier. I spend more time and effort pulling it out; often leading to a wall of stacked objects falling. Oh the perils of vacuum cleaning…
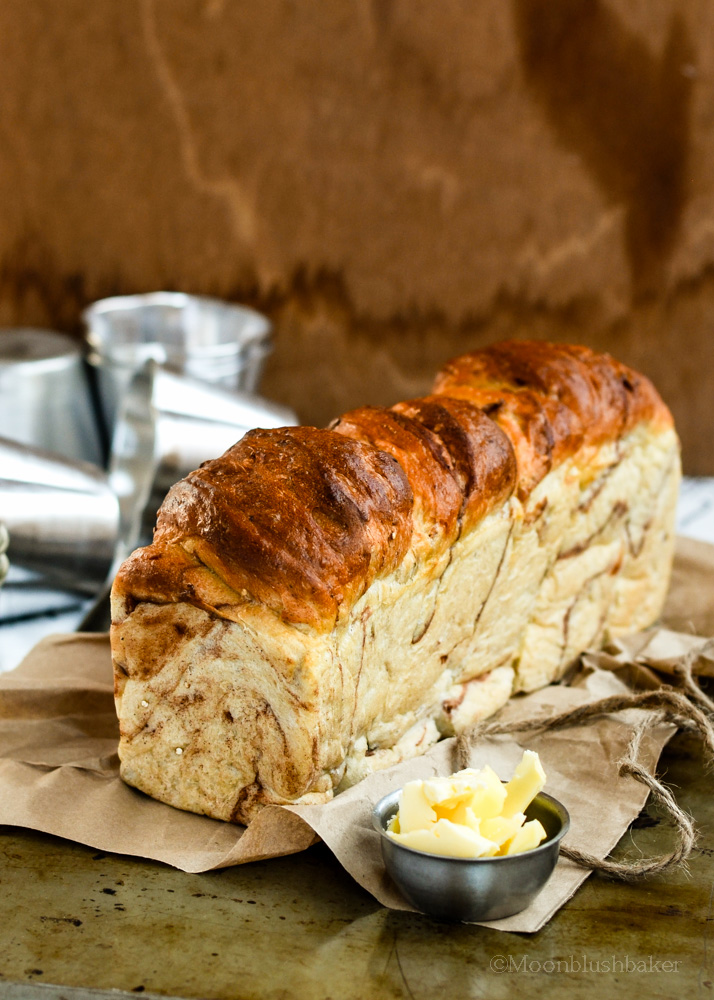
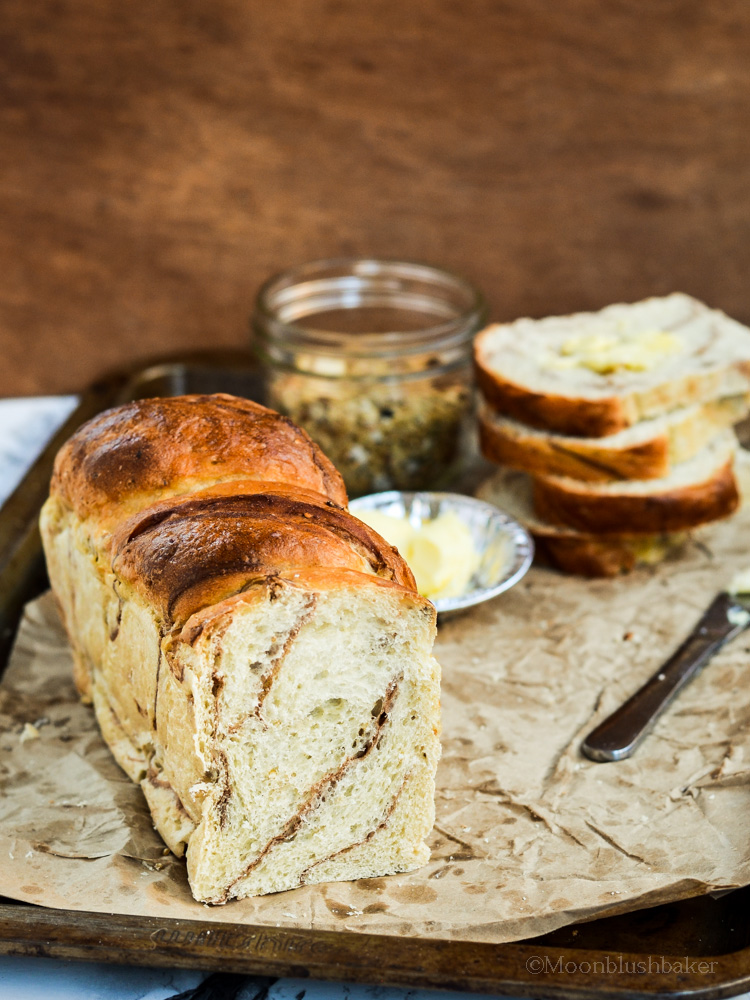
Thankfully making bread is not as dangerous as trying to find a way to get around cleaning. Like most the sweetbread I make have the texture of Hong Kong styled bread. Fluffy, pillow soft crumb with light glazed thin crust which melts in your mouth like a good milk candy. While the bread does taste delicious in texture, it really doesn’t have a flavour.
In order to put my bananas to good use, the over rip puree is combed in a mixture of honey and yoghurt to create a loaf that is soft and yielding. The moisture content of this bread is the key to keeping the crumb soft and even over baking; I did the first time and it did not affect the insides too much.
It stays soft for at least 3 days if you need it to the window pane texture. You should be able to see though a thinly pulled out piece of dough, this means your bread is fully gluten developed. I recommend resting the dough well before placing it in the oven for baking, so it may take up to 2 hours for each proof. However the payoff is great taste bread without the artificial chemicals.
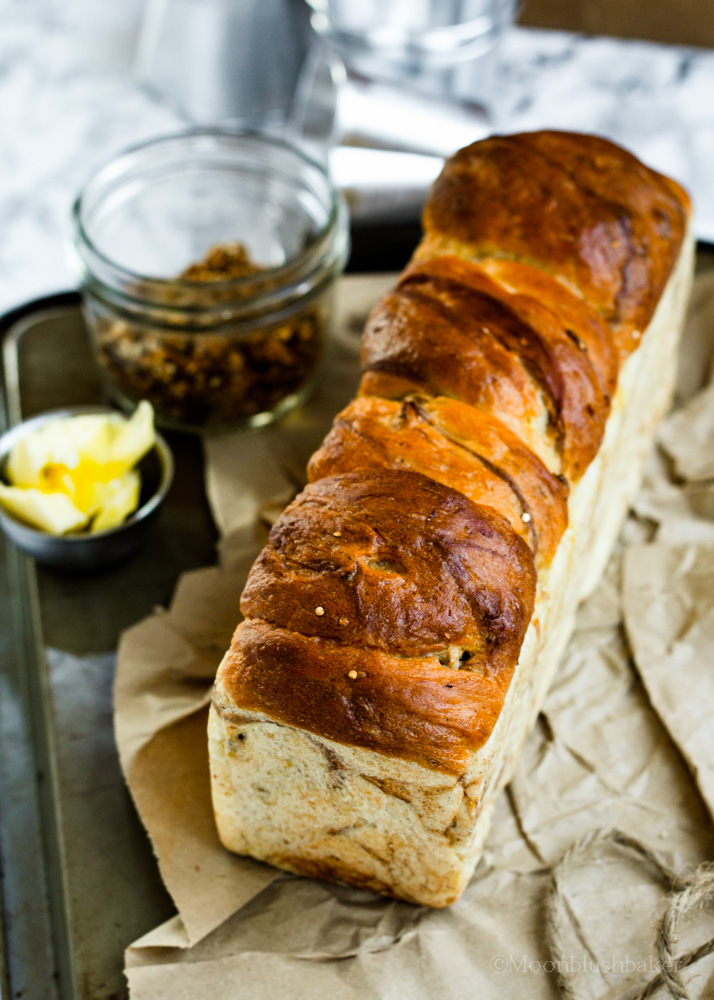
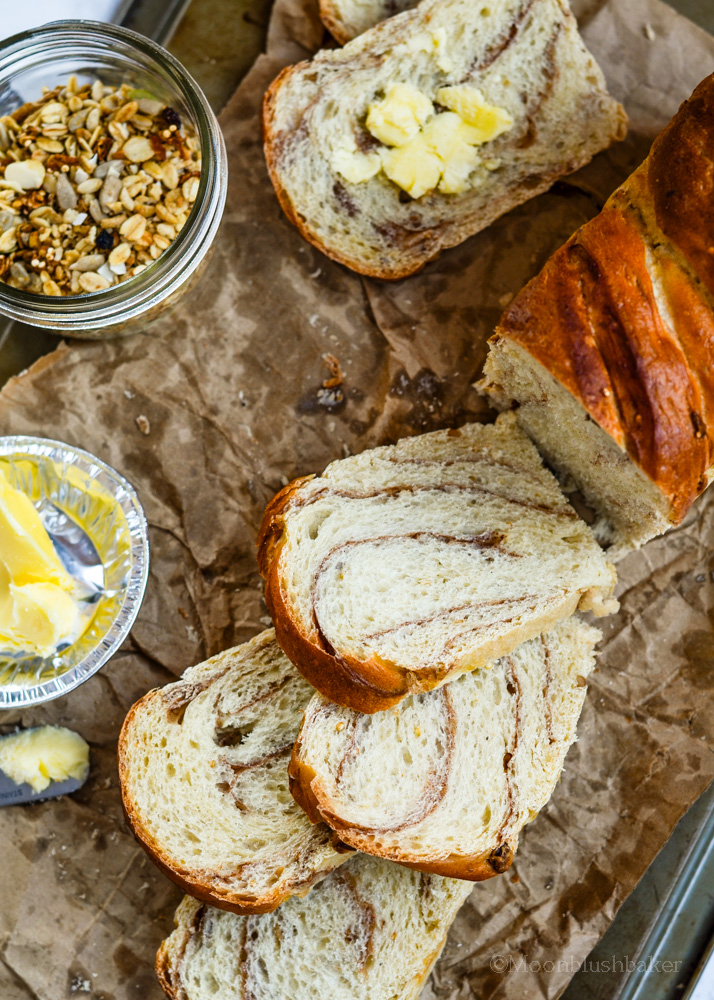
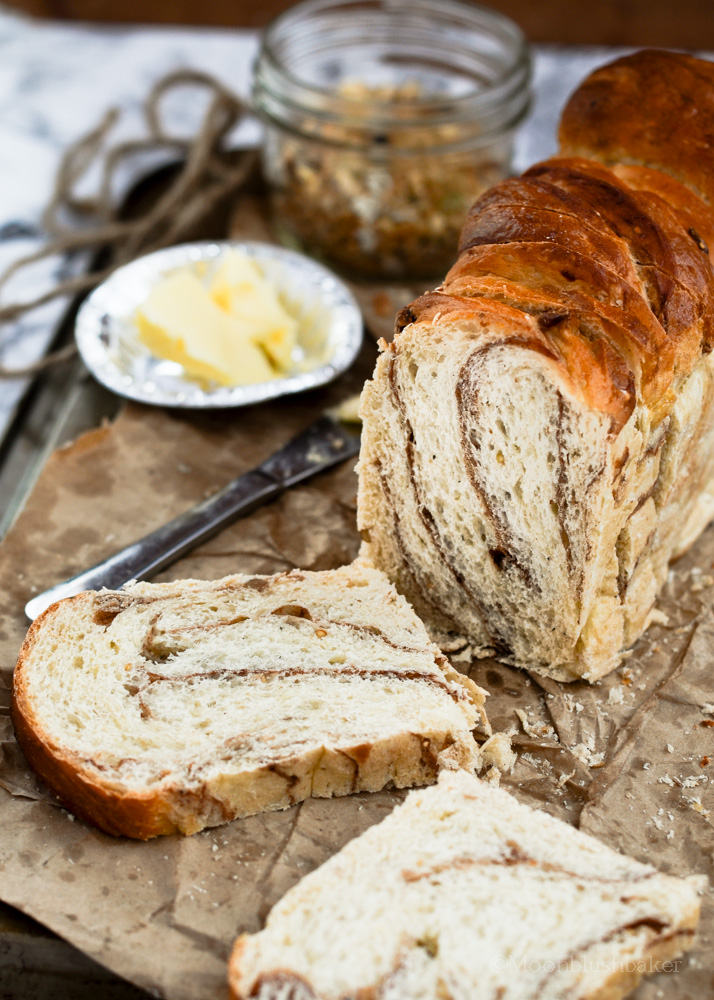
Forget having flavourless bread anymore! Also I used Atta flour with a scant amount of left over seeds in this bread. Simply I love the flavour of nuts and seeds, also it is bonus boost of whole grain nutrition for your breakfast or snack.
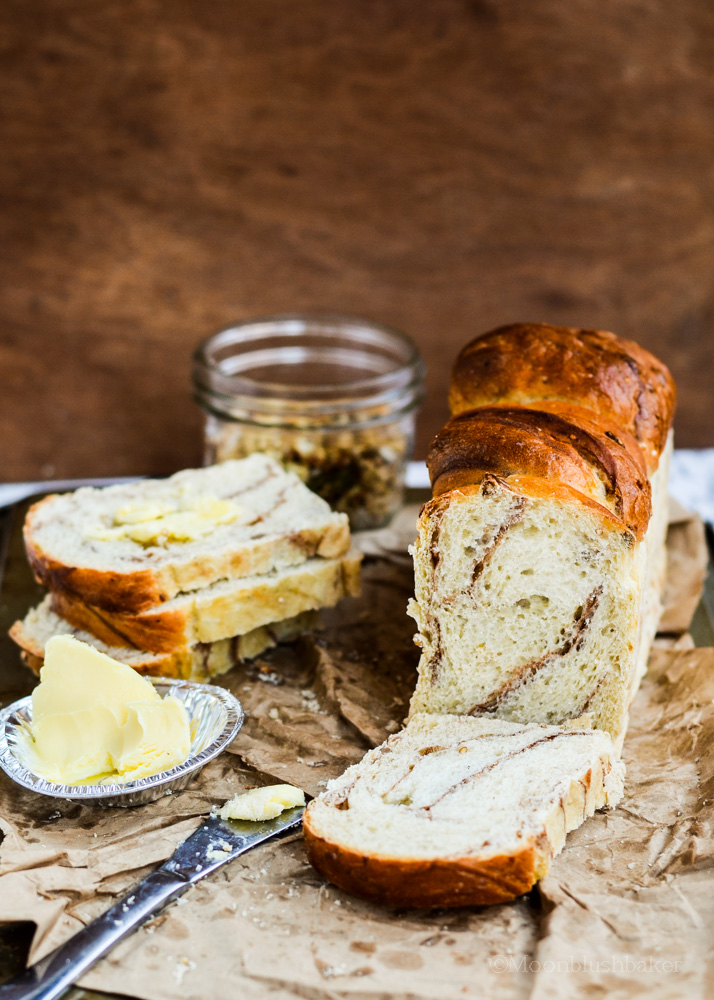
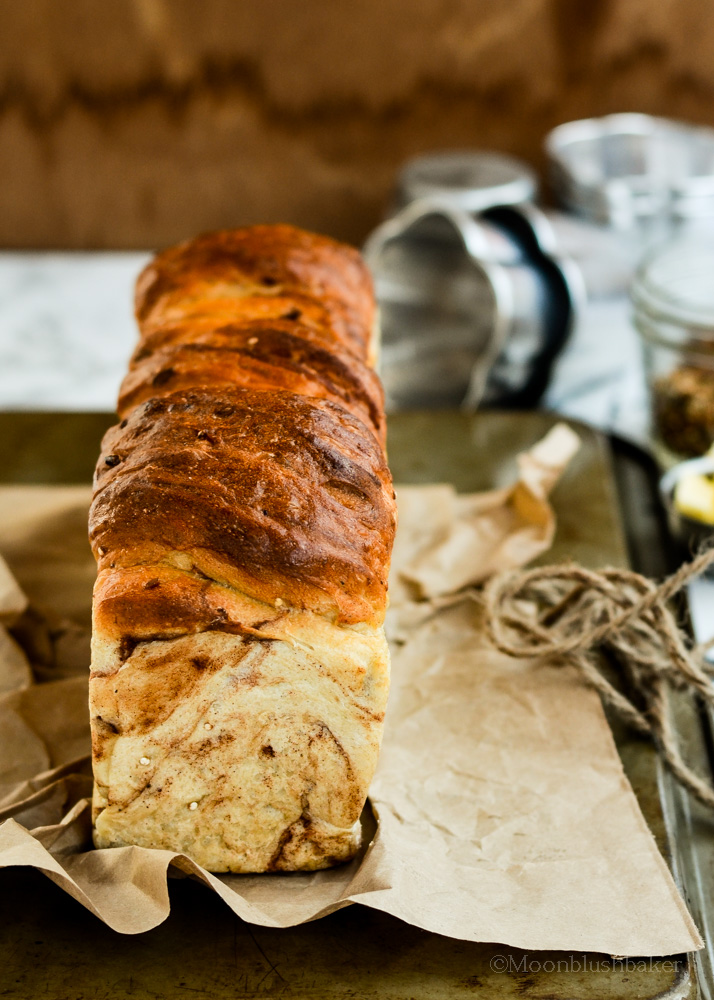
The scent of this bread is amazing when it wafts from your oven. It is impossible not to smell the aroma of freshly baked bread. So when the combination of yeasty sweetness meets the intensity of bananas, Atta flour and cinnamon; it would be impossible to resist. While it does require a bit more work than your standard quick loves or cake; really who needs ANOTHER banana bread recipe?
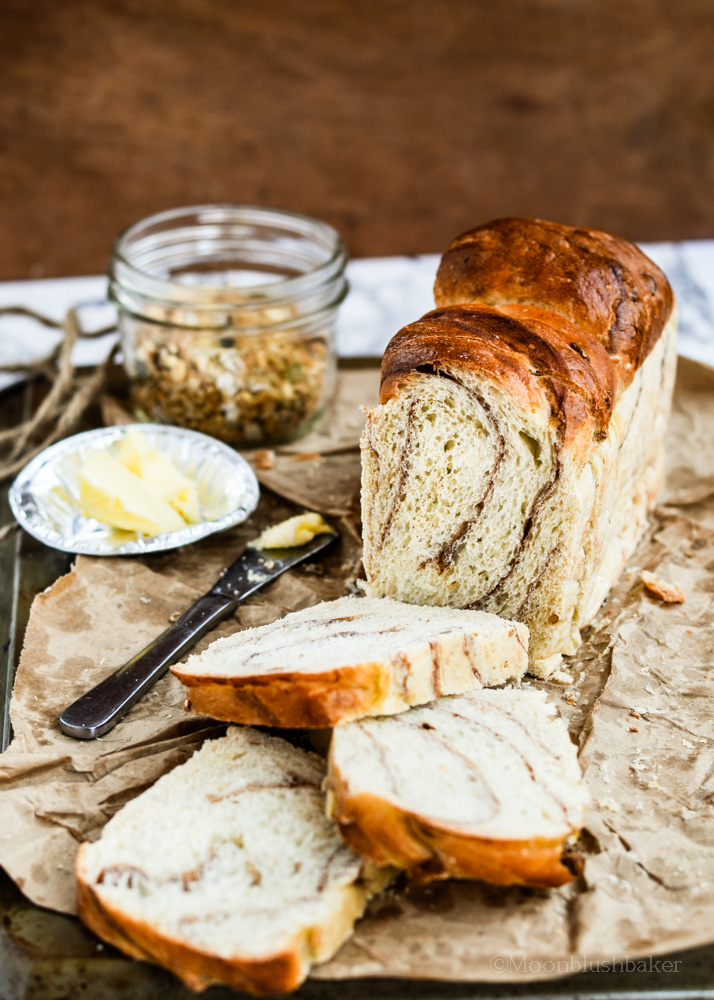
Yeasted Wholemeal, Cinnamon swirl Banana Bread
Serves: Two loafs
120ml warm water
50g honey
8g dry yeast
300g atta flour
300g bread flour
25g Milk powder
50g mixed seeds (I used a mix of sunflower and chia)
60g butter, melted and cooled
3 over ripe mashed bananas (about ¾ cup)
175ml natural yoghurt
5ml vanilla extract
5g salt
90g raw sugar
2 tablespoons ground cinnamon
Activate yeast in the mixture of warm water and honey. Allow to sit for 20 minutes or until foamy.
Place flours, seeds, 50g of the melted butter, milk powder, yoghurt, banana, vanilla in large bowl. Stir to combine
Pour in yeast mixture and knead on a well-floured surface. The mixture will be wetter than normal dough, but knead for about 30-40mintues by hand. Knead until it has the ability to hold itself up into a round shape and pass the window pane test
Grease a large bowl and the ball of dough and cover. Allow to proof for 2 hours.
Pre heat oven to 200C. Grease, line and flour your loaf pans. I got two from this recipe. The standard 1 pound loaf tin will deal with this amount dough nicely.
Punch down dough once doubled. Roll out dough into a rough rectangle, brush on butter and sprinkle your cinnamon and raw sugar
Be firm when you roll up the loaf like a Swiss roll. Cut the log length ways to revel the stripped cinnamon inside.
Carefully braid the two halve together, while twisting it in the opposite direction you are braiding. So if you going left side first, turn the braid right and vice versa. Once braided, tuck the ends in.
Place in the prepared tin.
Brush with egg wash. Proof again for 1 hour, covered with cling wrap.
Once it has doubled, Take off cling and bake in the preheated oven for 35 minutes.