Pages

Monday 15 December 2014

Universal gifting /-/ Nutty bucklinis caramel slice

raw caramel slice (6 of 1)


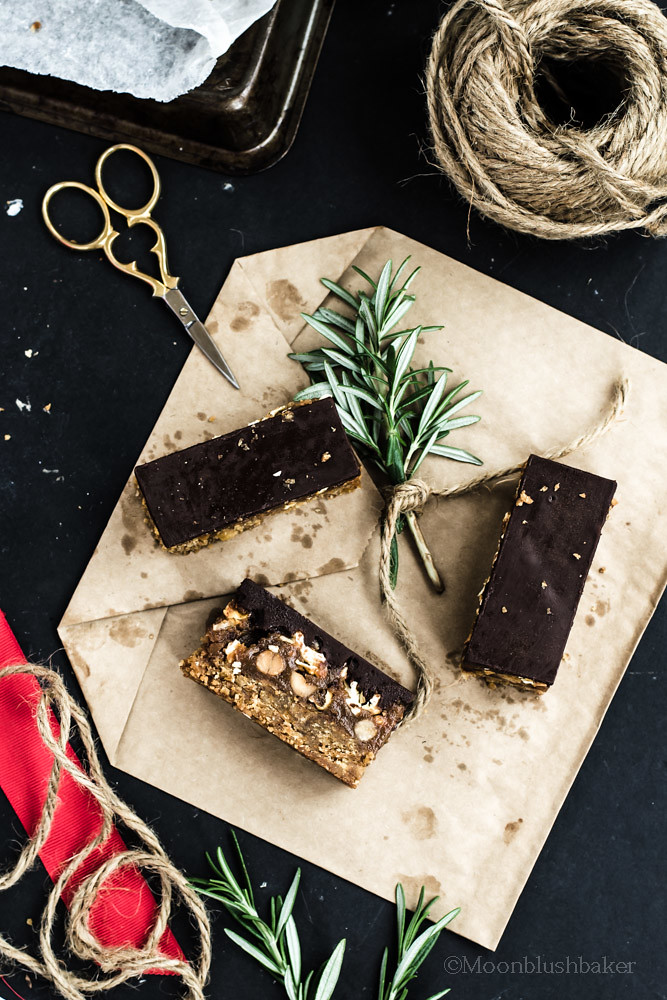
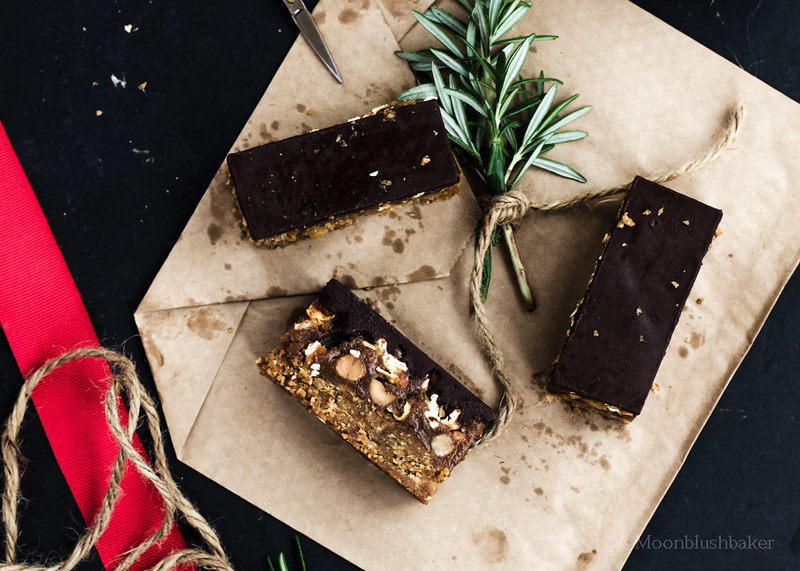
It’s that time of year! Cookies and sweets bars are being baked across the world, loving packed in a brown paper box and sent via the mail to all their friends. Of course the Northern hemisphere has this down packed and mastered the art of perfect mail cookies however in Australia the traditions are a bit different.  The temperature means not many bakers want to turn on the oven for fear of heat exhaustion. I have learned from last year but I have opted for the easy way out this year.


 Gift giving easy? Well, no, but small edible ones are!


raw caramel slice (8 of 1)


This time of year people go chocolate crazy down under. Rows and rows of seasonal confections line the shelves of the department stores, each boasting to be the perfect edible gift this silly season. 

I think I have spent more on chocolate this month than I have this whole entire year. Of course most of them are to give away in order to prevent headaches over what to give the friend you occasionally see at work. In reality it is just a way of fueling my chocolate hoarding and confectionery eating habit. Silly indeed.


raw caramel slice (7 of 1)


As much as I love seasonal chocolate decorated in glitter gold and fire engine red; not everyone is so keen on the idea of adding extra padding to their frame during the summer months.  With a pass history of sport addiction, full sympathies with those who hate this time of year for the sweets, feasting and late night drinking parties. All indulgence needs a bit of modestly which is poorly excised this time of year. Guilty as charged.


Also the friends who are label the “challenging” because of their dietary restrictions. While I might not be able to cater for everyone’s individual habits, I do like to have dessert that I give away after a dinner party or send over neighbors where I might not know the house holds eating habits. The seasonal sweet treats should be for everyone, not just the majority.  So today in spirit of good will and joy I think I have found the recipe that most people will be glad to eat.


raw caramel slice (2 of 1)

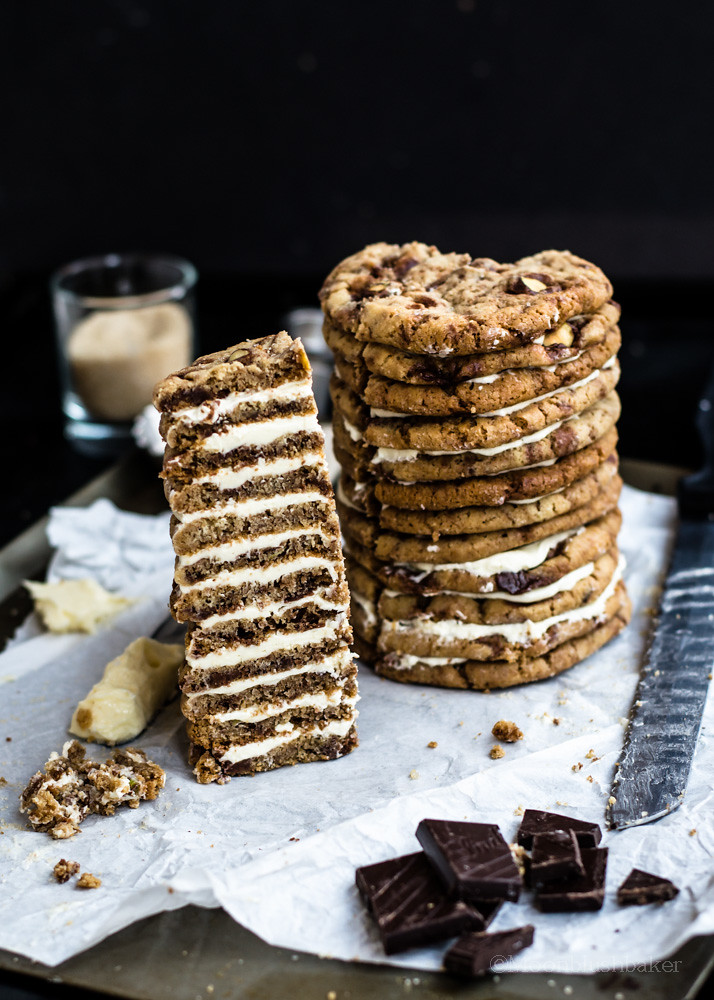
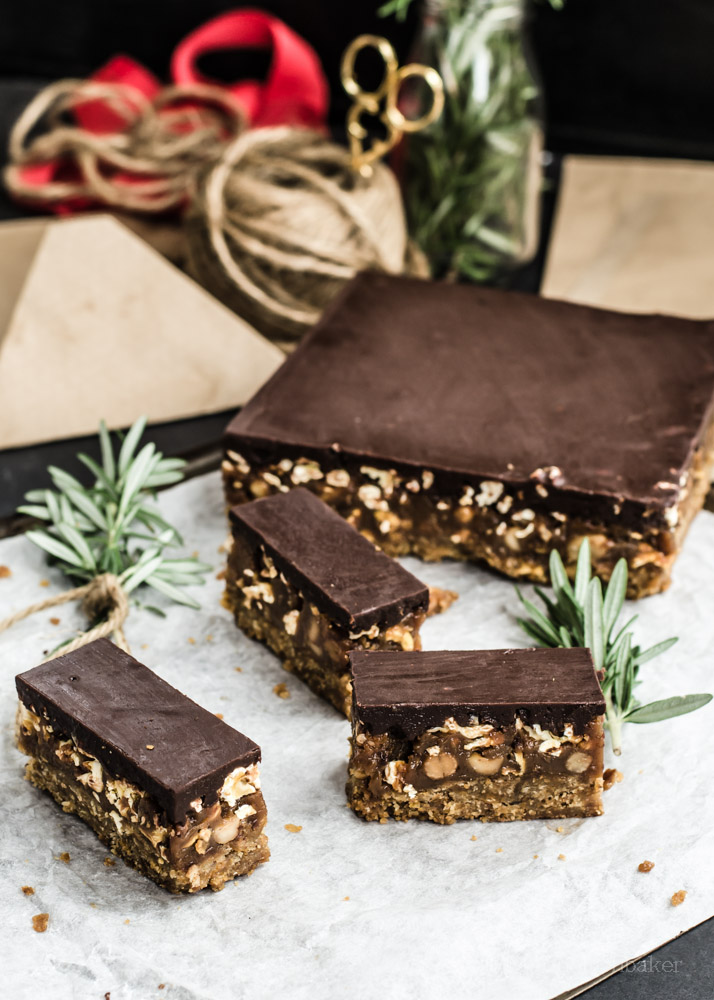
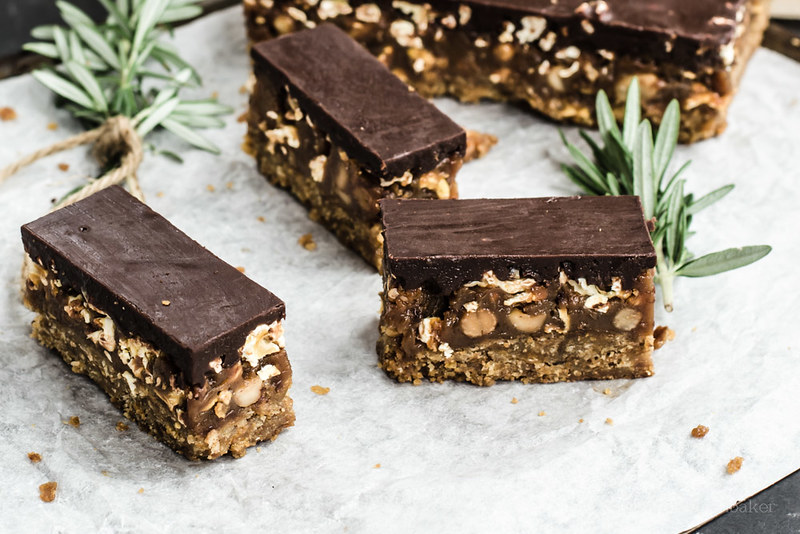
Pecan, almond and rosemary Caramel Slice is my way of spreading the dessert love just a bit further with one recipe. I love this time of year because the abundance of nut and spiced desserts and I think everyone would like to be to share in that joy. The middle is a combination of soaked cashews, molasses and date are processed to a smooth paste becoming a sticky caramel like layer. Perfect texture for holding all those chopped pecans and almonds without them sinking to the bottom. To improve the texture of raw desserts which can often be mistaken for uncooked fruit leather, I used buckinis (buckwheat which has been activated and then dried). 


raw caramel slice (1 of 1)


The sweetness is not the same as you would expect from a traditional sweet however the smoky undertones and natural oils of the nuts are preserved; so you are getting the real taste of the ingredients.This is why it helps to use the best ingredients you can source for this recipe as you will taste any rancid nuts or oils in the bar. Also I did not use normal chocolate for the topping but a combination of coconut oil and raw cocoa. To be really honest, I am not fan of the topping as it does not set as nicely as tempered chocolate. So take your pick of toppings but if you use normal eating chocolate they will no longer be vegan. 

raw caramel slice (4 of 1)

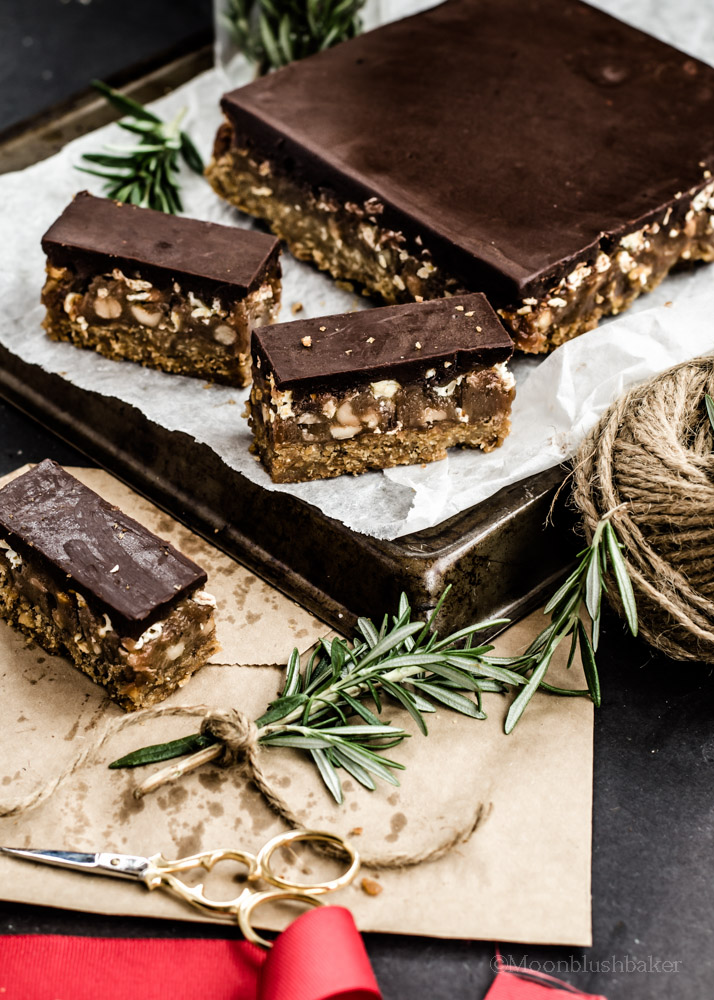
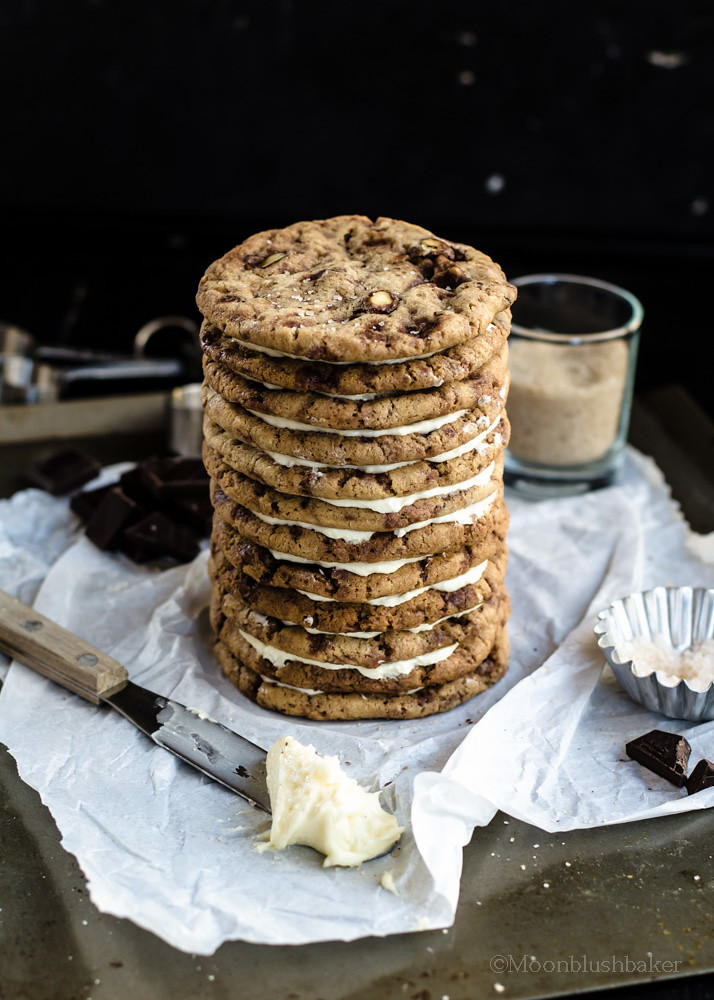
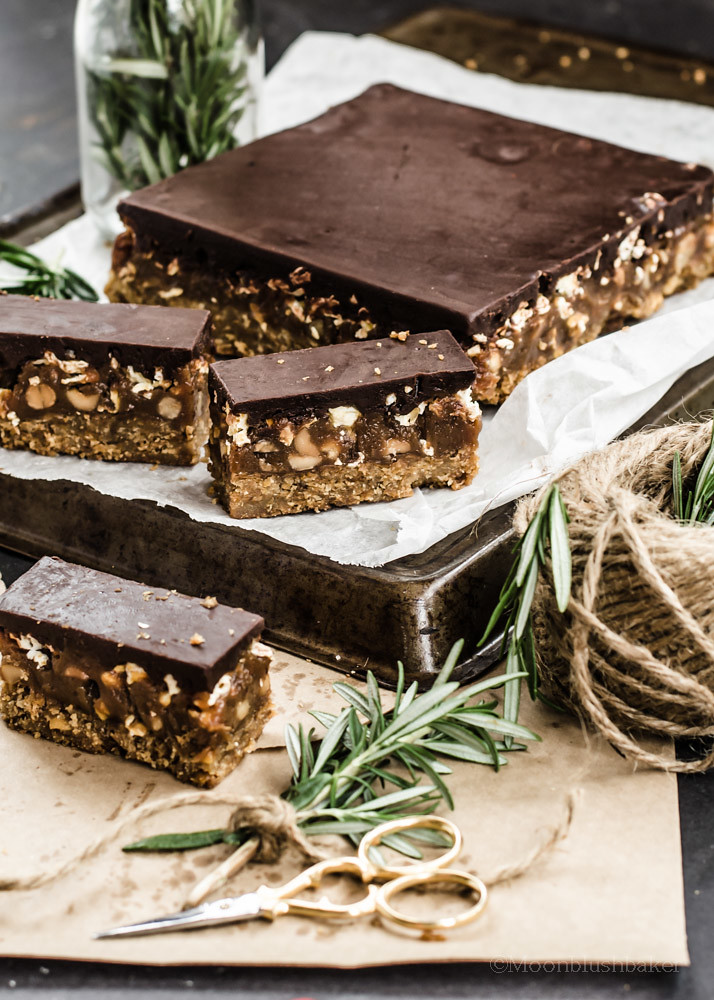
Call them millionaire’s short bread or caramel slice I have tried replicate the texture of the conventional slice in this recipe so you get a heavy layer of “caramel”; only mine has nuts and buckinis in it to!

  Bars that you can keep in the fridge for emergencies are what most of us need this holiday season. Bars which are sticky, chewy, sweet, crunchy and easy? Yep, sign me up!

raw caramel slice (5 of 1)

NOTES 
  • You will need a high power blended for this recipe or else the caramel filling will not be smooth enough.
  • Buckinis can be replaced by more almonds and pecans.
  • I am not using coconut oil in this recipe because does leave a ‘coconut” taste, however if you cannot get cacao butter use this instead. .
  • Soaked nuts in the caramel layer can be replaced with any other soaked nut.


raw caramel slice (3 of 1)

Nutty bucklinis caramel slice

(Raw, vegan, refined sugar free, gluten free)

Makes a 27 by 18 rectangle slice pan


Base
100g dates, de seeded
150g almond meal
50g pecans
1tbsp melted cocoa butter
1 scraped vanilla bean
2g sea salt

Blend all the ingredients in a high performance blender until it comes together and clumps. It will be wettish and have texture of course sand. Line the tray with baking paper coming 5 cm up the sides and push into the base. Freeze until needed.

Caramel layer
100g cashews, soaked for 5-6 hours, drained
65g almonds, soaked like above
200g medjool dates
30g cacao butter melted
50g molasses
10g vanilla extract
2g salt

Blend all the ingredients in the blender until smooth. Freeze for 10 mintues.


Nut additions
 40g almonds chopped
50g pecans chopped
40g buckinis

Press the chopped nuts and buckinis into the caramel layer. Return to fridge or freezer overnight.

Cacao layer
35g raw cocoa powder
50g rice syrup
70g cacao butter, melted
5g vanilla extract 

Stir all the ingredients with a whisk until a smooth sauce forms. Pour over the slice and shake the tray a bit to get an even layer.
Cut with a hot knife, and press firmly. Return to fridge for 10 minutes. Serve from the fridge.


raw caramel slice (9 of 1)
.

Tuesday 9 December 2014

It's my 2nd Birthday! (blog that is) /-/ Fruity Clinkers Rice Krispy Cake

 rice krispy cake (8 of 1)

A young girl sits on a polished, tacky wooden bench in a suburban super center. Within her little hands gasp a greased red and yellow printed take away box. The box hides the lovely scent of fried chicken nibbles and a golden pile of shoe strong fires that would be her proposed lunch. As she opens the box, the aroma creeps to perfume the area. Not even a minute pass before she begins to tuck in the chips and chicken. Not civilised with fork and knives but using her hands with the single tissues provided to maintain some modesty.

While she tucks into the box without a care in the world, she over hears the muffed sniggers and giggles in her left ear. Shifting her sight slightly to the left, she notices the noise is coming from the children sitting on that same bench; whispering and pointing in her direction. These children could be no more than her age however the girl knew the meaning of their actions straight away.


Suddenly the joyful taste of her meal was gone; left was only the over salted after taste of dried meat and fat. She tried to continue on with her lunch but he moist meat and lightly spiced crumb turned most vile. Slight tears welling deep, stomach churning and head down in shame. Carefully she closed the box, wiped her tainted hands on whatever napkin she had left, placed the box back in the bag. A proceeded to hop off the bench and made her way towards her mother’s trolley, indicating she was done. 


On the way out towards the car she dropped the barely eaten meal in the bin, stomach still rumbling but she was physically full with self-loathing and disdain.   

rice krispy cake (9 of 1)


Have I ever told you I have not eaten fried chicken and chips since I was 6? If you put the pieces together you will understand where I am going with this. Yep that little girl was me, sitting on that bench eating lunch. 

 That day was one the most horrid experiences in my childhood that I can remember. On that day I learned, the world doesn’t love little girls eating fired food and deep down I knew this was the start of many experiences that I will be mocked and made the outcast. 

How this have anything to do with today? Well to brighten the mood here a bit, it is my blogs 2nd birthday! Yes I have done 48 months of ranting post leading to a baking adventures ending in deliciousness. I cannot put into words how much this blog has helped me grow as a person and allowed me to see what I really want to do for the rest of my life. 


 rice krispy cake (3 of 1)

You shared my ups and major downs this year with great support, pinned and shared my pictures (which I am deeply grateful for as a 2nd year DLSR photographer) and commented on the posts ( I love each everyone of you). 


 As much as I would love to say I have friends that food bloggers, I don’t (Well I think I don’t anyway). However the general support network of the food blogging and bloggers have made me more secure. 


rice krispy cake (5 of 1)

I realised it is OK if you have out of the ordinary hobbies. It is OK to like to cook at home on a Friday night rather than go out partying on the town. It is OK to have the scent of bakery products from your home at midnight and that there is always a time for baking cookies (even at 3 am).  It is OK to be able to recite the conversions for ounces to grams, Fahrenheit to Degrees Celsius and US cups to UK cups of all baking products in perfect rhythm.  


rice krispy cake (2 of 1)

Most importantly, this blog and you guys who read from all around the world have made me feel more accepted as a person than I could ever do in the real life. That little girl would of have love to have known this world existed then she would not have thrown her lunch away but given the kids a tongue poke and kept eating.


 I never thought people I have barely met could make me feel more secure in my abilities than any marking guideline and for that I am being you guys a HUGE THANK YOU. Thank you for making fried chicken stuffed everything; Thank you for all the cookies and cake hacks; Thank you for the ice cream recipes that are almost insane. A big thank you to all of you who read my blog, without you now of this would be possible!

rice krispy cake (6 of 1)

This naked Clinkers rice Krispy cake is my 2nd blogs birthday cake! If you do not know what clinkers are they are fruity light crispy candy, coated in milk chocolate. They are colour differently on the inside, so you never know what you are going to get!


This cake is a chewy rice Krispy treat filled with fruity pop rock, milk chocolate buttercream topped off with dark chocolate ganache, choc coated pop rocks and crushed Clinkers. Green is apple, pink is strawberry, yellow is tropical, and orange is well… orange.   


The randomly coloured surprise is made even better with more candy! Let me cut this post short now. You do not need to fancy with this cake and is very easy if you are catering for a lot with a minimal time. Also the cleaning is a simple as boiled water and your washing liquid. The sugar melts instantly.

Layers of vanilla toned rice treat with the fruity crunch of the Clinker and the pop rock fun that you get on the top make this cake a real stunner. I hope you try it one day!


 rice krispy cake (1 of 1)


Fruity Clinkers Rice Krispy Cake with Pop rock surprise
This one makes a 16cm mini pan in four layers with a height of 3cm.

120g unsalted butter
400g mini marshmallows
12 g vanilla extract
480g rice puff cereal
Pinch of salt
Food gels in pink, green, yellow and orange

110g of unsalted butter, softened
150 g icing’ sugar
40g cocoa powder
7g vanilla extract
100g melted chocolate

70g dark chocolate, chopped
50g cream
10g butter
Clinker candies, roughly crushed (plus some for eating!)
Different coloured pop rocks in pink, yellow and green


CAKES

Grease four spring-form pans, set aside.In a small sauce pan, melt 30g butter and 100g marshmallows over a low heat stir with a greased spatula till melted. Add in a drop of the vanilla, green food colour and a pinch of salt. Add 120g rice puff cereal to the marshmallow mixture. Stir together with your spatula until all rice puffs are covered in the mixture. Press the cereal into the pans with greased. Cover with a sheet of baking paper and press flat and even. Refrigerate cakes until set. You will need to this three more times in yellow, orange and pink.
Chop chocolate and place in a heat proof bowl. Place this bowl over a pot of simmering water and stir until melted, allow to cool.


BUTTER CREAM

In a stand mixer, fitted with the paddle, beat butter, cocoa, and icing sugar on low until combined like sand. Turn the mixer to medium and beat until it is creamy and pale. Add the vanilla and beat on high for 30 seconds. Scrape down the bowl. On a low speed pour in the melt chocolate into the mix while beating the butter cream. Turn on to high whip until combined and fluffy again. If it is too soft place in the fridge for 5 minutes then beat on high again until smooth. Set aside.


GANACHE

Melt cream butter and chocolate in microwave proof bowl in 30 second burst in the microwave. Stir till melted and smooth.


ASSEMBLY

Four different colour unmoulded Rice Krispy cakes
One recipe of butter cream
One recipe of the ganache
Chopped Clinker candies and pop rocks


Place one layer of the cake on a lined turn table. Transfer some of the butter cream to a piped bag fitted with a round 1 cm opening. Frost the top of that cake and smooth out with an offset spatula. Sprinkle some pop rock candies in the middle, Place another layer gently on top. Repeat the frost, spread, sprinkle and next layer process until they are all used. Return to the fridge for 20 minutes for the butter cream to harden.

Pour ganache all over the top, allowing it to drip down. Sprinkle pop rocks on the edge and place halved or quartered Clinker candy in the middle, Use the ganache to help them glue to each other. Fridge for 20 minutes before eating.

Tuesday 2 December 2014

It's the season /-/ Seriously French Silk Pie

chocolate pie (8 of 1)

Today, I would not be complaining if it ended 10 hours ago. As someone who is accident prone, I had one of those days when it is amplified infinity fold.  Within the misery it gets worse as I had an accident with my light room program, computer and internet.
 

chocolate pie (1 of 1)

The day that I was about to post this (last Wednesday to be exact), all had a heart attack and froze in mid space. This is why I hate Window *bloody* 8 with it multi-colour icon toggle feature. Enough with the first world problems in my life as this time of year make me incredibility grateful for what I have. We do not celebrate Thanks giving in Australia, so no pumpkin pie, no corn bread side dishes and no turkey left overs. It is a sad time for the food bloggers in Australia (we are counting the days to Christmas). None the less the photographs of large gather of family and friends over food make me so warm inside.

chocolate pie (7 of 1)

This year my family did not (once again) have the best year; in fact it has to be up there as one of the worst one’s ever. In almost parallel irony it is also one of the best years for me achievement wise concerning where I want to go in life. I have no doubt that I will end up working in some job relating to food but it is so much more reachable now that I have a taste, a sip from the punch bowl which is the baking/pastry industry. So in that I am grateful.

chocolate pie (6 of 1)


I am grateful that I have still not fallen completely apart since March. While my dad is happily gardening among the clouds and listening to his Wide range Chinese radio, I still miss him every day he is not at home at 3:30 pm. My family is just not he same with that grumpy but wise man.


 On a more positive note of finally understanding why people have such an infatuation with pie, namely chocolate pies. Right now I have more than enough egg yolks to make at least 1 month supply of ice cream for me (I go through at least 4L ) however in weird turn of events I have suddenly had great cravings for chocolate. Chocolate anything right now is the go to dessert for me, so in order to keep in with the season I made a pie which is “very French”. I say “very French” as a nicer way of putting this dessert has a lot of cream, sugar and yolks; it is time of joyful eating now isn’t it? 

chocolate pie (3 of 1)

I have never tasted a real French silk pie before but looking up the recipes I fail to see why it is called French at all. This pie is REAL Chocolate Pie made from a base of Pate de bombe (DO NOT RUN, it is simple as making butter cream).  Boiling Sugar poured into yolks in a stand mixer may sound hard but seriously I find all you need is a good thermometer and a steady hand; the mixer does a lot of the work for you. 


Folded whipped cream and melt chocolate are the next additions to the golden foam, finished off which a large amount of sea salt flakes and a splash of bourbon for good measure.  This most silky pie filling that is the bomb! For your taste buds and if you eat a whole pie to yourself, forget your waist line.

 chocolate pie (2 of 1)


Seriously look at how silky it is! This is because there is no gelatine or thickening agents in it besides the egg yolks. Just the pure taste of chocolate, cream and bourbon. An yolk enriched pie crust become the tender flaky base for this melt away chocolate mouse pie. Well you might as well go all out and put some cream on their too. 

 chocolate pie (5 of 1)

Hell! Go for a heavy sprinkle of chocolate too! You will definitely win brownie points at your next party when you pull out this beauty from the fridge. The best part is that you can make it all in advance and it would keep for a good 3 days, air tight box, before the crust starts to go soft. So at this time of year when you need an instantly delicious but non-commercial dessert, give this pie a try.

 chocolate pie (4 of 1)

Really French Silk Pie


NOTE: I had a lot extra to make another pie if you wish. However the mouse is great if spooned into little cups and eaten like that. The pastry can be saved for another day in the freezer but makes great biscuits. If you are short on time go get a pie crust from the store and make the mousse, nobody will no the difference.

Adapted from Sugarbaby’s pate de bombe in her book.
Crust recipe from Gourmet Traveller

CRUST


350g flour
100g caster sugar
160g unsalted butter, cold in 1 cm dice
4g salt
3 egg yolks


Filling and garish; chocolate flake and whipped cream
Place flour and sugar in a large bowl and combine together with a fork.Slowly rub in butter with finger tips to form a mixture resembling golden breadcrumbs. Add egg yolks and continue mixing until dough just comes together and is smooth. Shape it into a ball, cover in plastic wrap and leave it to rest in the fridge for 1 hour at least.
Place chilled dough on a floured surface. Using a rolling pin roll your dough out to 3mm thickness make sure it will cover the tart tin or pie plate well. Once rolled out, gently roll your pastry on to the pin and un roll it on the top of the tart tin. I used a 20cm by 5cm tart tin.
Allow the natural gravity make the pastry fall around the tart tin but loosen any stubborn corners of the pastry. Make sure not to stretch the pastry to cover the tin. Neaten up the edges and chill again for 30 minutes.
Pre heat oven to 180C and place a baking sheet on the baking rack. Remove the tart from the freezer. Scrunch up a piece of baking paper and place in the middle of the tart. Pour in the baking rice or beans and bake in the oven for 20 minutes. Remove baking beans and continue to bake for 15mintues till golden brown. Allow to cool completely. Begin the mousse now


FILLING

10 egg yolks
200g caster sugar
55g water
400g dark chocolate, chopped
480ml pure cream
30ml bourbon

In a stand mixer fitted with the whisk, place egg yolks in bowl. On medium high whip egg yolks until they turn a pale gold and have slightly doubled in size.
In a small heavy base sauce pan, bring to the boil sugar and water. With a thermometer take the sugar mix to 120C. Once at this temp remove from heat and turn the stand mixer on to high power.
While beating the egg yolks in the stand mixer on high, pour in the hot sugar in a thin stream down the side of the bowl avoiding the beater. Continue on this speed until the mixture is beaten to room temperature.
At the same time this is happening, place bowl on top of a small pot of simmering water. Make sure the bowl does not touch the water. One simmer turn off the heat and place chocolate in the bowl. Stir gently to melt.
Whip cream to soft peaks and store in in the fridge.
Remove the bowl from the mixer. Fold in chocolate and bourbon until combined. Then gently fold in cream until all ribbons of white have disappeared. Pour into pie crust and tap the crust to create an even surface. Place in fridge until set (1 hour). Garnish with cream and chocolate when ready to serve.

Sunday 23 November 2014

Twinkle, Twinkle Little Lily /-/Ultimate Tiered Star Themed 1st Birthday Cake

 Lily's 1st cake  (20 of 1)

A long time coming but I finally post my niece’s! Year Old birthday! Sorry I lost the photos in my files. Anyway, enough with me Lily once again is the super nova of this post ( ha-ha I am being Pun-astic). You will understand when you see the theme is twinkle twinkle little star. So let me photo bomb you with lots of pretty cake pictures!


lily's cake 1st (8 of 1)

 A light box for the event.

lily's cake 1st (7 of 1)

Dessert and cake table.

lily's cake 1st (9 of 1)

 Lily's 1st cake (11 of 1)

Close up the cake plus final assembly.


 Lily's 1st cake (12 of 1)

We had a WHOLE roast pig. Seriously yum for the meat eatters.

Stir fry bar (1 of 1)

We had a stir fry bar where you could customize your own salad. Very Very good.

The other things we had the  party were White chocolate rocky road, fairy bread, lemon punch, chocolate coated fruits, blue velvet cupcakes( made by me!), Stars rice crispyies, candy jars, fruit skewers and straw berry mousse.  Of course all these were lovely provided and home made her friends.

Such a happy party!

 lily's cake 1st (3 of 1)

lily's cake 1st (4 of 1)

Well for an event like you will need a cake which is easy to do and almost no fail. This is the first time I have tired the butter, sugar and flour emulsion before adding the eggs and milk (or liquids). 

Verdict? Completely sold! The cake comes out nicely risen but flat enough to not have to cut off extra bits for layer cakes. The texture is firm but not as heavy as a butter cake, with evenly distributed crumb making for melt in the mouth eating. Also you do not have to do it in a stand mixer as rubbing in the butter to the flour and sugar is just as good.

Lily's 1st cake  (17 of 1)

I used this type of butter cream as it is tasty, taste of vanilla and stable as a rock. I have keep this butter cream out for 4 hours in hot temps and it is still holding up.

You will need a few extra things for this cake as layered, tiered cakes require more support and tools.

  • These things are
  • Wooden dowels
  • heavy duty cake broads
  • off set spatulas
  • turn table
  • butter cream ( one that is very stable)
  • Piping bags
  • A lot of disposable clean cloths like Chux
  • Sharp knife
  • Ruler
Lily's 1st cake  (18 of 1)

I got a lot of help from sprinkle bakes tutorial for her cake to feed 100. This is more suited for people in the USA as the products are all found in the Northern hemisphere however I adapted it to make it more Aussie friendly. You will be able to find all of these products from Aussie cake suppliers and most websites ship to Australia. 


Lily's 1st cake  (21 of 1)

The pans I use here are a 10 inch spring form pan, 8 inch spring form pan and 5 inch pan. I lined them all with baking paper ( bases and sides). The stars are made from fondant and coated in edible glitter.

 This cake is over the top and grand. If you like one layer I have included how I done it. All techniques are very forgiving and easy with stable butter cream. 

Lily's 1st cake  (19 of 1)


Perfect one bowl vanilla cake


360g all-purpose flour
400g granulated sugar
18g baking powder
6g flake salt
120g unsalted butter, softened
3 large eggs plus one egg white

180ml sour cream
180ml milk
3 teaspoon clear vanilla extract
1 teaspoon almond extract

Preheat the oven to 160C degrees and line baking pans with baking paper.
Place the flour, sugar, baking powder, salt and butter in a large mixing bowl, and mix on low speed to combine. It should take the texture of fine bread crumbs.
Add the eggs; one at a time. Stop to scrape the sides and bottom of the bowl. Mix until combined. Remove from stand mixer.
Add the sour cream, milk and extracts. Stir and Fold in well until fully combined. Do not over mix. It is easier to not over mix by hand mixer than doing it in the stand mixer.
Fill the pans half full and bake for 25-30 minutes, or until a bamboo skewer inserted in the middle of cake comes clean and the sides are pulling away from the pan.
Cool in tin then turn out on a wire rack.


Italian Meringue Cream Cheese Butter Cream


240g plus 115g caster sugar divided
160g water
300g egg white
620g butter, cubed
350g,cream cheese, soften And cubed
2tsp vanilla extract

At the same time, in a sauce pan combined sugar and water. Place on stove on medium heat. You are making sugar syrup. Place in sugar thermometer.
Once the sugar syrup has reached 113C.  In a stand mixer beat egg whites yolks until foamy and fluffy ( soft peak).
Heat the syrup, swirling to evenly distribute heat. Bring the sugar mix to 118C.
Once it reaches this temperature,  remove from heat. With the stand mixer running on high, drizzle the syrup into the bowl of egg whites. Make sure to pour down the side to avoid the beaters.
Continue to beat until this mix is room temperature. About 7 minutes
Change to paddle.
Add the butter slowly on medium speed. Scrape the bowl often. Continue this process until all butter is added.
Add cream cheese and vanilla flavour beat on high medium until fluffy. Set aside.


For the outer coating butter cream
 

Italian Meringue Butter Cream
240g plus 115g caster sugar divided
160g water
300g egg white
900g butter, cubed
7g sea salt
2tsp vanilla extract

At the same time, in a sauce pan combined sugar and water. Place on stove on medium heat. You are making sugar syrup. Place in sugar thermometer.
Once the sugar syrup has reached 113C.  In a stand mixer beat egg whites yolks until foamy and fluffy ( soft peak).
Heat the syrup, swirling to evenly distribute heat. Bring the sugar mix to 118C.
Once it reaches this temperature, remove from heat. With the stand mixer running on high, drizzle the syrup into the bowl of egg whites. Make sure to pour down the side to avoid the beaters.
Continue to beat until this mix is room temperature. About 7 minutes
Change to paddle.
Add the butter slowly on medium speed. Scrape the bowl often. Continue this process until all butter is added.
Add salt and vanilla flavour beat on high medium until fluffy. Set aside.


Assembly 

One recipe of Cream Cheese butter cream
One recipe of Plain Italian Meringue Butter Cream
Triple recipe of Easy, One bowl vanilla cake (you will have extra depending on how full you fill the cake pans.)
All the equipment listed above
Food colours
Glitter spray
Glitter powder
Tutorial from Sprinkle Bakes, for a large dowel cake.


Once you have all these things, I recommend you do Exactly what sprinkle bakes has wrote in the tutorial as it includes pictures. Please do not be intimated by the large amounts listed. The cake is simple 3 normal layer cake staked on each other. Of course because of the weight you will need extra support but she goes through that in her tutorial.  After this you if you want the three textures I got on this cake follow the instructions below.

 For smallest cake
Place on turntable With White butter cream do the final smooth coat of butter cream
With a glitter metallic gold spray, spray the top with a light coat of the gold working your way done half way to achieve an ombre affect. Continue to layer it until you get the colour you like. Once it is dry, sprinkle glitter on the top of the cake.


lily's cake 1st (1 of 1)
 

For middle cake
Place cake on turn table. Do the final layer coat in light pink. Fill a piping bag with a ruffle tip (Wilton #103). Hold bag vertically to side cake; with middle pressure move the piping bag side to side up the cake until you reach the top. The ruffle should sit on top of each other. Continue to do this until you have covered the whole cake.
Fridge for 40 minutes


Lily's 1st cake  (16 of 1)


For the largest cake
Do the final coat of butter cream making it as flat as possible. 
Finish the cake by holding the tip your offset spatula at 160 degree angle. Warm up you blade. Pressing gently on the frosting at the bottom of the cake. Smoothly spin the cake turntable while simultaneously dragging the spatula up the side of the cake, stop when you get to the top. Wipe the spatula clean with a towel whenever needed and continue again.
To finish the top, press the spatula tip in to the centre of the top of the cake. While turning the turn table, move the spatula slowly to the outer edge of the cake; creating a continuous circle. Fridge for  40 minutes
Finish off the cake by placing all the layer on top each other. Fix any edges or boos-boos with pink or white butter cream. Place the toppers which are simple cut out fondant, piping glue brush over and coat it in the glitter. You will need to make these 7 days ahead.


lily's cake 1st (2 of 1)

Wednesday 12 November 2014

Right to Brag /-/ Mini(ish) Pistachio fudge chunky cookie cake with Sea salt butter cream


cookie layer cake (2 of 1)
Today I am not going to be deep and meaningful. Not that my regular post are true D&Ms but you hopeful understand)


This post is about being selfish and having a humble brag.

cookie layer cake (4 of 1)


 In most societies bragging is considered bad form but I have always wonder why are people making us feel bad when you truly have an achievement to boast about? Not today! Not here! I want you go out today or (tomorrow) and tell people about something you have achieved. Seriously.

 cookie layer cake (3 of 1)

As much as I love having humble pie constantly on my selves, I have a few things today I can tell you about that I have achieved. 

From this food blog not only have developed a passion for photography but I have improved my skills in baking and writing. Sure passion for sweets will always be there however a lot of my favourite blog have inspired me to be more adventurous with cooking savoury meals. From a girl who could not fathom cooking Christmas a dinner for 7 nor prepare a meal for two of delicious pasta; 

I am preparing to make crispy skin pork belly for Christmas this year with all the trimmings.  Also!! I have eaten very well over the past year with the numerous recipes for grilled cheese too. God, cheese is good.

cookie layer cake (6 of 1)


This month I have receive a number of achievements as well!


  •  I am about to finish my culinary course this month graduating with a certificate 3 and 4 in pastry. FYI; looking for a full time job too, so contact me!
  • While this happened a while back; I graduated university last year but my ceremony is occurring later this month! I think my comment sums up what I expect on the day and consider I have to wake up so early to get to it, I deserve it!
  • Lastly and most recently, my first full colour photo has been publish in a magazine! If you didi not see the instagram, it is in a coffee magazine called “Perk” from the US. I can not describe the amount of joy it give you to see a piece of your photographic work in full, HD print. Ahhh… I will never live this down.


So Today make yourself a cookie cake and brag about it! Not just any cookie cake, this one with brown butter, pistachios, fudge and sea salt butter cream 

 cookie layer cake (7 of 1)


Layers of pistachio fudge chunk cookie layered with butter cream sounds good but it is the detail you need to know about. I am against anyone ever labeling a cookie the “best” mainly because it is always changing and I guarantee you have not tasted ever single cookie on the planet. This one is adapted from Jessica at "How sweet it is" who is not only known for her savoury but sweet, sweet trashed up desserts. One of biggest inspirations and here blog is always a constant inspiration food photography; so I guess this cake is inspired by her cookie.


 cookie layer cake (8 of 1)


Due to the rare occurrence of all these good things I felt the need to make the cake just for me and base on the Cakeblog’s cookie cake which I have been infatuated with.  Also another source of inspiration for this cake comes from"Ladyandpups". Mandy has been one of my inspiration ever since I was little one month old blog with her food that puts meat on the map. Who knew being ravenous would result in such delicious recipes? Anyway sandwiched between these chewy, nutty cookies is a sea salt butter cream. DO not skip on the sea salt! The cookies are only lightly salted and you need it to balance the out fudge in cookies (I find fudge by itself too sweet). 

cookie layer cake (5 of 1)

This cake generously feeds two people but I ate it by myself over a few days; so no hard done!

This probably the only way you can celebrate all these achievements (yours and mine!) So grab yourself a pot, butter and get cooking this weekend! Oh make sure you brag extra hard for me too.


  cookie layer cake (1 of 1)


Mini(ish) Pistachio fudge chunky cookie cake with Sea salt butter cream

Inspired by Thecakeblog 

Cookie recipe adapted from How sweet it is.

Butter cream recipe adapted from Ladyandpups.


Serves 2 generously

300g plain flour

4g baking soda

190g butter, browned and cooled ( look on how to prepare brown butter here)

2g salt

200g brown sugar

100g raw caster sugar

1 egg plus one yolk

1 vanilla bean scraped

1 cup or 150g-200g Pistachio Chocolate fudge, cut up into 1 cm piece.


Pre heat oven to 180C. Line two trays with baking paper.

Shift over large bowl flour, baking soda and salt. Set aside.

In large bowl whisk butter and sugars until combined. Add egg and yolk, whisk well. Add in vanilla pod scrapings and whisk until well combined. In three batches, mix in the flour mix until a homogenous dough forms. Add fudge and make sure they are well mixed.

I used a single cookie spoon (1.5 tablespoon) to make the cookies. With each cookie shape into a flat round disc ( about 1cm high). Make sure you work the dough enough to make the fudge stick in the cookies. Freeze them in a sealed bag or fridge them for up 2 days.

Place the dough balls on the tray, leaving about 6 cm in between each cookie ( better safe than sorry!) Bake for 14 minutes until the cookie is set and develops a golden edged crust. Once out of the oven, gently press the middles of the cookies that have risen too much. Cool on tray.


Buttercream


250g unsalted butter, soften

3-5g fine sea salt

5ml vanilla extract

450g icing sugar, shifted

20ml-30ml sour cream


In a stand mixer place butter and sea salt. Whip with paddle mixer to light and fluffy, this helps it to dissolve. I normally do this for 7 minutes, scraping the bowl well.

Add vanilla and beat well. In small batches all the icing sugar and beat. Make sure it returns to the creamy, white texture before adding the next batch. Use the sour cream to thin out the mix if yours is too thick.


Assembly


Make sure all cookies are cool. You will need 12 cookies for this cake. Place a cookie on the base of piece of baking paper. Spread  under a table spoon of butter cream on the top of the cookie, place another cookie right side up on to the butter cream. Continue this process until you get a 12 level cookie stack. Fridge for at 30 minutes before serving for yourself.