Pages

Monday, 30 September 2013

Keeping face /-/ " Give me a Hershey kiss" Cupcake


I do not deal with pressure well, that is fact. Sometimes I worry over the posts I do for this blog in case they are not good enough, or the pictures look weird, or I have somehow posted something substandard on here. Stupid right? I am not even one of those big bloggers with millions of followers but yet I worry about little things like this. While one day I would love to own my own URL, domain name etc. (actually if anyone can help me here, please contact me!) however I guess starting small does have its benefits.


One of things I am glad of for being a little blog is the reduced expectation. When I mean expectation I refer to the way people always expect something of certain standard from you every time you cook or bake.

This concept can be applied anywhere, whether you are a chef, an artist, a fashion designer; once you have become big shot you develop a reputation or some quirk you are known for. Now I am still finding my feet here, so I would post things I thought were particularly delicious or looks pretty but for other it must be more than that. 


I was watching an old episode of Master chef Australia from 2011, normally watch the master class ones to get tips. Anyway this was elimination episode were the contestants had to cook a signature dish from a big chef. In this case it was Heston Blumenthal. There no other name that is more associated with molecular gastronomy than him. Even Spell check on word has his name in the system (really it changed it for me).

One of things I noted was the constant expectation of each contestant’s expectations for the mystery dish. It had to have SOMETHING secret to it. Either the dish was a dessert but look savoury, or had some chemical added to it or it was about to explode on them.


This got me thinking, does Heston ever really just want to cook something normal but can’t because of his reputation? Imagine going over to dinner at Heston’s place, god the pressure on him to create something out of this world.

We all know the feeling when you just want to sit down with a simple sandwich of ham and mustard; even fore go cooking and just get take out, microwave a packet or eat chips and dip for dinner. I am sure all those big chefs and bloggers are not so super human that they never have craving for things like this. 


How hard must it be to go shopping as one of them too? Everyone would be looking to see what you bought. Of course this goes into a whole another topic of how “virtuous” are the foods and it reflection on the character, so I will stop here. None the less, think about it. Being a small time baker does have its perks. 

Do you guys have this expectation when you find something you are passionate about?


Hershey kisses are a rare treat here, so I actually go my hands on some of the mini baking chips after some very good internet shopping. While I never normally eat milk chocolate plain, I would happy down a packet of these milk kisses or bar of Hershey milk. There is something special about them. 


Based on the high hat cupcake, you follow the same instructions on the Martha’s website. However ever you need to change the chocolate coat you do on them. I tempered my chocolate here. It does make it easier when you have the wrap up the top in foil. Either way, whether you sick to normal method or my recipe, they still look and taste like those choc mellows in the stores. Hard to beat chocolate and sugar right?


The base is a Hershey chocolate chip studded vanilla cupcake which is the one I use to provide a great cupcake, not too risen and even crumbed. I do use only yolks in this cake, mainly for the texture factor but I does give it a lovely yellow glow. While the cake is delicious it is more about the look here; yep posting this because I think it looks pretty. Sue me.

For the candy lover in all of us, have a bit of fun by making you cupcake look like a giant kiss. I am sure your sweet heart would love one! 


High hat Hershey cupcake

Inspired and adapted from High hat cupcakes by Martha Stewart

Makes 18


125g unsalted soft butter

180g caster sugar

4 egg yolks

140g plain flour

50g corn flour

10g baking powder

5g baking soda

2g salt

1 tsp vanilla extract

190ml milk and then whisk 2tsp vinegar in to it. Stand for 5 minutes

170g mini chocolate chips


Pre heat oven to 180C

In large bowl cream the butter and sugar together until pale yellow and fluffy. Use a stand mixer here, and I left it for 7 minutes.

Shift flour, corn flour, baking soda, baking powder together in another bowl.

Add the egg yolks one by one, whisking well after each addition. Add salt and vanilla here and beat till fluffy again.

Alternating between flour mix and milk mix, beat these into the butter. So one flour, then beat, one milk then beat etc… until you combined all the mixes.

Using an ice cream scoop, potion out your batter into your lined cupcake tray.

Bake in the oven for 18 minutes or until the wooden tooth pick comes out clean.

Cool in tray for 10 minutes then remove to wire cooling rack.


Prepare your meringue

250g caster sugar

4 egg whites

2g cream of tartar


Combine sugar and 200ml water in a small pan and bring to the boil. DO not stir but swirl the pan to even cook the sugar. Place in your thermometer.

Cook until syrup reaches 115C about 10-15 minutes

On a stand mixer whisking eggwhites with cream of tartar to soft peaks

Meanwhile, bring sugar syrup to 121C.

Increase speed to high and with motor running, gradually pour syrup into meringue. Once all the syrup is added turn down to medium speed until cooled to room temperature and meringue is thick and glossy.

Place in a piping bag with a 1cm round tip.

Pipe in a high swirl on to your cupcakes. Shape it into a rough kiss shape

Place in the freezer for 1 hour.


Temper your chocolate 

500g milk chocolate, finely chopped


On a pan of simmering water place 2/3 your finely chopped up chocolate in a glass bowl. Melt the chocolate, stirring constantly until smooth. Heat the chocolate to 45C or 112F. Remove

Place the rest of chocolate in the melt bowl. Stirring constantly bring down the temperature to 26C or 78F.

Place back on the simmering water and bring it up 29C or 86F. Now it is ready to use. Place in high sided narrow cup


Assembly

Remove your cupcakes from fridge.

Dip them in the chocolate mix and allow for the rest to dip off.

Place back in to fridge. Repeat with all cupcakes.

With a piece of foil, cut it to about 27cm to 10cm.

Print out piece of paper with the kiss logo.

Glue the paper to the end of the foil. Allow to dry.

Carefully wrap and fold the foil around the kiss and tuck the end, so it remains stable. NOTE: You may also need to trim it to make it easier to handle

NOTE: Make sure you do not crush the paper logo too much.

Transfer to fridge. After it is cold again you can shape it better.

Thursday, 26 September 2013

High class, low class /-/Vegan Humming bird breakfast pound cake


I am not sure if it just me but there ALWAYS is this dynamic between so called high class food, low class food and the viability of a recipe. On the web there some weird divide that if I recipe suggest a lower class brand instead of high class stuff ( Store bought baking chocolate verses French imported callebaut); bakers distrust the recipe. Now I cannot say that all things are like this but recently I came pass a comment on a blog that was sceptical of a recipe "workability" just because it had listed a brand of baking chips. 


We have all seen the cookies recipes on the back of the packet or the try me idea on the side of box cereal, however what is your attitude to them?

Do you think they will work or be a major flop? Would they taste good or be another waste of ingredients? Love to get your opinion!


I am going to stand up for these lower class ingredients for three reasons.

1. Yes I am not loaded. While I may try my best to purchase the best quality, not everyone has enough money to shell out for $50 dollar a kilo produce.

2. Sometimes! The lower class ingredient is actually what you want! I think about all those candy bar cakes and even stews from offal can be the best things on the food stuff list. Not everything has to cost the world in your baking.

3. Finally if you think the higher classed ingredients you purchase would mean you are less likely to fail in the kitchen, think again. Kitchen fails happen all the time and it is not down to your butter quality.


Now, now gent bakers and lady bakers I think we have forgotten the fundamentals of what actually make thing turn out right. This maybe an unpopular opinion but it is all about following a recipe to the T; that means grams (or in US Ounces). Sure the sweetness may need to be changed up depending on your taste but if you did what the recipe told you, in the correct measurements it should come out edible. It may not be best thing you could back but it essentially has all the basics. Really besides the recipes in the Bouchen Bakery book by Thomas Keller, most cake and cookie recipe have similar processes.

Sorry I just had to get this out, nothing like good rant to get through the week…


Now I am posting a very humble sweet bread recipe. This is my first vegan try at a bread/cake. Normally I would have butter and eggs totally at an arm’s reach but I have used them all after posting two celebration cakes and two customer orders outside this blog. Also I have been Inspired by Averie for Averie cooks. I am sure you know who I am taking about the Peanut butter queen of the food blog sphere. 

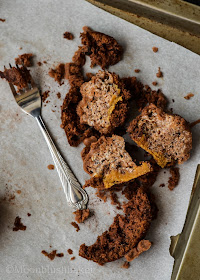
Anyway she posted a recipe for pumpkin vegan muffins a few weeks ago, so I was inspired to try one of my own. Using one of her pound cake recipes I decide to adapt it into a breakfast sweet loaf. This a roasted humming bird breakfast pound cake. Why breakfast you ask? Well it is because it has the left over Tropical granola I made in it to add that textural contrast and I made a whipped coconut/tofu spread. So lots of good whole grains, protein and fats to boot. Yes I am listing the healthy things to this cake but really what matters most me is that it tastes good.

Typical me right… Anyway Left over bananas? Give them a twist by roasting along side pineapple, the slight acidity helps it rise better (chemical baking here) and who is going to argue with a combination of pineapples, coconut and bananas for breakfast?


Humming bird breakfast pound cake
Adpated from many recipe on Averie cook's blog under Vegan tag


200g whole meal flour

2 tsp baking powder

1 tsp baking soda

5g cinnamon

3g nut meg

3g sat

10ml vanilla extract

50ml soy milk

2.5 tsp (15g) coconut milk powder

1 tsp apple vinegar

2 LSA eggs (linseed, Sunflower and almond mix), Mixing one tablespoon of LSA then mix with 3 tablespoon water. Whisk together and leave for 5 minutes.

110ml coconut oil melted

170g granola ( used left over from this tropical granola recipe)

Grilled/broiled Banana and pineapple mix * (instruction below)


Grilled/broiled Banana and pineapple mix*

On a baking tray, lined with baking paper, place 3 medium (about 300g uncooked) and 4 slices of can pineapple.

Preheat grill to high. Sprinkle 200g brown sugar on fruit.

Place under grill until well browned and caramelised.

Allow to cool then mash everything (syrup and all) in to a paste.


Pre Heat oven to 180C and line a large loaf tin (I used the one you can get from IKEA here) with oil and baking paper.

In a large bowl shift you flour, baking soda, baking powder, cinnamon, nut meg and salt.

In another jug mix the vanilla extract, soy milk, coco nut milk powder, vinegar, LSA eggs, coconut oil and Banana pineapple mix. Whisk until smooth.

Make a well in your flour mix bowl and pour the wet mix in. Fold with a wooden spoon until just combined. Add you granola and fold through.

Pour into the loaf tin and place in the oven.

Turn the oven down to 160C and bake for 1 and 10 minutes or until a skewer comes out clean. IF it is browning too much place a sheet of foil on top.

Once baked leave in tin for 20 minutes then turn out to completely cool


Coconut tofu spread

300g extra firm silken tofu, well pressed for 3 hours.

30g desiccated coconut

30g skinless unroasted almonds

40g caster sugar

5ml coconut essence


In a food blender, blend coconut and almonds into a smooth paste

After add process tofu, caster sugar and vanilla until it forms a thick spread.

Store in the fridge until use.

Monday, 23 September 2013

Taste Value /-/ Triple Roasted pepper corn bread Skillet


Looking back on the past few weeks, I have actually developed a new respect, appreciation to some extent, for some new food stuffs. As you know my medical drama lead to me all soft food, liquid diet for the past month or so. At the beginning, goodness I thought I am going to shrivel from boredom by eating a minimal selection of soft foods; however like history repeating itself (again), I was dead wrong.


I actually got quite creative with food in the kitchen and found new foods I previously knew as the “untouchables” group. Not that I held anything against them, it is just I (most likely) been caught up in the whole “fresh is best thing” and “home made ALWAYS is better than the prepared stuff”.

Did I ever mention I have no self control when it comes to buying food? SO… If I want to eat it I am going to buy it then and there. One of the reason why My house is overflowing with food (#bakers/foodbloggerproblems)


One of these things has to be my new love for frozen peas and spinach. Yes, I used to almost never eat these things because I always had access to fresh stuff. What can I say? I like my veggies to be crunchy and textural. However raw spinach and raw sugar snaps peas do not go down well when you have no back teeth. In addition have you ever experience the pain of having veggie fibre being caught in between your gums and exposed teeth ligament’s? Yes it is as painful as it sounds….


Microwaved or simmered in a little pot, they always come out really tasty. Really sweet , mashed ASAP without having to get out the big machines. I lived off this for two weeks.

Also finding new comfort in eating cream corn and pre cooked pulses (butter beans, chick peas etc.) straight from the can. I do not know about eh deliciousness in these earlier, it is just like eating mash potato but without the cooking!


My point is really do not dismiss foods until you given them red hot go. Like really sat down and tired them at least 3 times. After that you can say whether you will touch them again or not. I think my family members also agree that the new additions of cream corn on the menu is about as comforting as a big warm hug!

This post is actually about one of my discoveries that you guys in the USA, in particular, the southern states will be familiar with. I am talking about corn bread, yep the butter milk corn bread. This is one of those classic recipes I got from a source I know has great southern inspired food, I am talking about the Homesick Texan of course! Anytime I need something along the lines of biscuits, that is go to website.


I love corn meal, no questions asked. Whether it is American style or Italian style like I used in these popcorn cookies or in eggless tart; the sweetness by the yellow meal is wonderful. Not only for the colour and taste but texture too; I am sucker for textural breads. This one is flavoured with vintage cheddar, then I added roasted mini red, yellow, orange peppers and a few seeded roasted jalapenos. Sure you do not have to do this but they make it really sweet but in savoury kind of way. Also the smoked, slight charred flavour of peppers is what I like best about it.


We all know corn bread is best when it is has a crusty outside but a tender inside, so the heating the pan in the oven is CRITICAL TO THIS BREAD. Really do not skip it, also use lard. Yes use it! Or at least shortening to get the crunchy outside.

I may not be very worldly when it comes to food but little moments like these make me happy I am always wrong.


 Triple Roasted pepper corn bread
Adapted from the Homesick Texan

Pepper mix 


6 mini peppers (red, yellow, orange mix)


4 jalapenos (red or green)


230g yellow corn meal

75g plain four

70g vintage cheddar, finely grated

50g cream cheese, cubed to 1cm

Your pepper mix

5g baking powder

3g salt

1 egg

260ml buttermilk ( I ran out of butter milk>_<, so yes I did use yoghurt)

120ml yoghurt

40g lard, veggie shortening or oil.


On you stove, place mini peppers and Jalapenos directly on the heat source. Using tongs, flip the peppers until they are black all over. Place in a plastic bag and steam for 20 minutes.

Once cool, remove the skin by rubbing the peppers. Get most of it off but it is ok to have some back on.

Remove the seeds from all the peppers by cuting and scooping it out. 
Dice finely and set aside. 

Preheat oven to 220C

Place your skillet (23cm) and lard in the oven. Heat them up for at least 10 minutes then start your corn bread.

In large bowl place your flour, corn meal, baking powder, baking soda, and salt. Whisk together with a whisk until combined. Add the cheeses and toss to coat and mix evenly.

In large jug mix the buttermilk, egg, pepper mix and yoghurt.

Pour you wet mix in the dry one. Stir till combined.

Pour into the pre heated skillet, bake for 25 minutes. It should be brown on the edges but golden on the top.

Wednesday, 18 September 2013

On her birthday/-/Pumpkin spiced Croquembouche on a caramel mud cake with Honey butter cream.


One of saddest and unluckiest birthdays that have ever occurred in my family happened. It happened last week. Why would a birthday be sad or be considered unlucky? Well let me count the ways.


My Older sister birthday just passed in the first week of September. Of course I had to make a cake for her but as you guys know I was still drunk on medication from the surgery. For all of those who are wondering now, I AM ALL BETTER sorta now I have new tooth problem but that’s off topic… THANK YOU FOR ALL YOUR GET WELL WISHES! My family is very happy to receive them.


So drunk on meds I attempted this cake, I used the word attempted strongly. Yes, crazy me working with cake, butter and boiling hot sugar. Thankfully I survived, barley. Blessing my hardy hands. Yep I used to sew and now I cook, so I have developed that ability to not feel pain as much as another’s ( let me say not always good when you find you burnt yourself two hours later)


My sister has always loved these puffs, she is the one that would look at the dessert menu first then order her main. Her motto in food is “always order dessert” which I think is great; too many girls are on that “no dessert for me thanks I am too *insert excuse*”

However on this day, her birthday she spent the night in the emergency ward of the hospital after catching a terrible stomach bug.


Ok so let me draw you time line of her down fall.


7:00pm:Pick up special fried flat head (her fave fish dish); she felt uncomfortable


8:00pm: Get to my place and wait for dinner, She had to lie down from feeling so woozy.


8:30pm: Sitting in the fetal position on the Lazy boy and covered in blankets.


9:30pm: Trying to get the courage to eat but Throwing up most of it. Heat pad, wet towels and meds are called in.


10:30pm-11:30pm: The rest of us cutting and eating cake (pictures, presents etc.); feeling a bit better to eat.  A little bit of cake and a puff. She leaves with a bit of cake and some food. (now here is where it gets very bad)


3:00am!!!: Now I am about to go to sleep; I get call from her. Crying and intense pain she rings for medical advice from me? REALLY!? If you are crying from the pain; the first thing you should do is go to the hospital; not call your brain dead of sister. Anyway handed over to my mum who talked some sense into her.


Anyway next morning I hear, via my mum and Facebook (yes she even updated her facebook about this event); She was on two dips and given morphine…..


Yes this was the saddest birthday ever.


Hopefully I might be able to make this again so her can have a fresh piece but until then I tell you what I did with most of it.


This is the cake that went into this  BIRTHDAY CAKE ice cream; Caramel mud cake with a honey butter cream icing and pumpkin spiced Profiteroles. We all know the concept of the croquembouche; so this is my take on it. It might be smaller and less impressive than the big one but I do not have the fridge space for that 1 meter tall tower.


While people think this a complex thing, you actually just need to be prepared. Get your sugar ready and your cake then dip and place as fast as you can!


The caramel mud cake was a wonderful complement to the icing which had tones of honey to it. This caramel mud is so easy and the incredibly tendered crumbed and moist when at room temperature.


The bonus of honey and salt is that sickly sweet feeling you can sometimes get from mud cake does not happen here. Also I reduced the sugar quite a bit in this cake as the addition drizzled caramel on top will take it OTT. I am in love with spices right now, so the crème filling these puffs are made from pumpkin puree, spices and cream. This cake is a very autumn winter inspired cake but it is my fall well cake to winter in Australia.


Let’s Hope your next Birthday goes better than hers!


Pumpkin spiced Crouqembouche on a caramel mud cake with Honey butter cream.

Makes about 35 Puffs and a 20cm by 1cm 3 layered cake


For the puffs

From this recipe


100g Butter


10g sugar


215ml milk


3g salt


130ml water


125g plain flour


4 eggs


Filling
Get the recipe for Pumkpin Crème here, I do not come up with this; so I am not sure if I can post the recipe again. This is very easy but and well worth the effort, I added 3tsp Pumpkin spice to the recipe (Equal amounts of Saigon cinnamon and all spice then for every 1tsp add 1/4tsp nutmeg and ginger and a 1/8tsp of cloves.


Topping

You need to batches of this. One for assembly and one for finishing


300g caster sugar


1Tbp corn or glucose syrp


50m water


Cake Adapted from taste.com


150g butter, cubed


200g white chocolate (any eating/cooking chocolate), chopped


130g (1 cup, firmly packed) light brown sugar


180ml (3/4 cup) warm milk ( I used a unsweetened nut milk for the flavour)


1 tbs honey


1 scrape vanilla bean pod


2 eggs, at room temperature


300g (2 cup) plain flour


1.5 tsp baking powder


0.5 tsp baking soda


5g course pink sea salt


Pre heat oven to 160C


Line 3x20cm greased cake pans with baking paper.


In large sauce pan melt your milk, butter, white chocolate, sugar, honey, vanilla bean over low heat. Stir continuously until melted well and combined. Set aside for 20mintues to cool.


Shift baking powder baking soda, flour and salt together.


Add eggs whisking well after each addition.


Whisk in flour in three batches until combined.


Pour mix into your cake tins and bake for 30 minutes or until the skewer has a few crumbs left ton it when poked in the middle. Cover with foil if it is browning too much.


Leave to cool in pans for 10 minutes then cool on a cake rack until cool.


Once cool, wrap in ccling film and fridge for one day.


Puff instructions


Preheat oven to 190c.Prepare two lined baking trays


Place butter, sugar, milk, salt and water in a large saucepan and bring to the boil. Remove from heat.


With a wooden spoon beat in flour. Return to heat and continue beating until mixture comes away from the sides of bowl. I did for about 10 minutes. Remove from heat and cool slightly.


In large bowl of a stand mixer, place dough ball. Beat mixture for 1 minute for it to cool. Add eggs one at a time, beating well between each addition, until all the eggs have been added and mixture is thick and glossy. Beat for a few more minutes, or until thickened and shiny.


Spoon half the choux pastry batter into a large piping bag fitted with a 1 cm round nozzle. Cover the remaining pastry with cling film. Pipe mixture onto trays in mounds


Bake at 200c for 10 minutes then turn it down to 180c for 15 minutes. Once they have browned, feel hollow and firm; Transfer to a cooling rack and immediately piece the bottom of the puff with a sharp knife.


Honey swiss butter cream


140g egg whites


140g caster sugar


3g sea salt flakes


1 teaspoon of clear vanilla extract


210g unsalted, cubed, soft butter.


200g runny honey.


In medium bowl whisk together your egg whites and caster sugar.


Place bowl over a saucepan of simmer water. Whisk continuously until the sugar is fully dissolved. Rub a bit of mix between your fingers to test.


Transfer mix to a stand mixer with the whisk attachment. Beat until it becomes a big fluffy and white. At this point it should take about 8 minutes for the meringue to come to room temperature.


Change to paddle mix. While beating the mix on medium with the paddle add the butter a cube at a time until it fully combined. GO slowly here and scrape down the bowl frequently. Once butter is all added, beat on medium high till it is fluffy and pale.


Add vanilla and beat again. In order to incorporate honey use the final vanilla. While beating on low, pour in the honey into the vanilla swiss butter cream until combined.


Set aside for later use


Assembly


Cut the domes off your cakes and set aside.


Ice and fill each cake, you can get wonderful tutorial here on Bakers Royal but just do not do the ruffles.


Fill your puffs with crème by poking a small hole in the bottom of each puff and using a 1cm nozzle, pipe you filling in. You can tell if it is ready when you fell the puff have a bit of resistance when you hold it. Repeat with all puffs, set on a baking tray and fridge for 1 hour.


Now be prepared here. The final product!!


Take out your cake and puffs. Also if you do not have heat resistant hands like me, get yourself some thongs.


Place your pan of caster sugar, glucose and water over medium heat and bring to the boil. Once it turns golden brown in 15 minutes remove from heat. Quickly dip each puff into the syrup then on to the cake. If you cake is cold enough the butter cream will not melt too quickly and you will return it to the fridge later so no panic J


Place each puff in a circle pattern, work your way up repeating the dip and place technique to build a tower. So you will place each puff on top of the space between the below puffs.


Once built, return to the fridge for 1 hour.


On Serving

Make the other batch of toffee. Using two forks dip then in the caramel then lace over the tower on the cake. I like to draw a figure 8 pattern on to the cake but do whatever you want. You should get thin strands of caramel setting on the cake. Continue to do this until you have enough for your liking. Now it is ready for serving!

Monday, 16 September 2013

I never.../-/Fully loaded Birthday cake ice cream


I know you should never say never. However in the kitchen as much of a foodie (or maybe more eater) that I am, there are just some things I will NEVER make. Not that I do want to appreciate the art making these foods; it is just that well… I am not bothered…


The process and satisfaction of making your own up there with one of the best feelings you can get out of life but over the years I found that there are some things you will never get right in kitchen. They will never taste the same as the original and will always fail you. Not only are so they have right equipment, the correct ingredients and a tired and true recipe; but also they have experience. For anyone who is baker or a cook, experience is one the key factors in sorting out the good from the best.


In age where the accessibility to gourmet and foreign foods is so easily, as bad as it sounds; I would rather get someone else to do it. I Think Nigella Lawson once said this in one of the episodes in Forever summer series; that when you go to a deli or cheese shops you are “not just buying their produce, you are buying their skills too”. Also can you imagine a world where there was no deli, no coffee bean roasting house and no pickling shop? Forget your morning coffee, and salami and antipasti sandwich. 


As expected some of these things on my list are complicated due to the long processes with equipment and weird ass ingredients. Give me a break, I have more appliances than I have fingers and toes and you say I still need more stuff?!

Sorry dessert chefs, I ran out of titanium oxide to dye your cake; I used in my last batch of impossible candies *feel the sarcasm*

No I do not have a foam pump to create aired chocolate bubbles or this “chocolate cous cous”.


*sign* Maybe one day I will be able to make these magical foods but until then I think I will make do with the “basics” (at least the basics for a baker)


You are probably wondering what I never make. Well I am NOT going to tell you. I can’t having you citing me wrong can we? ;) Nah kidding.

Some of these things are:

Beer ( failure results in explosive results)

Dried fruits, veggies or meats (I like sultanas but not that much)

Asian noodles eg. Soba, pulled noodles

Milk arrow Biscuits or Maria Biscuits (they are not the same when made at home)

Tim tams (ditto)

Homemade Candy bars (I might be inspired by candy but not enough to try and make it)


What are some of thing you will never make? Have you ever hand to go back on your word because you did end up making it?


Now this list is not set in stone because I never thought I would end up making my own ice cream. However the temptations are just too much and have given in to the trend. I have adapted a recipe from Philippa Sibley. She recommends a base of a cream angelise to create the smooth and melt in mouth ice cream and you should infuse the flavours of the vanilla pods or other spices before in the cream/milk mix.

Now this ice cream is the result of having left overs (again) in the kitchen. This might be a sin but we always have left over birthday cake; always. Even though cake is great the day after, you can make it better right here.

So birthday cake ice cream was the order of the day. The ice cream is vanilla cake flavoured base with chunks of cake and butter cream icing running through it. Really cake and ice cream? Who can argue with that?

So you can have birthday cake and ice cream!

Fully loaded Birthday cake ice cream
Adpated from Philippa Sibley, P.S Desserts
Makes 1.5 litres


350ml milk

300ml cream

1 vanilla bean, scraped.

150g sugar

7 egg yolks

50 ml Cake flavoured vodka

About 4 slices of cake (I used a caramel mud cake with vanilla/honey butter cream; GET IT HERE) So my cake was 20cm circle with 3x2cm layers with butter cream about 1 cm thick

In large pot combine milk, cream, and the skin of the scraped vanilla pod. Bring to boil.

In another bowl add egg yolks and sugar. Whisk to combine.

Pour milk and cream over the egg yolks while whisking continuously.

Pour mix back into the pan. With a wooden spoon, stir all the time until it reaches 80C.

Remove from heat and cool for 15 minutes.

Place vodka in the custard mix.

Cool in fridge overnight.

Separate your cake from your butter cream on your left over cake. Crumble up

Pour into your ice cream machine and churn to the manufacture instructions. In the last 5 minutes add the cake and butter cream pieces.

Freeze overnight in bowl of choice.


Wednesday, 11 September 2013

#tag sad face/-/ Sweet and sticky pretzel knots


I have never considered myself a crier. Nope not even when Simba’s father died in lion king, could not spark a tear in my child hood eyes. Through my teenage years, high school work was the only thing to make me cry; mainly due to stress but not emotional boyfriend stuff. Only recently(really recently two days ago) I saw the value in having a good cry.


Overall, I do not enjoy crying or do I enjoy the why the way I look after crying too. Who wants to have the red puffy eyes and runny as nose? I see master chef, Idol and SYTYCD when they ask question to spark emotions or criers; I though “OH gosh here we go again” while rolling my eyes.

Rating master pieces.


When I ask my friends about this they say it is form of stress release and it allows for you to experience emotions which have been bottled up. Of course I asked this question about a year ago and have only remembered it; but it really ring true. I responded to their answer with a scoff and a statement about them being such a girl. Sorry to them if they are reading this now and to all women for using this insult.


I think you all know if you have read my last few post, my family members are quite ill right now. Also I have a few complications after my surgery and I have to go back in a few days to get it checked out again. Wisdom teeth extract is simple my ass… Anyway I think something has just tipped me over the edge today.. I started crying not just crying like balling my eyes out crying. Bridget Jones dairy crying. Tissues, screaming, and cursing everything. After this long 1 hour cry, I did feel significantly better; I know that hormones are released from your eyes when you cry but I never believed it up to now. Yes, even I, the science geek had doubts about emotional science.


Crying does not result of a lack of will power or being “too emotional”. It is when you are so invested, so passionate about something that failure or hardships you may come by makes you feel so anguished. Maybe in my adolescent years I didn’t care enough about my something to actually feel that bad. Of course I still will never be a full on crier type but I do see the value in it. At least I am no longer being called heartless by my friends and family.


I know sport season is coming up for the USA and here in Australia. While I am not the biggest fan of sport, I do like the way it brings people together over good food and drink. Allows for one day for a little R&R. We all need that.


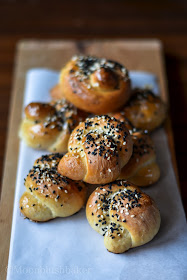
So these are mini Sweet pretzel knots! Look how cute they are! Also they are not salty pretzels but sweet ones. After baking I used a watered down rice syrup to coat them. I prefer rice syrup as it is a little more sticky and malty than maple or honey. If you do have those, honey and maple will do the same job, just do not water it down. Mini pretzel sweet burgers, dip them into sauces, eat them out of impulse from the box are all good ways of eating these. These remain slightly sticky which is desirable when the inside is soft and chewy. I did not develop this recipe but used one from a baker I truly trust; I have linked it to her sight with a few adaptation but overall they are the BEST ones. Really and I am a picky pretzel girl.


Stick and sweet pretzel knots

Adapted from Annie Eats, on her adaption from Sweet like home and Alton Brown


100ml warm water

160ml warm milk

120g caster sugar

10g salt

14g yeast, dry

500g breads flour

60g butter soften


Finishing

4 Litters of water

50g baking soda

1 egg white


Sugar syrup

150g rice syrup

20g water


Black and white sesame seeds


In a large jug, mix milk and water and 30g sugar. Mix to dissolve, add yeast and allow to stand for 10 minutes or until foamy.

In a large bowl add flour, salt, and remaining sugar. Knead into a soft dough, that should come away from the sides. Transfer to floured bench and knead in soften butter. After continue to knead for 20 minutes. It should have very springy, toughish texture like rubber.

Place dough in grease bowl and allow to rise for 1.5 hours. My kitchen is cold right now, so use your own judgement.

Preheat oven to 220C

Line three baking trays with baking paper and oil it.

Bring water and baking soda to the boil in large pot.

Divide your dough into 20g balls. Take each ball and roll it into a 10-15cm long tube. After knot the long like you would a tie. One length on top of the other then push through the hole made.

Place on tray. Do this with the others. I got 30 from this recipe.

In batches of 4, place them in the boiling soda water. Boil on side for 30 seconds then turn and give another 30 seconds,

Using a skimmer drain the pretzels on a wire rack and top with seeds.

Bake in oven for 15 minutes.

Once baked immediately brush over syrup, leave to cool.

Monday, 9 September 2013

Spring time blues /-/100 grand cakelets


Only two days in to Spring and this is what I see forecast for the weather. “Australia’s hottest and driest summer is predicted”. My screws up when I read these words…Yep it is really happening.


I accept we, Australia that is, are no longer in winter. Over past week I have woken up to warm even hot temperatures, sunny skies and faint sound of crickets in the background. Yep, that when you know spring has come in Australia when the crickets and other insects are in numbers that you can hear them *shiver*. Did I ever mention that I am afraid of bugs?


By my tone I think you can pick up I am not the biggest fan of the Australian Spring and summer. Heat has always been uncomfortable for me. Confession; I sweat very easily. It must be a trick by fate that I end up living in one of the hottest and driest countries on the planet. I cannot even travel to other tropical climates without being afraid of developing some sort of dehydration or heat rash, or whatever comes with sweat.

Gross I know…. Funny that I can share this on my blog but cannot tell my boss the reason why I needed more than 2 work shirts as a barista.

What? It gets hot standing next to the coffee machine.


This also complicates sleep too, no surprises why it contributes to my nocturnal existence. No covers and even sleeping on a mattress is too warm, so as bad as this sounds I have taken to sleep on the wooden floor with a bed sheet.

It is not as peasant like as it sounds. It actually does wonders for my back. Really try it for those of you out there who have back issues. Anyone who has been camping, back me up here!

That must be my trade for the perks of summer; Sunglasses, great tropical fruits and veggies and the longer days. I can not wait to try all recipes I have book marked from you guys in the USA where they feature berries, corn and tomatoes. Not to mention mango season and cherry season is fast approaching too! YUM….


Oh well for the love of good food I am willing to put up with the heat.


I must be one of the only people who have not tasted a 100 grand bar before. I was given a few by close friend who visited USA and now I am totally jealous we do not have these here!

I am not sure why these are not more popular. Caramel centre, Krispy rice bits and chocolate? What is not to like? I made these a about a month or two ago but I have neglected to post. Sorry, I get my SD cards mixed up… fortunately I made these again to share with you guys!


The cake is baked in donut pan. One, I love my donut pan; so brand new! Two, the hole in middle is the perfect container for the toffee/caramel centre. I might not be an expert at the candy bar cakes; I leave that to the professionals (e.g. cookiesandcups, baker royal, Confessions of a cookbook queen etc); however I could not past up the opportunity to make cake after being so inspired by this candy bar. What can I say? I like my sweet now I am better and can chew again.


Krispy topping contains a soft, chewy caramel center in a cakelet, which is denser than a normal cupcake but not quite a brownie. Chocolate loaded, it makes a wonder base to the flavours on top. Finished with a signature drizzle of chocolate. Really this is a dessert of candy bar dreams.


100 grand cakelets

Make 12 cakes


100g chocolate, melted


125g butter


150g caster sugar


2 eggs


2tsp vanilla extract


180g plain flour


20g Dutched cocoa


1 tsp baking powder


½ tsp baking soda


100ml sour cream


80g 100 grand bars, chopped up


Pre heat oven to 180C.

Cream butter and sugar till creamy and pale. Beat in eggs one at time, making sure it fluffy before the add the next one.

Shift your cooca, flour, baking powder and baking soda together in a medium bowl

Add the extract then beat again. Alternating add the flour mix and sour cream in 3 batches.

Fold in chocolate and 100 grand bars.

Spoon into your donut tin. Do not be afraid of over fill as it does help to hold the toffee later.

Bake for at 160C (turn down your oven) for 15-20 minutes. Leave to cool in trays.


Rice puff topping, Toffee and assembly

2 cups chocolate rice puffs


50g butter


100g chocolate marshmallows


10g dutched cocoa


Recipe for chewy toffee I used here. Really easy and it very chewy by Dan Leopard


100g melted milk chocolate


Place your cakes on a lined baking tray.

Once you have made your toffee allow it to cool to semi set in the pan. Spoon the toffee as best you can into the hole of donuts. Allow to rest for 20 minutes.

In a small sauce pan melt butter, chocolate and cocoa until it is combined.

Pour over rice puffs in large bowl and mix to combine.

Once it warm enough for you to touch, use an ice cream scoop to measure out mounds of rice crisp cake on to the cakelets. Gently push the rice crisp cake to it sticks.

Top with melted milk chocolate. Repeat for all cakes

Transfer to fridge for 1 hour and allow to stand at room temperature for 20 minutes before eating.